Tag Archives: core data

Core Data – Child save context, propogate up to Parent

xCode 7.3 demo

Parent-Child Contexts

An important point that you need to get a good grip on is that contexts can be chained such that one is the child of another.

CoreDataStack.h

CoreDataStack.m

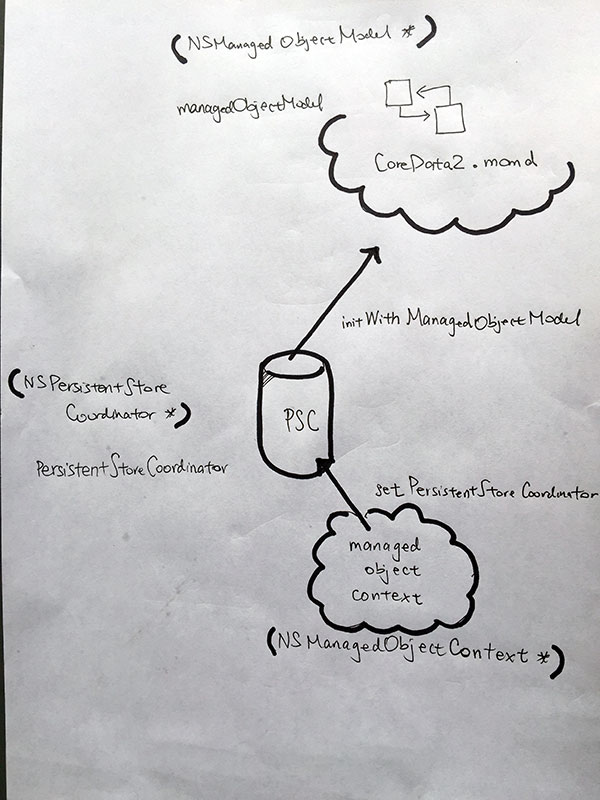
We create a private (child) and parent context.
The parent is what connects to the Persistent Store Coordinator.
The child is connected to the parent context through the parentContext property.
The child DOES NOT connect to the PSC.

If and when you do this, you have to realize that:

  • Changes saved in a child context are pushed to the parent, not to the persistent store.
  • The parent context behaves as the child’s persistent store.
  • Changes saved in a parent are not pushed down to the child.
  • Changes saved in a sibling are not pushed to other siblings.

This means that changes only propagate one level up in a context hierarchy. If the context you are saving is several levels away from the persistent store, you will need to save each parent context in the hierarchy until you reach the context that saves to the persistent store to actually persist your changes.

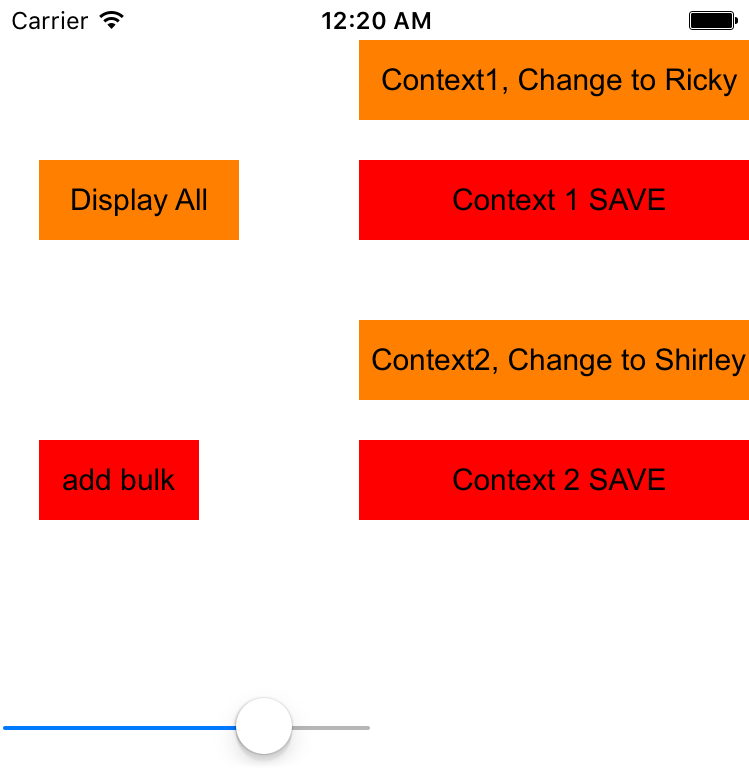
Demo – Changes saved in an child context are pushed to the parent

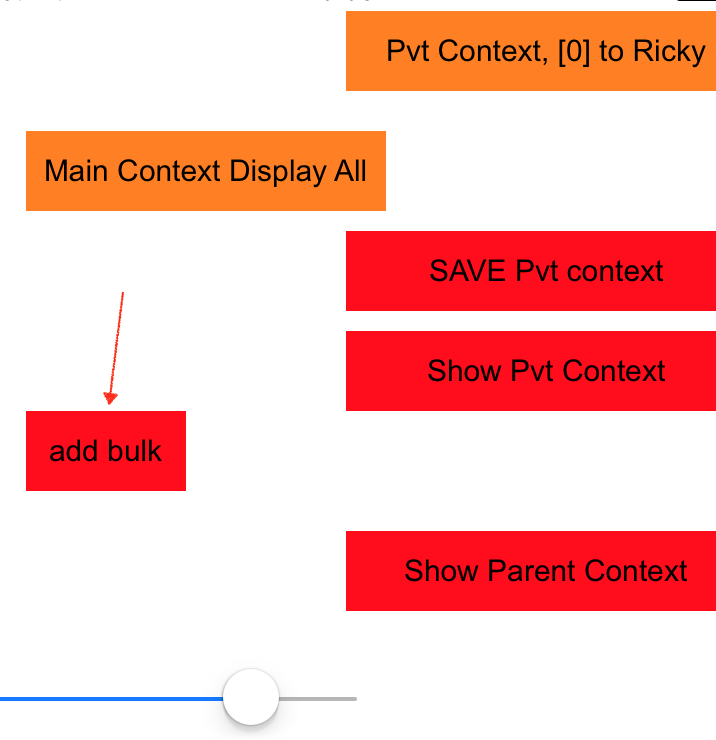
First click the Show Private Context Button.

show_pvt_context


output:
(PRIVATE CONTEXT) – no people found

Do the same for “Show Parent Context” and you’ll get the same output.

Hence, we know that both child/parent contexts do not have any data so far.

Okay, Let’s first add some objects.

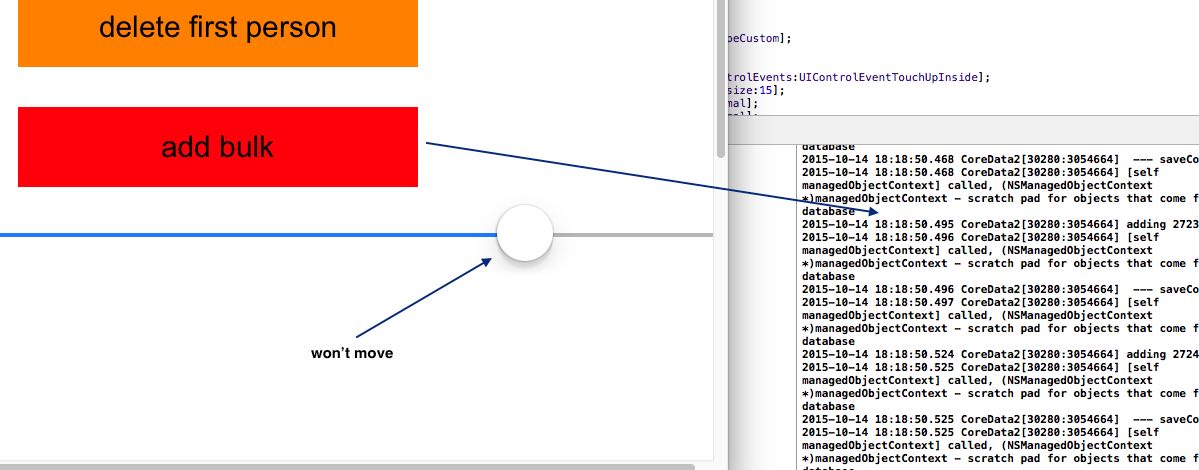
We first put a block task onto the private context. Its basically adding three Person objects.
Once those objects are initialized, we tell the context to save.

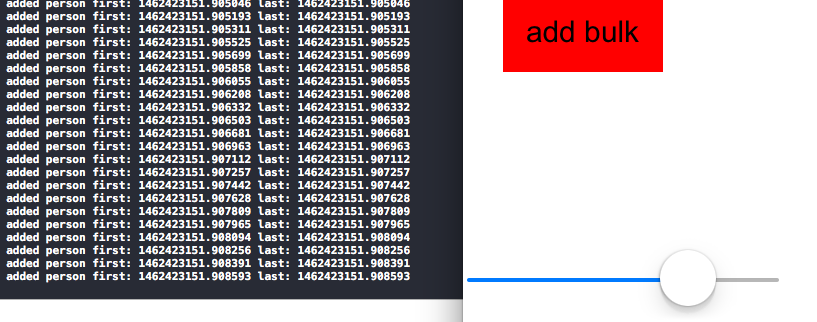
Press the ‘add bulk’ button do add the objects.

add_bulk


output:
——– ADD BULK PEOPLE ———–
added remark: 1472782237.562826 1472782237.562826
added remark: 1472782237.563077 1472782237.563077
added remark: 1472782237.563318 1472782237.563318
PRIVATE CONTEXT save success!

Now, if you click the “Show Pvt Context” button and “Show Parent Context” button, you’ll see that they both show data. This is because when the private context saves its data, it pushes it up to the parent automatically.


output:

(PRIVATE CONTEXT) —— RESULTS ————
There are 3 number of entries so far
0 —————-
firstName = remark: 1472782941.371055
lastName = 1472782941.371055
object address is: 0x7f835bf95af0

(PARENT CONTEXT) —— RESULTS ————
There are 3 number of entries so far
0 —————-
firstName = remark: 1472782941.371055
lastName = 1472782941.371055
object address is: 0x7f835bf11150
….

What happens to the parent context if child does not save?

Let’s edit the first object by pressing the “Pvt Context, [0] to Ricky” button.
We put a task block onto the private context. It gets the first object, and changes
the first name to “Ricky”


output:

PRIVATE CONTEXT — CHANGE FIRST PERSON TO RICKY… ————

Then have the private context display its results. You will see that Ricky appears.


output:

(PRIVATE CONTEXT) —— RESULTS ————
There are 3 number of entries so far

0 —————-
firstName = RICKY
lastName = 1472783378.062207
object address is: 0x7f8bc161d400

But if you display the PARENT CONTEXT, you will not see it. The reason why is because you need to save the private context in order
to propagate the changes up the parent.

Try clicking on the “Save Pvt context” button. You’ll see this:
PRIVATE CONTEXT save success!

Then click the “Show Parent Context” button and you’ll see Ricky in the results:


output:

(PARENT CONTEXT) —— RESULTS ————
There are 3 number of entries so far

0 —————-
firstName = RICKY
lastName = 1472783378.062207
object address is: 0x7f8bc161b390

Now, press the “Main Context Display All”, you’ll see that its empty:

That’s because each save only propagate up one level. Thus, in order for the changes to be saved into the PSC, 2 points must hold:

1) The context must be connected to the PSC
2) The context’s parent context must be nil.

Our parent context satisfies both.

Click on “Main Context Display All”. You’ll still get:

There are no people in the data store yet. We need to make sure each context saves to propagate the changes up.

propagate

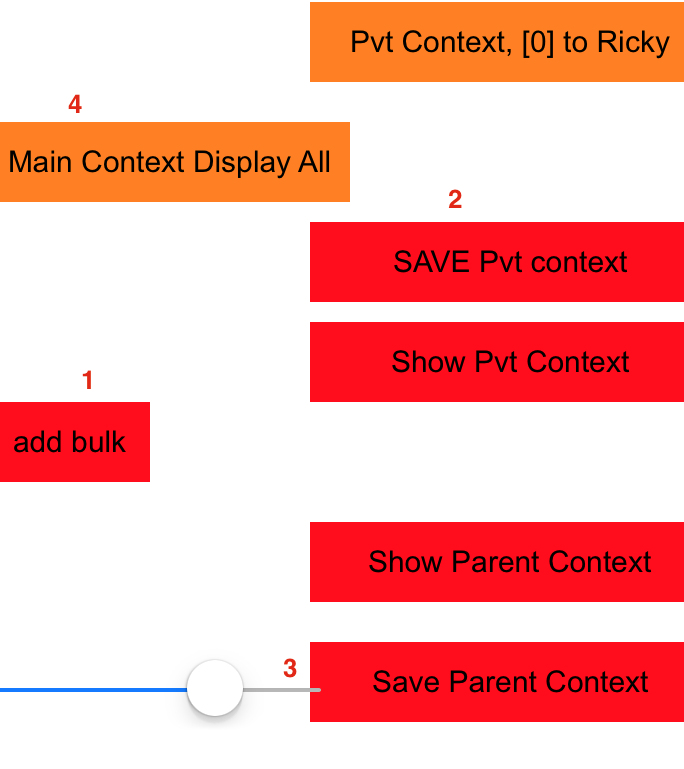
Now, save the parent context by clicking on “Save Parent Context”.

Due to the parentContext’s PSC is set, and that its parent context is nil, its saves will reflect to the PSC.

Thus, whatever context that’s connected to the PSC will be able to see the results.
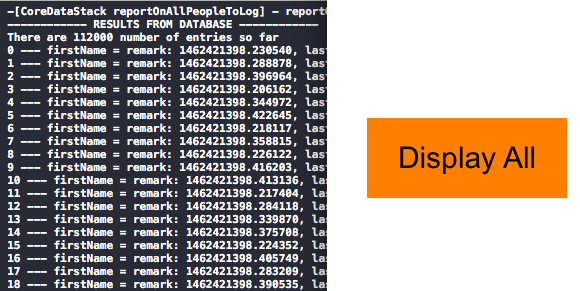
Click on “Main Context Display All” and you’ll see that our main context now has the results:


(MAIN CONTEXT) —— RESULTS ————
There are 3 number of entries so far

firstName = RICKY
lastName = 1472784795.060829
object address is: 0x7fac7acbbeb0

Async Fetch Request – part 1

xCode 7.3 demo, AsyncFetchRequestEx1

Setting up the Stack

We create the core data stack called BNRCoreDataCoordinator.

Then we set up the PSC and MOC…

1) Set up lazy loading accessor for NSPersistentStoreCoordinator
2) Set up lazy loading accessor for NSManagedObjectContext

Notice that the MOC is connected to the PSC:

MOC Saving

Inserting Data

We throw a task block on our MOC’s private background queue. That task to simply initialize an Entity object
n number of times. Core Data returns ready objects for us to initialize. Once all the Entity objects are set up,
we tell the MOC to save context.

The caller of this method will get a completion block to signify that our Entity insertions have been done.
We throw this completion block onto the main queue visual reply.

How To Use

In your ViewController, import the core data coordinator, and implement a lazy loading accessor.

Let’s insert the data when it first appears. As you can see, when the insertion have completed,
we can do something on the UI, or just log a completion message.

Core Data #3 – sibling Main/Private MOC on a PSC

CoreData Stack #3 xCode 7.3

ref – http://blog.chadwilken.com/core-data-concurrency/
http://stackoverflow.com/questions/30089401/core-data-should-i-be-fetching-objects-from-the-parent-context-or-does-the-chil
https://github.com/skandragon/CoreDataMultipleContexts

https://medium.com/bpxl-craft/thoughts-on-core-data-stack-configurations-b24b0ea275f3#.vml9s629s

In iOS 5, Apple introduced

  • 1) parent/child contests – settings a context as a child to a parent context is that whenever the child saves, it doesn’t persist its changes to disk. It simply updates it own context via a NSManagedObjectContextDidSaveNotification message. Instead, it pushes its changes up to its parent so that the parent can save it.
  • 2) concurrency queue that is tied to a context. It guarantees that if you execute your code block using that context, it will use execute your code block on its assigned queue

Thus, we can use parent/child contexts and concurrency queue to set up our Core Data Stack.

Say we create a parent context. It will act as the app’s Task Master. Its children will push their changes up so that the task master will and executes them in a background queue.

When creating this Task Master context, we init it with macro NSPrivateQueueConcurrencyType to let it know that the queue is a private one. Because its a private queue, the threads used to run the tasks in this private queue will be executed in the background.

Now, let’s a child context. We we create a temporary MOC who’s parent context is our Task Master.

Notice its parentContext assigned to our Task Master.

This implies that whenever our temporary MOCs finish their tasks, (whether its getting data from the net or reading in loads of data from somewhere or whatever task that takes quite a bit of time) and that we call MOC’s save,
this does 2 things:

1) save sends the NSManagedObjectContextDidSaveNotification message, and thus our Notification center observes. We go to handleMOCDidSaveNotification method where we call a method for the parentContext (task master) to do the save.

2) The background context’s changes are pushed into its parent context (task master).

Here is the handler that handles all name:NSManagedObjectContextDidSaveNotification message triggered by our child temporary MOCs.

where handleMOCDidSaveNotification is:

In handleMOCDidSaveNotification, we ignore other context, we take care of these temporary MOCs only. We RETURN and do nothing iff the temp MOCs are NOT tracked in our NSHashTable directory, or if its the UI context.

If the temp MOCs ARE tracked, that means they are temp MOCs, and we go ahead merge our temp MOCs with the UI MOC. We merge our changes with the UI MOC, because the UI MOC is not a parent context of the temp MOCs. The UI MOC is a separate entity.

When a MOC saves, its changes are pushed into its parent context. These however are not immediately written to disk. We write to the disk, after the background MOC saves, sends the NSManagedObjectContextDidSaveNotification notification, we go into handleMOCDidSaveNotification, and in the method saveMasterContext. saveMasterContext saves our parent private context, thus making it write to disk, and if it takes a long, its ok because its a private background queue.

http://stackoverflow.com/questions/30089401/core-data-should-i-be-fetching-objects-from-the-parent-context-or-does-the-chil

In short,

To clear up the confusion: after creating the child context from a parent context, that child context has the same “state” as the parent. Only if the two contexts do different things (create, modify, delete objects) the content of the two contexts will diverge.

So for your setup, proceed as follows:

create the child context
do the work you want to do (modifying or creating objects from the downloaded data),
save the child context
At this stage, nothing is saved to the persistent store yet. With the child save, the changes are just “pushed up” to the parent context. You can now

save the parent context
to write the new data to the persistent store. Then

update your UI,
best via notifications (e.g. the NSManagedObjectContextDidSaveNotification).

Is a GCD dispatch queue enough to confine a Core Data context to a single thread

http://stackoverflow.com/questions/7718801/is-a-gcd-dispatch-queue-enough-to-confine-a-core-data-context-to-a-single-thread?lq=1

Concern
One big advantage of GCD dispatch queues is that it manages and makes use of multiple threads to process its FIFO tasks as needed. Each task gets executed by one thread. However, the it “may” be a different thread that processes the next task.

So – if I understand this right – tasks I hand off to one and the same dispatch queue, could end up running in different threads, potentially handing off a core data context from one thread to another, and having things go wrong. Is that right?

Answer
The accepted answer to that question, using GCD queues, does ensure that a new context is created on each thread, but does not point out the necessity of doing this.

The big thing you need to remember is that you must avoid modifying the managed object context from two different threads at the same time.

That could put the context into an inconsistent state, and nothing good can come of that. So, the kind of dispatch queue that you use is important: a concurrent dispatch queue would allow multiple tasks to proceed simultaneously, and if they both use the same context you’ll be in trouble.

If you use a serial dispatch queue, on the other hand, two or more tasks might execute on different threads, but the tasks will be executed in order, and only one task will run at a time. This is very similar to running all the tasks on the same thread, at least as far as maintaining the context’s consistency goes.

See this question and answer for a much more detailed explanation.

This is how Core Data has always worked. The Concurrency with Core Data section of the Core Data Programming Guide gives advice on how to proceed if you do decide to use a single context in multiple threads. It talks mainly about the need to be very careful to lock the context any time you access it. The point of all that locking, though, is to ensure that two or more threads don’t try to use the context simultaneously.

Using a serialized dispatch queue achieves the same goal: because only one task in the queue executes at a time, there’s no chance that two or more tasks will try to use the context at the same time.

Core Data Stack #2 – multiple contexts and resolving conflicts

https://developer.apple.com/library/ios/documentation/Cocoa/Conceptual/CoreData/ChangeManagement.html
http://stackoverflow.com/questions/4800889/what-does-apple-mean-when-they-say-that-a-nsmanagedobjectcontext-is-owned-by-the

Multiple Contexts manipulating the Database

source download

Let’s see what happens when we have 2 contexts making changes to the database. First let’s add in an extra NSManagedObjectContext called privateQueueContext2. Implement the custom set method and create our context to execute tasks on a queue.

Then synthesize it and create the custom set method.

CoreDataStack.m

How we want to test it

We’re going to test what happens when 2 contexts edit a database by having the first context get the first Person and change its name to “Ricky”, then save the context. Then we’re gunna have the second context get the first Person and change its name to “Shirley”. The change, and its related saves will be overlapped.

But first, let’s implement the code where the contexts edit a common object (0-th indexed object of the fetched result array), then do a context save.

We do this for private context queue 1:
1) We have changeFirstPersonPrivateQueue method which responds to a button that changes the 0th Person object’s name attribute to Ricky.
2) Then we have privateQueueContextOneSave method which responds to a button that wants context 1 to save.

I want to emphasize that

We do this for private context queue 2:
1) We have changeFirstPersonPrivateQueue2 method which responds to a button that changes the 0th Person object’s name attribute to Shirley.
2) Then we have privateQueueContextTwoSave method which responds to a button that does context 2 save.

Now that the implementation is ready hook up these methods to buttons.

Specifically what we’re trying to do is

to have context 1 be able to make a change to the first Object, then save it.
to have context 2 be able to make a change to the first Object, then save it.

Hence we should have 4 buttons.

2contexts-view

Now, we know if one context makes “changes and save immediately”, then it gets reflected in the database. The next context that either reads or make further changes will see the updates. However, what if the 2 contexts’s changes and saves overlap each other?

Let’s look at this example:

  • First, click on the “add bulk” button to add Person objects into Core Data.
  • Then, click on the “Display All” button to show all the first/last name of the Person objects.
  • Then, we use context 1 to change the 1st Person object’s first name to “Ricky”. Click the “Context1, make change to Ricky” button to edit Object 1’s name to “Ricky”.
  • Then, we use context 2 to change the 1st Person object’s first name to “Shirley”. Click the “Context2, make change to Shirley” button to edit Object 1’s name to “Shirley”.
  • Then click on “Context 2 save”
  • Then click on “Context 1 save”
  • In this case, you’ll get an error:


    2015-10-27 00:29:56.801 CoreData2[48750:5178513] Unresolved error Error Domain=NSCocoaErrorDomain Code=133020 “(null)” UserInfo={conflictList=(
    “NSMergeConflict (0x7f96bbc0f100) for NSManagedObject (0x7f96bbd0aa90) with objectID ‘0xd000000000040000 ‘ with oldVersion = 1 and newVersion = 2 and old object snapshot = {\n firstName = \”remark: 1445930979.058863\”;\n lastName = \”1445930979.058863\”;\n} and new cached row = {\n firstName = SHIRLEY;\n lastName = \”1445930979.058863\”;\n}”
    )}, {
    conflictList = (
    “NSMergeConflict (0x7f96bbc0f100) for NSManagedObject (0x7f96bbd0aa90) with objectID ‘0xd000000000040000 ‘ with oldVersion = 1 and newVersion = 2 and old object snapshot = {\n firstName = \”remark: 1445930979.058863\”;\n lastName = \”1445930979.058863\”;\n} and new cached row = {\n firstName = SHIRLEY;\n lastName = \”1445930979.058863\”;\n}”
    );
    }

    ..and you’ll come to the abort method:

    ref – https://developer.apple.com/library/ios/documentation/Cocoa/Conceptual/CoreData/ChangeManagement.html

    If your application contains more than one managed object context and you allow objects to be modified in more than one context, you need to be able to reconcile the changes. This is a fairly common situation when an application is importing data from a network and the user can also edit that data.

    Ultimately there can be only one truth, and differences between these views must be detected and reconciled when data is saved. When one of the managed object contexts is saved, its changes are pushed through the persistent store coordinator to the persistent store. When the second managed object context is saved, conflicts are detected using a mechanism called optimistic locking. How the conflicts are resolved depends on how you have configured the context.

    When Core Data fetches an object from a persistent store, it takes a snapshot of its state. A snapshot is a dictionary of an object’s persistent properties—typically all its attributes and the global IDs of any objects to which it has a to-one relationship. Snapshots participate in optimistic locking. When the framework saves, it compares the values in each edited object’s snapshot with the then-current corresponding values in the persistent store.

    • If the values are the same, then the store has not been changed since the object was fetched, so the save proceeds normally. As part of the save operation, the snapshots’ values are updated to match the saved data.
    • If the values differ, then the store has been changed since the object was fetched or last saved; this represents an optimistic locking failure. The conflict must be resolved.

    Say in our example, when our contexts gets the first object in our Core Data, it does so using

    as you can see in the code. Basically, the NSArray you get back is a snapshot of its state. Within the NSArray, we get the 0-th index object, and change its attribute. What we’re changing here is just a snapshot. Now, when you decide to save after you change the attribute in the situation of the 2nd context changing the name to Shirley, it compares the values in its object’s snapshot with the then-current corresponding values in the persistent store.

    Context 2 – no conflict

    In our case for context 2, before it saves, it sees that the current corresponding value in the persistent store is the same as the values in the snapshot it received. In both cases, it is the default value “remark: whatever today’s date is”. Since they are the same, then the store has not been changed by other context(s) since context 2 fetched it, and thus the save proceeds normally.

    Context 1 – conflict

    It does not work for context 1 because when context 1 fetches the object, its snapshot is “remark: whatever today’s date is”.

    However, because context 2 previously managed to change the 0th Person object’s name attribute to “Shirley” and then save. This means the current corresponding values in the persistent store is Shirley.

    This means the values differ, and thus, for context 1, the store has been changed since the object was fetched or last saved. This represents an optimistic locking failure. And the conflict must be resolved.

    Resolving conflicts by synchronizing changes between our contexts

    If you use more than one managed object context in an application, Core Data does not automatically notify one context of changes made to objects in another. In general, this is because a context is intended to be a scratch pad where you can make changes to objects in isolation, and you can discard the changes without affecting other contexts. If you do need to synchronize changes between contexts, how a change should be handled depends on the user-visible semantics you want in the second context, and on the state of the objects in the second context.

    Consider an application with two managed object contexts and a single persistent store coordinator. If a user deletes an object in the first context (moc1), you may need to inform the second context (moc2) that an object has been deleted. In all cases, moc1 automatically posts an NSManagedObjectContextDidSaveNotification notification via the NSNotificationCenter that your application should register for and use as the trigger for whatever actions it needs to take. This notification contains information not only about deleted objects, but also about changed objects. You need to handle these changes because they may be the result of the delete. Most of these types of changes involve transient relationships or fetched properties.

    Code for Context 1

    First, let’s look at the context setter methods. Whenever other contexts save, we want to make sure our own context updates on their saves. Thus we add an addObserver to observe saves from other contexts. Whenever other contexts save, the message NSManagedObjectContextDidSaveNotification gets sent, and we capture it like so:

    What this means is that whenever object self.privateQueueContext2 sends a message name NSManagedObjectContextDidSaveNotification, then let’s call custom method mergeChangesFromContext2.

    Note that for the object parameter, if you can it to the sender of the notification such as self.privateQueueContext2, then we will then only be notified of self.privateQueueContext2’s events.

    If we set to “nil” you will get all notification of this type (regardless who sent them).

    In our particular case, we set the object parameter to context 2, so that we can be updated on whatever context 2 just did, or is doing.

    The custom method gets called whenever context 2 saves, because we as context 1, wants to merge changes from context 2 if and when context 2 does save. We do a simple check that if the notification is from context 2, then we simply have our context 1 merge via the method mergeChangesFromContextDidSaveNotification method:

    Run the program, add your bulk of People object. Then Display them. You’ll see the first object which is 0th index.

    reportOnAllPeopleToLog method called
    2015-10-27 11:17:59.555 CoreData2[49227:5232602] ———— RESULTS FROM DATABASE ————
    2015-10-27 11:17:59.556 CoreData2[49227:5232602] There are 10 number of entries so far
    2015-10-27 11:17:59.556 CoreData2[49227:5232602] 0 —————-
    2015-10-27 11:17:59.556 CoreData2[49227:5232602] firstName = remark: 1445969859.502338
    2015-10-27 11:17:59.557 CoreData2[49227:5232602] lastName = 1445969859.502338
    2015-10-27 11:17:59.557 CoreData2[49227:5232602] object address is: 0x7fd358d8f710
    2015-10-27 11:17:59.558 CoreData2[49227:5232602] 1 —————-
    2015-10-27 11:17:59.558 CoreData2[49227:5232602] firstName = remark: 1445969859.822105
    2015-10-27 11:17:59.558 CoreData2[49227:5232602] lastName = 1445969859.822105
    2015-10-27 11:17:59.559 CoreData2[49227:5232602] object address is: 0x7fd358d83d40


    etc.

    Press button Context 1, Change to Ricky
    Press button Context 2, Change to Shirley
    Press Context 2 save
    Press Context 1 save.

    You’ll then see that Context’s RICKY is the latest save

    result:


    reportOnAllPeopleToLog method called
    2015-10-27 11:19:53.481 CoreData2[49227:5232602] ———— RESULTS FROM DATABASE ————
    2015-10-27 11:19:53.481 CoreData2[49227:5232602] There are 10 number of entries so far
    2015-10-27 11:19:53.481 CoreData2[49227:5232602] 0 —————-
    2015-10-27 11:19:53.481 CoreData2[49227:5232602] firstName = RICKY
    2015-10-27 11:19:53.481 CoreData2[49227:5232602] lastName = 1445969859.502338
    2015-10-27 11:19:53.481 CoreData2[49227:5232602] object address is: 0x7fd358c31a90
    2015-10-27 11:19:53.482 CoreData2[49227:5232602] 1 —————-


    etc

    The result is now correct. When context 2 saved Shirley, context 1 merged itself with context 2’s changes, and thus when our context 1 saves, it will see that the persistent store value and its snapshot value are both “Shirley”, and thus goes on to save its own changes of “Ricky”. Thus, after the save, we see that the value “Ricky” is reflected in the database.

    Some Upkeep

    However, this only applies for context 1 merging if and when context 2 saves. What if context 2 need to merge on what context 1 does? That means we have to do the same thing for context 2.

    Also, what if we have x number of contexts? That means for whatever context n that’s saving, we just make sure all other contexts merge with the saving context.

    Notice object is set to nil in order to observe NSManagedObjectContextDidSaveNotification messages from any object. Then in our mergeChanges custom method, we simply make all contexts merge with the saving context.

    and…

    Using the Queue and performing your edits and saves via blocks

    Apple states:
    [A context] assumes the default owner is the thread or queue that allocated it—this is determined by the queue that calls its init method. You should not, therefore, initialize a context on one queue then pass it to a different queue.

    This means that in our custom setter method for a context, we create the context with an init to a concurrency queue type. This means default owner of privateQueueContext is the queue used via the init:

    Hence privateQueueContext and the init-ed queue are now pinned together. This pattern is thread confinement or isolation.

    We created privateQueueContext with this queue, and must remember to always use privateQueueContext with this queue.

    For example, say we have a task: “use privateQueueContext to get a Person object to manipulate and later save into Core Data”. We want to queue this task because we’re doing this 10,000 times and needs to be run on a background. We queue this task on privateQueueContext because privateQueueContext is what is involved.

    Notice we use privateQueueContext on all. If in the task of fetching the Object using privateQueueContext but queueing the task on say privateQueueContext2 (which has its own queue via an init), then we have “have violated thread confinement by exposing the MOC object reference to two queues. Simple. Don’t do it. Don’t cross the streams.” (http://stackoverflow.com/questions/4800889/what-does-apple-mean-when-they-say-that-a-nsmanagedobjectcontext-is-owned-by-the)

    Part of the reason is because multiple queues process tasks concurrently. So whatever context data you are executing in queue A, may also be executed in queue B at the same time. If you were to confine tasks to its attached queue, then no context data will ever be shared because each task is processed one after another via FIFO.

    furthermore

Core Data Stack #2 – 1 context, background task

  • http://www.cocoabuilder.com/archive/cocoa/290810-core-data-conflict-detection.html
  • http://joelparsons.net/blog/2013/09/02/background-core-data-with-privatequeuecontext

Updated Demo 5/5/2016

demo 10/26/2015

Have the context process in the background

First step is to add a private queue context where it will save a lot of data into the database.

  1. add a NSManagedObjectContext privateQueueContext object, synthesize it
  2. custom set method where we create the context with a queue
  3. queue up tasks such as bulk add
full source for CoreDataStack.h

addBulkPeople method is the process of using our privateQueueContext object and throwing a block on the queue and processing the saving of data into the database.

reportOnAllPeopleToLog method is using our mainQueueContext to simply get data from CoreData and see what’s in the database.

CoreDataStack.m

First, we set up our init method and init our queue contexts via custom setter methods.

Notice when we alloc and init NSManagedObjectContext, we initialize the context with concurrency type NSPrivateQueueConcurrencyType

Essentially, instead of the old way of attaching a context to a thread, we now have the option of attaching a context to a queue. This means that whatever job and/or tasks are lined up for this context gets queued. Thus, whatever operation needs to be done by that context will be completed FIFO via blocks.

Now that we have our queue context ready to be used, use queue up tasks by adding in blocks of code to the queue. We want to add a bulk of people so we queue up the task of “adding 10,000 people”. This is obviously a very time consuming task, and by adding it onto our context queue, we make it run in the background. Thus, freeing up the main thread for UI operations.

reportOnAllPeopleToLog

…simply reads the Core Data and displays the results.

Keep in mind that in the demo, the mainQueueContext is initialized with
NSMainQueueConcurrencyType, which runs on the main thread.

Thus, you SHOULD put tasks that update UI here.

If you are to use a time consuming task like a loop that displays all the People (like how we’re doing it), expect the main UI to freeze.

If you want to change it so that logging is done in the background and not freeze the UI, then change the NSMainQueueConcurrencyType to NSPrivateQueueConcurrencyType.

Then, put your code inside [self.mainQueueContext performBlock:^{…}.

Below are just some of the standard methods for the core stack.

Now, run the app. Make sure there is no previous version installed because we want a clean database.

Click on the add bulk button so we let it add 10,000 people into the database. Then play around with the scrollbar, you’ll notice that its responsive. Hence, we’ve successfully used the context to queue up jobs and run them on a background queue. The main thread is then responsive.

add_bulk

If you want to display all the Persons you’ve added, click on the display all button. The display all button uses the mainQueueContext, which runs on the main UI. Hence, put all the code that updates the UI, into that queue.

display_all

For demonstration purposes, we are using NSPrivateQueueConcurrencyType for the mainQueueContext. Hence, anything you do on on that context SHOULD BE TO UPDATE THE UI.

If you do labor intensive job such as logging all the People you’ve added, the UI will freeze…as demonstrated in the updated demo project.

IF you want to do the logging in the background, you can change it to NSPrivateQueueConcurrencyType:

then place your logging task in the performBlock like so:

Then, your logging will be executed in the background and not block the UI.

Next, using multiple contexts >>

Core Data Stack #1 – everything on main queue

https://blog.codecentric.de/en/2014/11/concurrency-coredata/

Everything on Main Queue

Create a iOS project and check “using Core Data”.

This is how it works:

basic_core_data_diagram

At the most basic level we have a CoreDataStack class.
In its implementation file, we first have:

NSManagedObjectModel – Managed Object Model

We start with the managed object model.

  • Essentially, it is the schema of our model.
  • Our model comes from the .momd file. In xcode, you can create your model and it will save to the .momd file.
  • Then we load it into a NSURL, which in turn is used to initialize a NSManagedObjectModel object.

NSPersistentStoreCoordinator – Persistent Store Coordinator

The persistent store coordinator is responsible for coordinating access to multiple persistent object stores. As an iOS developer you will never directly interact with the persistent store coordinator and, in fact, will very rarely need to develop an application that requires more than one persistent object store. When multiple stores are required, the coordinator presents these stores to the upper layers of the Core Data stack as a single store.

This is essentially the database connection. It coordinates between our model and a .sqlite file.

The class has attribute that points to our previous defined NSManagedObjectModel. Then it stores a NSURL to a .sqlite file. From there on, it is used by either one or many NSManagedObjectContexts in order to do DB operations.

NSManagedObjectContext – managed object context

This is the scratch pad for what goes into and comes out of the database. We use this to do many operations, then use save context, predicates, and other special operations to make changes to the database. There can be either 1 or more context used at the same time.

Full Source

CoreDataStack.h

CoreDataStack.m

Inserting into Core Data

Notice this method:

insertNewObjectForEntityForName returns a NSManagedObject * for you to manipulate. All you have to do is set the attributes of the object and then call the saveContext method.

NSManagedObject are the objects that are created by your application code to store data. A managed object can be considered as a row or a record in a relational database table. For each new record to be added, a new managed object must be created to store the data. Similarly, retrieved data will be returned in the form of managed objects, one for each record matching the defined retrieval criteria. Managed objects are actually instances of the NSManagedObject class, or a subclass thereof. These objects are contained and maintained by the managed object context.

When NSEntityDescription returns an object for you to insert. All you have to do is set the attributes of the object and then call the saveContext method.

Every object that is returned to you by the method insertNewObjectForEntityForName will be monitored by your context. Once you finish updating those objects, and you call saveContext, your context will check up on those objects and then save them accordingly.

Group changes together

However, calling saveContext for every change takes a bit longer because you are having the persistent store coordinator communicate with the database off of one change. You can group your changes together, and then tell your context to save once.

The Downside

While this stack is very simplistic, the downside is that if you record large amount of data, the UI will be unresponsive because you are running off of the main thread.

coredata-ui-clogged

For example, in our example, we have a for loop of 10. Change it to 10,000, and try to play with the UI controls on your viewController. They won’t work because your main thread is busy processing the 10,000 core data operations.

Core Data Part 5 – deleting

Core Data part 4 – rollback

After you get an object and change its attributes, IF YOU DO NOT saveContext, you can rollback the data to its original value.

For example, say we get the first indexed Person object. You change the first name to Ricky. If you use [coreDataStack saveContext], that means the change is permanent in the database and you will be able to see the change when you restart up.

But if we comment out [coreDataStack saveContext], that means the change is not permanent and is only in cache context. You will see the change in the current usage of the app, but if you restart the app, you will see the old value.

In other words, in the database, we have NOT updated the value.

When [coreDataStack saveContext] is commented out, the changes you make is ONLY reflected in the current usage of the app, and not in the database. Thus, you can rollback to the original value by first checking to see if there was a change on the context by using
[[coreDataStack managedObjectContext] hasChanges]. Then if there was a change, you rollback the value by doing [[coreDataStack managedObjectContext] rollback]

Core Data part 3 – Add Data

DEMO PROJECT

Given that,

1) You have your Data Stack set up
2) You have a model set up, and generated your model object which derives from NSManagedObject. Make sure your properties are @dynamic so that it uses the superclass’s synthesis (via NSManagedObject).

Remember, if you do not use @dynamic, and instead use @synthesize, it means you will be writing the getter/setter method yourself and if you do not write it correctly, the data you save using Core Data will not be there when you restart the app.

for xCode 7 and after, category file is generated

If you are using xCode 7 or after, a category file is generated along with the entity file like so:

  • Person+CoreDataProperties.h
  • Person+CoreDataProperties.m
  • Person.h
  • Person.m

The reason for this is because whenever new entity files are generated by doing:

  • click on .xcdatamodeld file
  • then Editor >> Create NSManagedObject subclass

you won’t have your Entity files overwritten. All your properties and methods will still be there. Instead, xCode will over-ride the Category file(s) instead.

Hence put all your code in Person, and leave the Category file alone.

Implementing the Entity files

Person.h

Person.m

Adding data

In your CoreDataStack.h, we’ll make 2 methods.

  1. create a new person
  2. display on all the people who’s in the database into our console.

Here are the few important issues when Adding a Person using core data:

1) use insertNewObjectForEntityForName method for Core Data to return you a managed object so you can initialize it with data.

2) Make sure you save context on it.

Here are the few important issues when fetching using core data:
executeFetchRequest gets what we need according to a request. It returns an array and you can iterative through it and display it.

ViewController button and responder

In your UIViewController, add a button and a responder method for both Adding a Person and Logging all the people to the console

Now let’s add a display button. Give it a responder method name displayAll.

Implement the button responders:

Now, go ahead and run the project using xcode. Press the Add Person button to add Person objects into the database, and see the results through your console.

Then press the display button to show all the Person objects that’s been saved into the database. Restart the app using your xcode project, press the display button again, and look at the log console to see the objects you’ve saved from before.