Assume you have a project on GitHub. We first use Azure, and create a LOCAL GIT. What this means is that we have a local git repository running on Azure. We then push our project from GitHub into the Azure local git.
make sure your code is simple.
|
1 2 3 4 5 6 7 |
var http = require('http'); var port = process.env.PORT || 1337; http.createServer(function(req, res) { res.writeHead(200, { 'Content-Type': 'text/plain' }); res.end('Hello World\n'); }).listen(port); |
Create Node JS Website, push it to GitHub, and clone it onto your Mac
https://github.com/Azure/azure-content/blob/master/articles/app-service-web/web-sites-nodejs-develop-deploy-mac.md
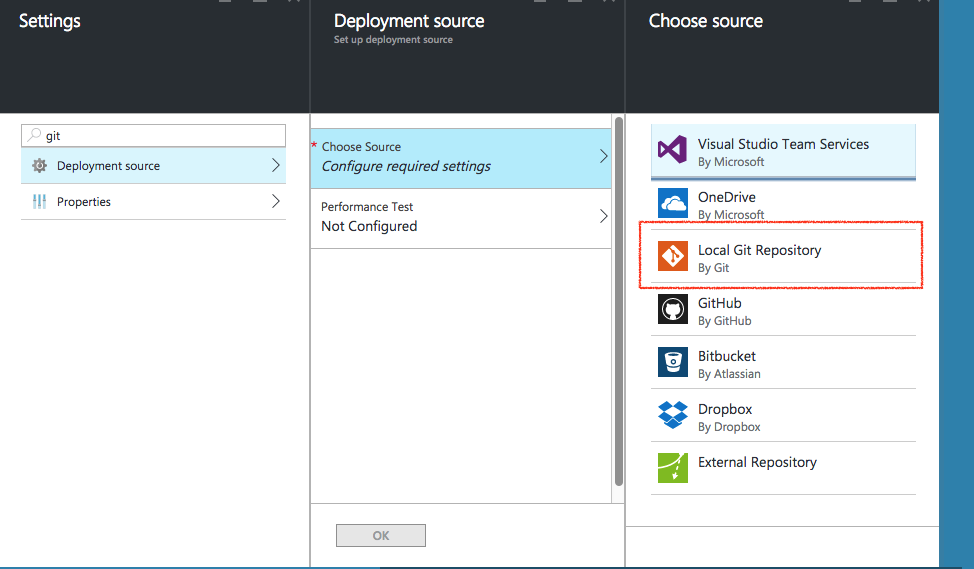
Select Local GIT. This means that are going to push our project from GitHub, have a remote git here in Azure. Azure will provide us a git location via a GIT URL. We just put our files into that URL, and that’s it.
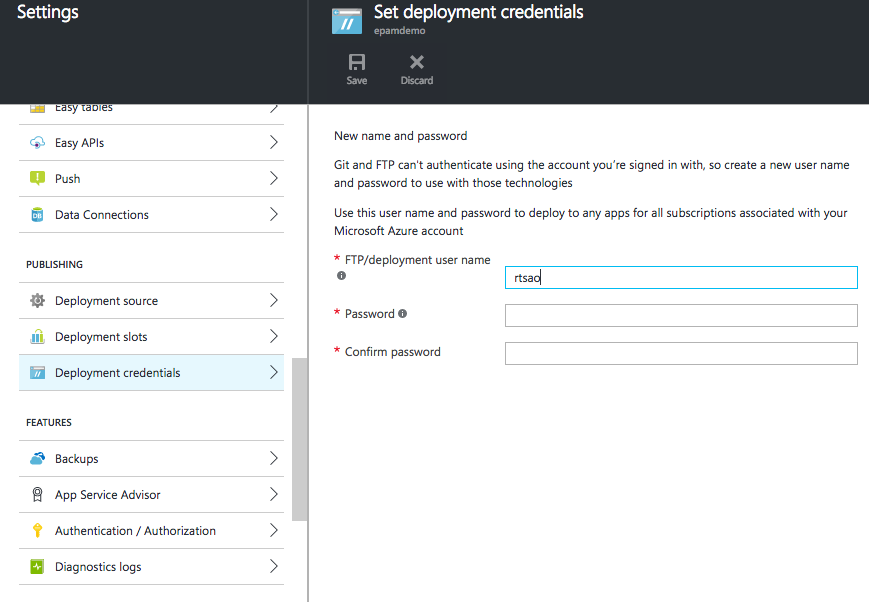
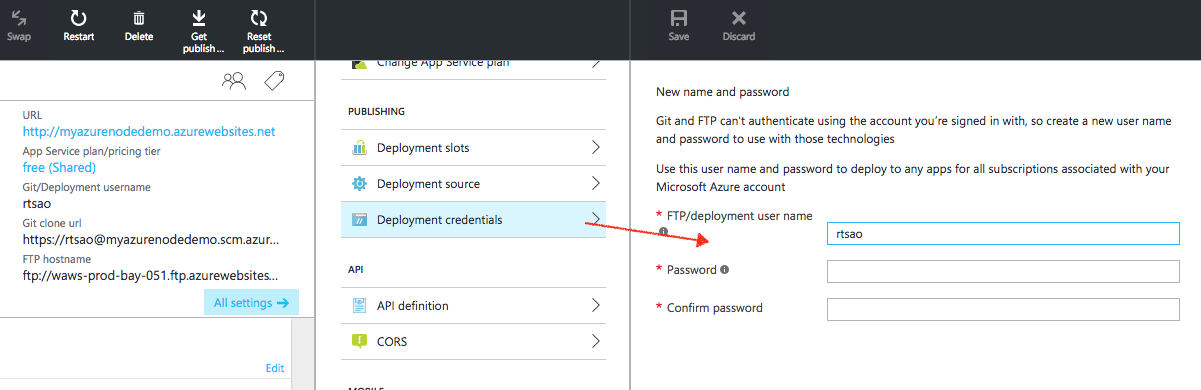
Make sure we create credentials for when we push our files from our local Mac, up into Azure’s local git.
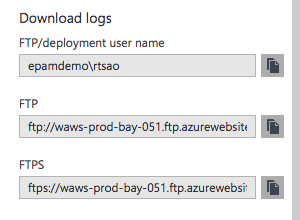
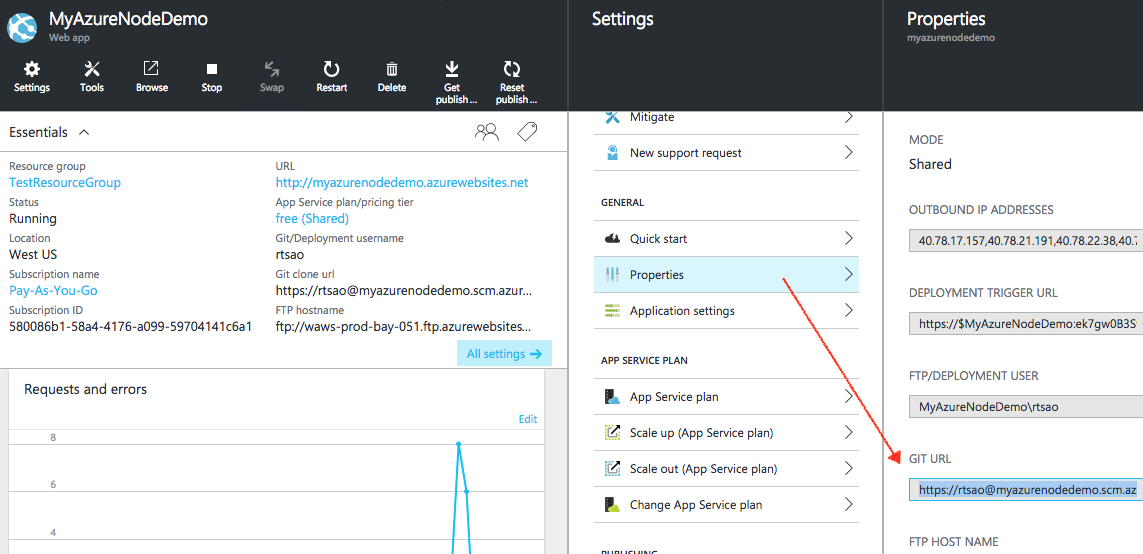
Get the GIT URL
In our Mac’s local repository, we create a remote git location called ‘azure’. This means that we are to push our files/changes to that GIT location.
Make sure you are in your Mac’s local project directory (the where the .git folder is):
rickytsao$ git remote remove azure
rickytsao$ git remote add azure https://rtsao@myazurenodedemo.scm.azurewebsites.net:443/MyAzureNodeDemo.git
rickytsao$ git push azure master
Password for ‘https://rtsao@myazurenodedemo.scm.azurewebsites.net:443’:
Counting objects: 83, done.
Delta compression using up to 4 threads.
Compressing objects: 100% (79/79), done.
Writing objects: 100% (83/83), 13.19 MiB | 1.06 MiB/s, done.
Total 83 (delta 7), reused 0 (delta 0)
remote: Updating branch ‘master’.
remote: Updating submodules.
remote: Preparing deployment for commit id ‘fda61c8b1c’.
remote: Generating deployment script.
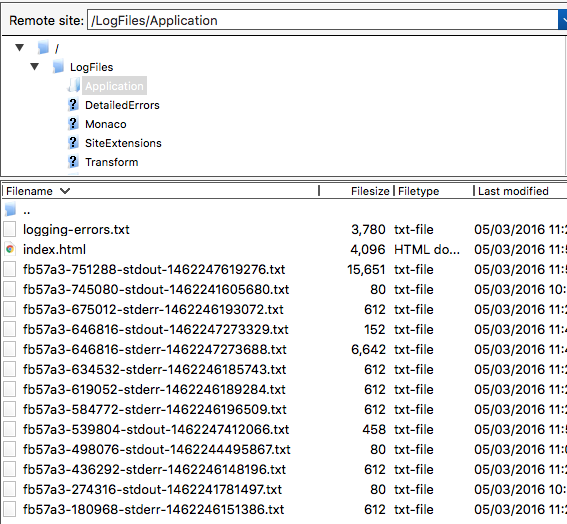
..you’ll also see it copying the files, then telling you the deployment is successful
remote: Copying file: ‘controllers\users\PUT_bbt~email.js’
remote: Copying file: ‘controllers\users\PUT_sign~email.js’
remote: Copying file: ‘controllers\users\PUT_~email.js’
remote: Copying file: ‘models\user.js’
remote: Looking for app.js/server.js under site root.
remote: Using start-up script server.js
remote: Generated web.config.
remote: The package.json file does not specify node.js engine version constraints.
remote: The node.js application will run with the default node.js version 4.2.3.
remote: Selected npm version 3.5.1
remote: …….
remote: npm WARN book_api@0.0.0 No repository field.
remote: Finished successfully.
remote: Running post deployment command(s)…
remote: Deployment successful.
To https://rtsao@myazurenodedemo.scm.azurewebsites.net:443/MyAzureNodeDemo.git
* [new branch] master -> master
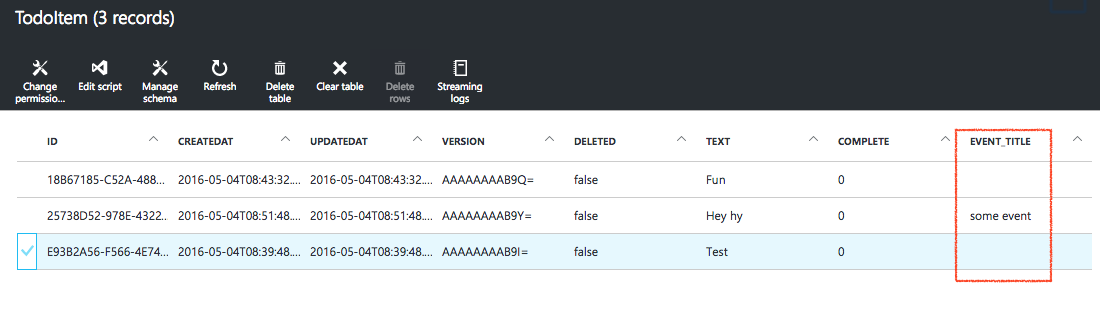
Creating SQL Database
https://azure.microsoft.com/en-us/documentation/articles/sql-database-get-started/
Node Code
|
1 2 3 4 5 6 7 8 9 10 11 12 13 14 15 16 17 18 19 20 21 22 23 24 25 26 27 28 29 30 31 32 33 34 35 36 37 38 39 40 41 42 43 44 45 46 47 48 49 50 51 52 53 54 55 56 57 58 59 60 61 62 63 64 65 66 67 68 69 70 71 72 73 74 75 76 77 78 79 80 81 82 83 84 85 86 87 88 89 90 91 92 93 94 95 96 97 98 99 100 101 102 103 104 105 106 107 108 109 110 111 |
// ======================= // get the packages we need ============ // ======================= var express = require('express'); var app = express(); var bodyParser = require('body-parser'); var morgan = require('morgan'); var mongoose = require('mongoose'); var config = require('./config'); // get our config file var port = 8080; // used to create, sign, and verify tokens app.set('superSecret', config.secret); // secret variable // use body parser so we can get info from POST and/or URL parameters app.use(bodyParser.urlencoded({ extended: false })); app.use(bodyParser.json()); app.use(require('./controllers')); // use morgan to log requests to the console app.use(morgan('dev')); app.listen(port); console.log('web services now exposed at http://localhost:' + port); var strVar = "Ricky"; var strVar1 = "6680"; var strVar2 = "Ricky"; var strVar3 = ""; var intVar = 6680; //jdbc:sqlserver://azurenodedemo.database.windows.net:1433;database=azurenodedemo;user=rtsao@azurenodedemo;password={your_password_here};encrypt=true;trustServerCertificate=false;hostNameInCertificate=*.database.windows.net;loginTimeout=30; var tedConfig = { userName: 'rtsao@azurenodedemo', password: 'Tsao6680', server: 'azurenodedemo.database.windows.net', // If you are on Microsoft Azure, you need this: options: {encrypt: true, database: 'azurenodedemo'} }; var Connection = require('tedious').Connection; //create new connection var connection = new Connection(tedConfig); connection.on('connect', function(err) { if (err) return console.error(err); console.log("Connected!!"); executeStatement(); }); var Request = require('tedious').Request; var TYPES = require('tedious').TYPES; function executeStatement() { var createStmt = "CREATE TABLE Persons ( PersonID int, LastName varchar(255), FirstName varchar(255), Address varchar(255), City varchar(255) );"; var getAllTableNames = "SELECT name FROM sys.tables"; var showColumnNames = "select name from syscolumns where id=object_id('Persons')"; request = new Request(showColumnNames, function(err) { if (err) { console.log(err);} }); var result = ""; //Node.js is evented, thus listening for events // listen for 'row' event request.on('row', function(columns) { columns.forEach(function(column) { //console.dir(column); if (column.value === null) { console.log('server.js - column value is NULL'); } else { result += column.value + ", "; } }); console.log(result); result ="\n\n"; }); // listen for 'done' event request.on('done', function(rowCount, more) { console.log("server.js - ALL DONE"); console.log(rowCount + ' rows returned'); }); console.log("server.js - EXECUTE SQL"); connection.execSql(request); } exports.app = app; |
Further samples on SQL manipulation:
https://msdn.microsoft.com/library/mt715784.aspx
run “Node server.js” in a terminal
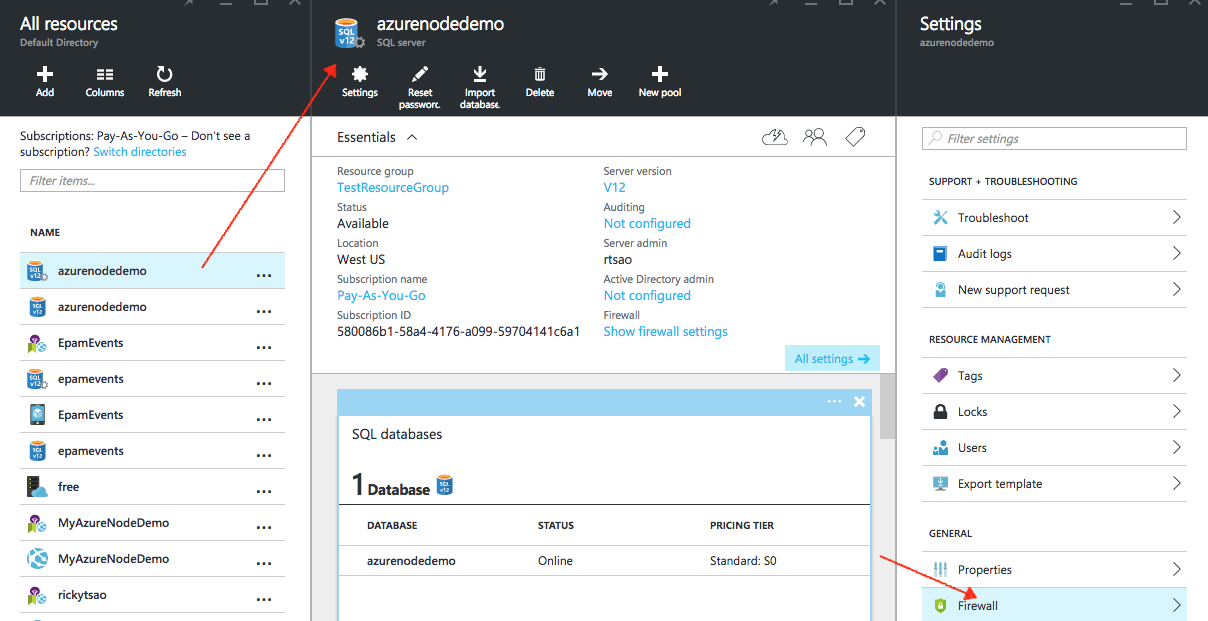
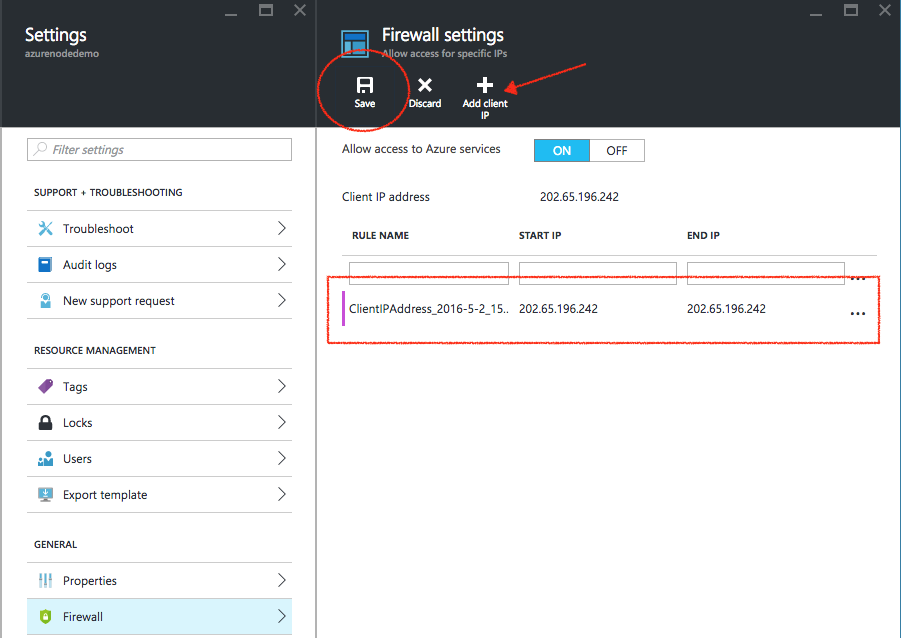
If you run your node app, you’ll see that your connection may have a problem because:
|
1 2 3 |
{ [ConnectionError: Cannot open server 'azurenodedemo' requested by the login. Client with IP address '202.65.196.242' is not allowed to access the server. To enable access, use the Windows Azure Management Portal or run sp_set_firewall_rule on the master database to create a firewall rule for this IP address or address range. It may take up to five minutes for this change to take effect.] message: 'Cannot open server \'azurenodedemo\' requested by the login. Client with IP address \'202.65.196.242\' is not allowed to access the server. To enable access, use the Windows Azure Management Portal or run sp_set_firewall_rule on the master database to create a firewall rule for this IP address or address range. It may take up to five minutes for this change to take effect.', code: 'ELOGIN' } |
Basically, you have to go to your SQL server, and have the firewall allow access to your ip address like so: