Adding a style sheet to your page

Click on the PageSettings icon of your Page. Then, Add > New Item

create-style-1

In the search box, look for Page-Stylesheet-file.

create-style-2

Create your own custom CSS file called mystyle.css.

Put it in C:\inetpub\wwwroot\hkex\Website\styles
You can verify this location in your Sitecore Rocks explorer by hitting up Website\styles

Then, insert this into the location of your style sheet:

create-style-3

Reload your site and you should see that the background has turned red.

You can also right click on your web page and select “Page Source”. Once the HTML source comes up, search for your file name mystyle.css to verify that the page has loaded it.

create_style-4

Doubly Linked List

xCode demo

Tests

.hpp

.cpp file

Set up Visual Studios 2015 project with installed Sitecore

ref – https://www.akshaysura.com/2016/06/29/tihidi-setup-a-visual-studio-2015-sitecore-8-x-mvc-solution/

Assuming you have a Sitecore site already set up with the Sitecore Instance Manager, you want to create a project in Visual studio so that you can start developing custom code for sitecore.

Initial Setup

First create a new folder on your desktop like so:

C:\Users\Ricky_Tsao\Desktop\Projects\TIHIDI

Then create folders Dependencies and Source like so:

C:\Users\Ricky_Tsao\Desktop\Projects\TIHIDI\Dependencies
C:\Users\Ricky_Tsao\Desktop\Projects\TIHIDI\Source

Source folder is where you’ll put your Visual Studios project.

Then create folder Sitecore under Dependencies like so:
C:\Users\Ricky_Tsao\Desktop\Projects\TIHIDI\Dependencies\Sitecore

Creating VS project

new_project

Start the VS as an admin. Go to File > New > Project. Under New Project, click on Web, then new ASP.NET project.

Give it a name, say THIHIDI.WEB. Then under location, Browse to:

C:\Users\Ricky_Tsao\Desktop\Projects\TIHIDI\Source

This is where you will be putting all the project files. Uncheck create directory for solution. This is because the Source folder is already the directory for our solution.

project_location

Then on the next screen, we’ll select the Empty project, check the “MVC” box, and click OK.

empty_mvc

Settings

When the project is up, Delete the Web.config and Global.asax.

delete_global_web

What we’re gunna do is to get the web.config and global.asax from the installed sitecore site, and copy it into our visual studio project.

copy global.asax and config.web from:
C:\inetpub\wwwroot\hadoken\Website

into

C:\Users\Ricky_Tsao\Desktop\Projects\TIHIDI\Source\TIHIDI.Web\

App Config

Create App_Config folder in C:\Users\Ricky_Tsao\Desktop\Projects\TIHIDI\Source\TIHIDI.Web\

app_config

Copy the ConnectionStrings.config and Sitecore.config from:
C:\inetpub\wwwroot\hadoken\Website\App_Config

in to your visual studio’s (Web project root) > App_Config folder:
C:\Users\Ricky_Tsao\Desktop\Projects\TIHIDI\Source\TIHIDI.Web\App_Config

cp_config_appconfig

Back in Visual Studio 2015, include the newly created App_Config folder. If you don’t see the App_Config folder, go to menu Project > Show All Files. Then you should be able to see the App_Config folder.

Also include the copied Global.asax and Web.config.

Add references to the Sitecore.Kernel.dll and Sitecore.Mvc.dll from

C:\Users\Ricky_Tsao\Desktop\Projects\TIHIDI\Dependencies\Sitecore

Open Views\web.config and add the following to the end of the node so that you can use @Html.Sitecore() in your views.

Restart Visual Studio 2015 and reopen the solution.

Rebuild solution.

At this point we have everything we need to deploy. Double check to make sure your MVC versions matchup before you deploy to the website. In my case, no additional work needed.
Setup a One Click Publish profile pointing to the website root.

Using sitecore rocks on Visual Studio 2015

ref – https://www.cmssource.co.uk/blog/2012/June/basic-sitecore-development-tutorial-part-3-visual-studio-sitecore-connection

Sitecore Rocks is a VS plugin that allows us to easily access our Sitecore content from within VS. It saves time by bypassing the Sitecore development centre. The following steps highlight how to hook up sitecore rocks with our currently static Sitecore web project.

After installing Sitecore Rocks, a “Sitecore” menu will appear in your visual studios. Click on on it to open the sitecore dialog box.

connect_to_sitecore

  • Click on the ‘Connect to a Sitecore Website’ button as shown on the right. The connection dialog box will open up.
  • Select the ‘Hard-Rock Web Service’, which is specifically for the newer editions of sitecore, from the Data Provider drop-down.
  • Type the name of your website into the Host Name category, in this case: sitecorex.
  • Enter‘sitecore\admin’ into the User Name category and enter ‘b’ into the Password field.sitecore rocks connection

test_sitecore_connection

Browse for the location of the Website folder in the root directory of your Sitecore website and tick the ‘Automatically Upgrade Server Components When the Dialog Closes’ checkbox.

Hit the Test button. You should receive a pop-up saying ‘Yes, it works!’ if you’re successful.

If you’re prompted with a series of dialog boxes regarding upgrading the server components, click OK then check the Sitecore.Rocks.Server component checkbox, then click Update when prompted to update server components. Select the Website folder of the SitecoreX website (C:\inetpub\wwwroot\hadoken\Website) and click OK.

If a ‘Yes, it works!’ dialog box appears you’re successful. Click OK and you should see the sitecorex website content icon with drill-down ability appear on the left. You should be able to go into the contents of the website, in the master database, as it is shown within the Sitecore Content Editor.

Installing and running mongoDB on windows

Step 1 – general install

https://code.msdn.microsoft.com/Mongo-Database-setup-on-6963f46f

First, download Mongo DB msi file. Double click it and install it onto your machine. Look for the bin folder where all the executables are:

windows_mongo_install_location
1. From the Desktop, right-click the very bottom left corner of the screen to get the Power User Task Menu.

2. From the Power User Task Menu, click System.

3. Click the “Advanced System Settings” link in the left column.

4. In the System Properties window, click on the Advanced tab, then click the Environment Variables button near the bottom of that tab.

5. In the Environment Variables window (pictured below), highlight the Path variable in the System variables section and click the Edit button. Add or modify the path lines with the paths you want the computer to access. Each different directory is separated with a semicolon as shown below.

windows_mongo_env_var

Now open up a GitBash and check to see if the system recognizes your mongo installation:

mongo –version

You should then see output of the mongo installation.

Now open command-prompt (administrator) and run the following command to start mongo server
mongod

You’ll see it start up and then checks for

Open another command-prompt (don’t close 1st prompt) and run client command:
mongo

You’ll see an error that says it can’t find a particular directory that it wants to store data/logs to.

Simply create that directory and mongod again.
Then you’ll see it start up.

Optional – doing a manual run of mongod on a custom path

This basically makes mongod save all data and logs onto a custom path that you like
In order to do this, open up a command prompt and type the command like so:

C:\Users\YOUR USER NAME>mongod –dbpath the location where you want to create the database for example

> mongod –dbpath “c:\Users\your user name\Products\Mongo\database

However, if you want to do it the default way:

http://stackoverflow.com/questions/9647561/how-to-connect-to-mongodb-in-windows/31586020#31586020

Create default db folder.
mkdir c:\data\log
mkdir c:\data\db

to create both folders in your c drive.

Create config file in bin folder of mongo (or you may in save your desired destination)

Use following commands in command-prompt:

echo dbpath=c:\data\db>> “mongod.cfg”
echo logpath=c:\data\log\mongo.log>> “mongod.cfg”

This adds following in text file named “mongod” and save it as
mongod.cfg
dbpath=c:\data\db
logpath=c:\data\log\mongo.log

Using exe to create Sitecore

Locate your exe file and double click it.

1_sitecore

Click through the wizard and say you want a complete installation.

2_complete

It will then ask you for a license file. Attach the license file.

3_license_file

Give a name for your site.
3_name

In windows 10, make sure you have MS SQL Server installed. Also make sure you have MS SQL Server Management Studio installed which you can use to view raw table data.

Sitecore uses this server/database to install its tables and insert data.

In the Management Studio, look at the Object Explorer window. Locate and see the name of your server. Type and enter that name into the Database Server textfield for our installation as shown. Your admin should give you an un/pw to connect. You can test the connection of the authentication your admin gives you in your SQL Server Management Studio. If you can click next onto the next step, then the connection is successful. If not, make sure the database name, un/pw is correct.

4_db_settings

Remember the install location.

sitecore_install_location

Click next, and finish the installation.

5_launch

Use your SQL Management studio to verify that Sitecore has created the databases into your server. It will be using these databases to store data in.
6_db_created

So now, just hit up the url in Chrome:

http://test1212/sitecore/login

admin/b

and you should be in the CMS.

7_publish_site

Go to Content Editor > Publish tab
Change the title to Ricky’s First Site. Make sure you save.
Do a smart publish. Leave the other defaults.
Once, its done, go to your browser, type: test1212/

and you’ll see your site and the changes.

EPAM Activities Version 1

Admin App

Adding an Event

The admin app let’s the user create events. The events are stored in the Easy Table TodoItem in Azure.
There is a table that shows all the non-expired events. There is also an ‘add event’ button.

1_app_main

Click on the add button and you’ll see this screen. In this version, you simply need to supply the event’s name and its expiration time.

2_add_event_screen

Insert the event title and expiration time like so:

3_input_event

Then click on the add button. You’ll see that the adding of the event is in process as the app sends the data to the Azure server.

4_adding_event

Once the data is sent to the server, the app will then pull (refresh) the data from the server. You will get a successful message confirmation.

5_successfully_added

In the Easy Table results, you will see the results:

6_easy_table_result

Once the data is sent to the server, the app will then pull (refresh) the data from the server. This updates the table on our app as you can then see the results.

7_device_result

Expiring (removing) an event

There are two ways for an event to be expired. First way is to simply let the expiration time pass and all client apps remove the event. This is because all client apps are programmed to ONLY show events with non-expired time.

The second way is for the admins to remove the events manually.

1_swipe_to_delete

On a row that you want to remove, swipe left and you’ll see the complete button. Click on it.

2_item_marked_for_removal

You’ll see that the app processes the removal of the item.

3_removal_success

Once its successful, the item will be removed from the backend, and be reflected on the client apps.

Client App

Let the app load up the log in screen. This is Microsoft’s proprietary log in screen.

1_sign_in

Recent Table

Recent table means non expired (expiration time is larger than now) events that are still available for registration:

2_recent_table

You should be able to see the data in the Easy Table with a datetime that is larger than now:

3_recent_easy_table_not_expired

History table means expired events. This means these events’ expired time is less than now. It WILL NOT be viewable in Recent Table. It will be viewable here in history table.

4_history_table

5_history_easy_table_expired

From the main screen, there’s a user icon on the top left. Click on it to go to your user profile.
You will see the scheduled events tab.

Scheduled events are:

  • Non expired events (expired time is larger than now)
  • you’ve registered for it

Currently in our example, there is none. If you do want to register for an event, left swipe it, and click on ‘Register’.

6_scheduled

Registering for the Data

6_a_register

If you want to register for an event, go to the recent table view in the front page. You’ll see events that are available for registration. Left swipe the row and you’ll see a register button. Click on the button to register for that event.

6_b_registered

Once an event is registered, you cannot register for it again. Thus it is grayed out.

6_c_user_profile

Go to your user profile. You will then see that it appears in your scheduled table view.

6_d_easy_data

Go to the Azure Easy Table to verify the data. Then see that your user email appears.

In your User Profile go to the user tab. Previous events means

  • Expired events (expiration time is less than now)
  • You’ve registered for it

7_previous

You can verify the data in the Easy Table. You will see that you’ve registered for this event in the past. Also, the event has expired.

8_scheduled_easy_table_expired

Finally, if someone else wants to log into their account, you need to logout, and let someone else log in.
But if its just you using the app, you don’t need to do anything. The app will automatically refresh your tokens for you.

9_logout

SightCore Training notes

Everything in Sitecore is an item

An item is a unit of content, not a page

Items are not files

Each item has a GUID

Items are represented in a hierarchical structure called Content Tree

Sitecore interfaces display all or part of the Content tree.

Some items are addressable via URL.
Items’ URL is determined by position in the Content Tree.

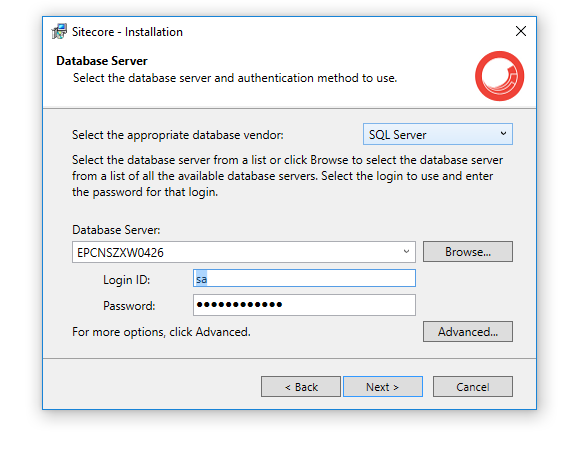
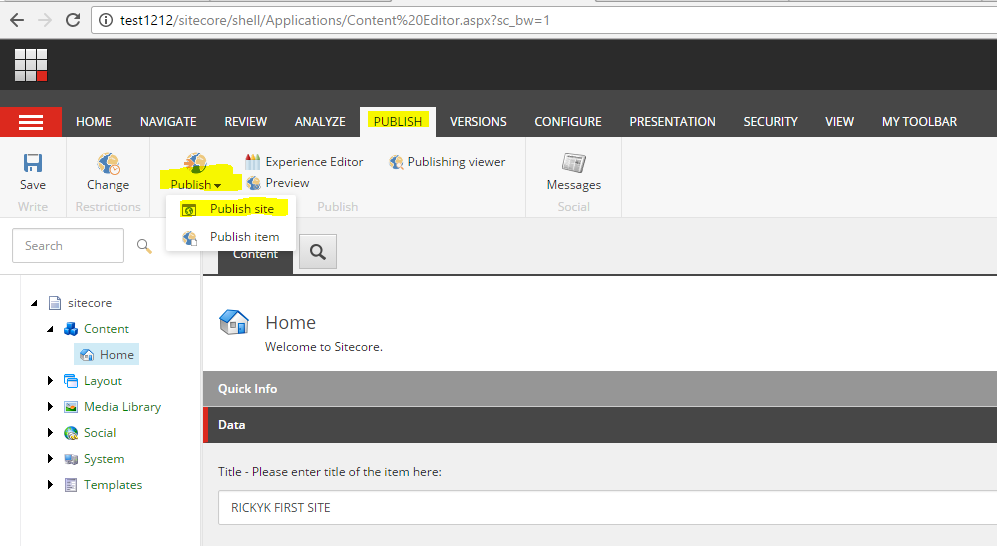
work in Master database

Client browsers retrieves data from Web Database.
Synchronization between Master and Web database is called publishing.

Which experience editor mode would you use to add a new component? Designing mode

Desktop,
Content Editor,
Experience Editor

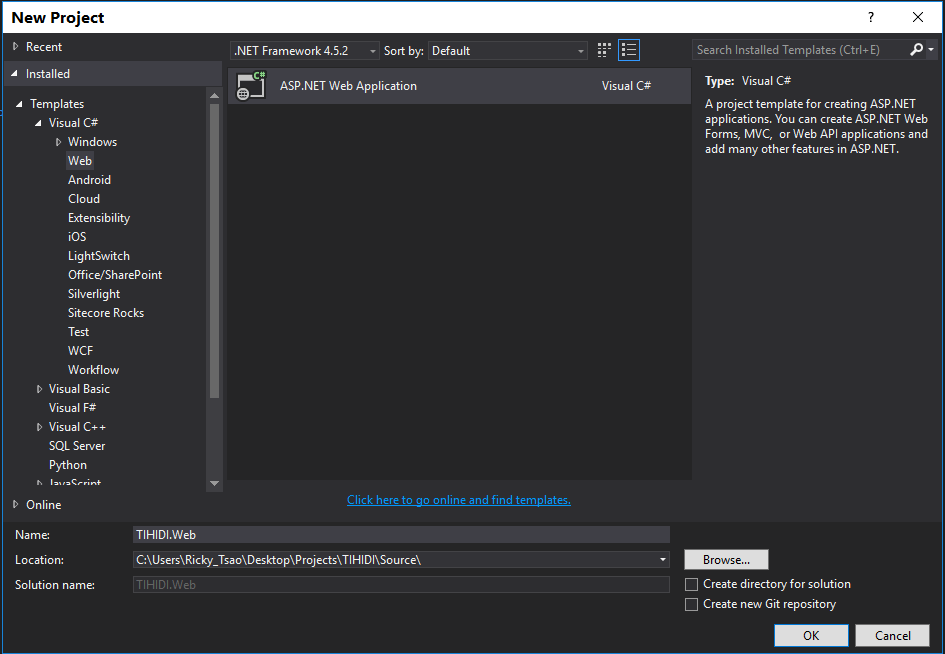
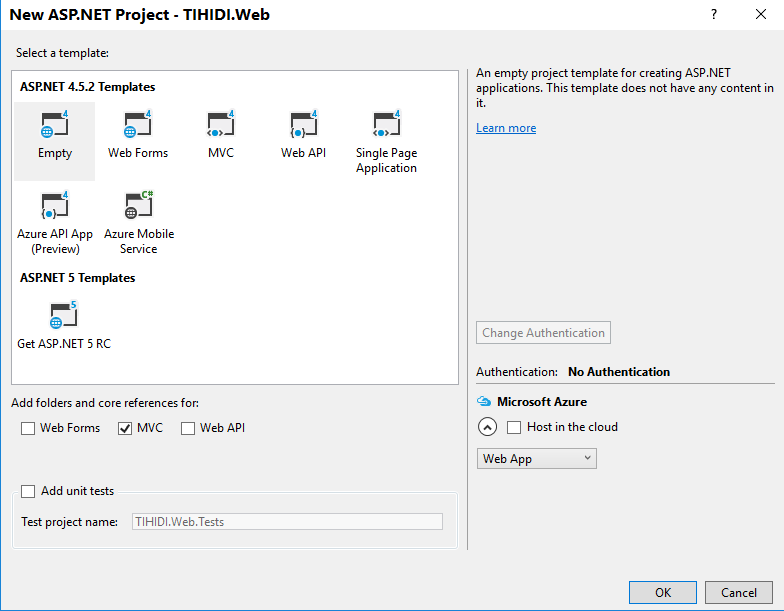
Sitecore is ASP.NET application

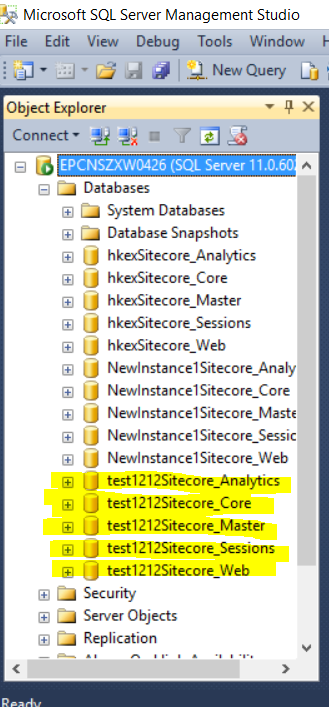
  • Master – authoring database, work in progress
  • Web – published, live content
  • Core – settings and membership

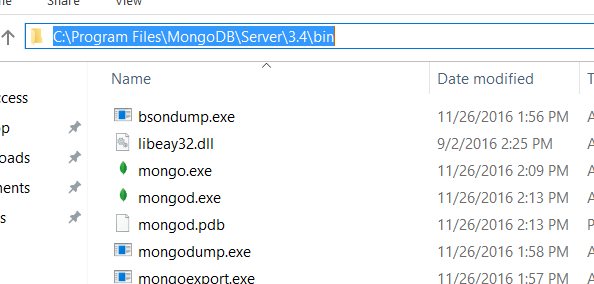
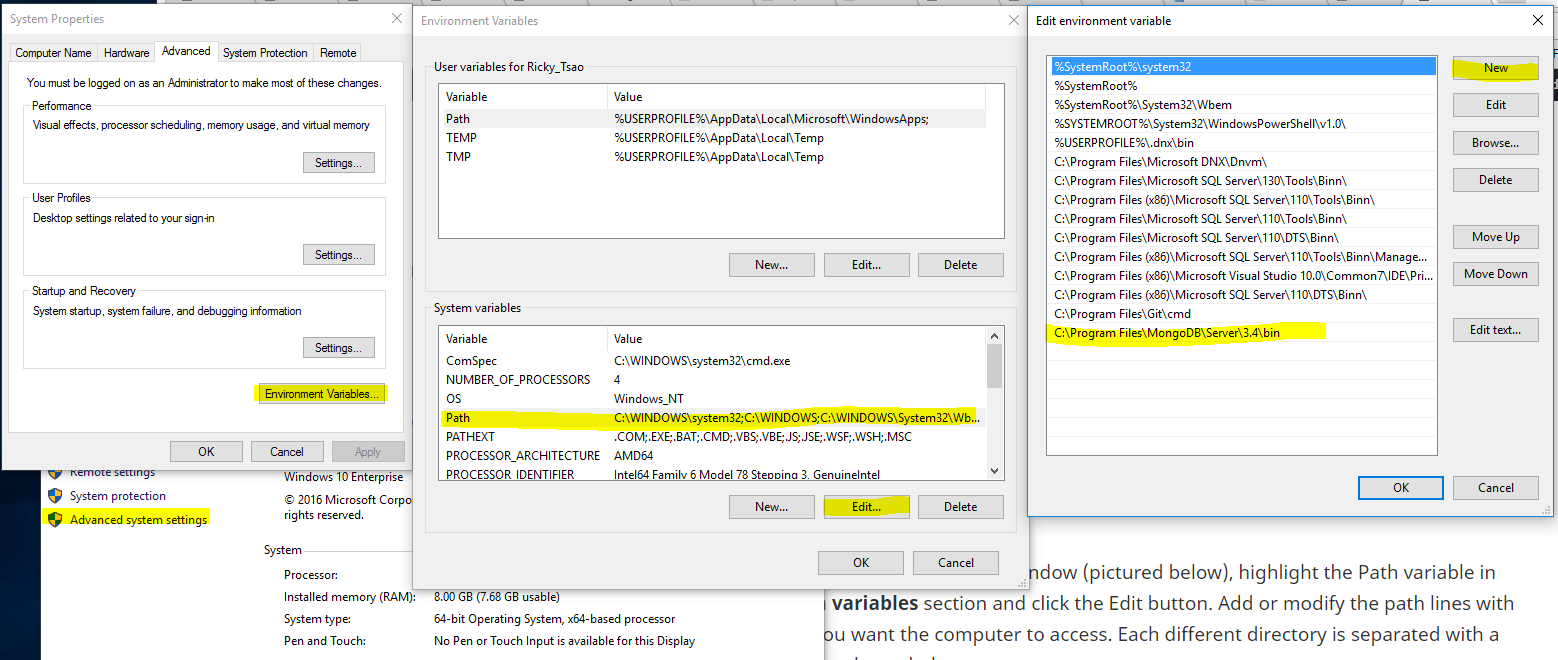
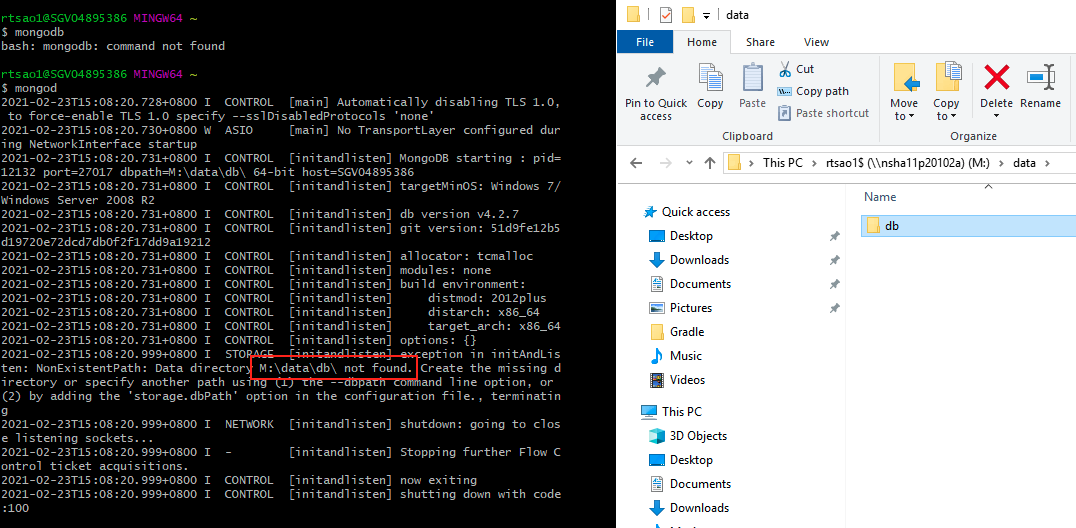
xDB – MongoDB NoSQL Collection starting with v7.5. Collects information. Then xDB aggregate and pushes them to Reporting DB.

Reporting
SQL server. Replaces Analytics DB previous to v7.5. Multi dimension data. Reporting search for analytics, which comes from Mongo. MongoDB has most detailed data.
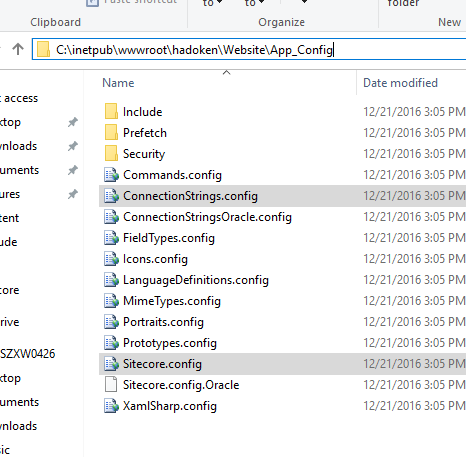
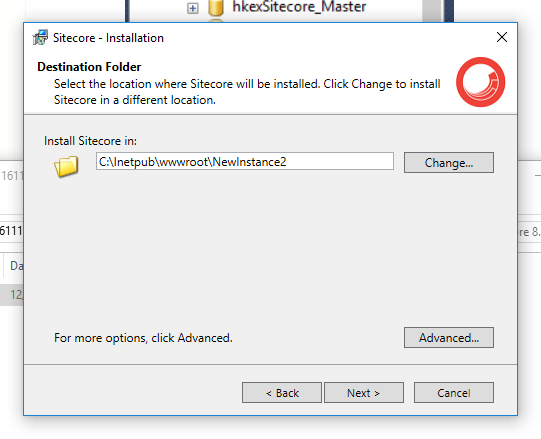
File System

website – web root of ur application
database – database files
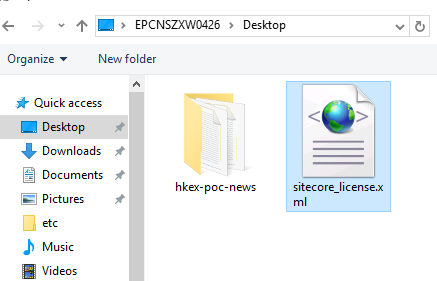
data – license, site core logs, packages, indexes

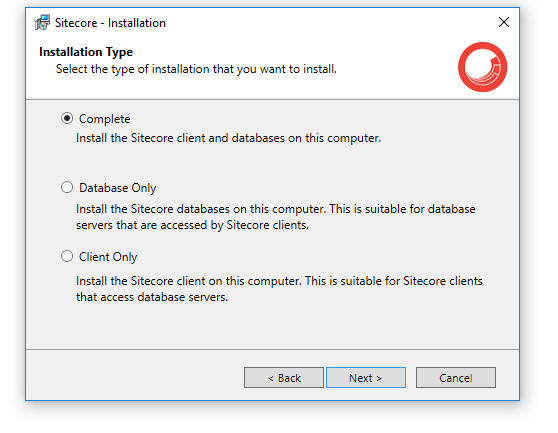
Installation Scenarios – recommended minimum
Server for CMS
DB server
Content Delivery server

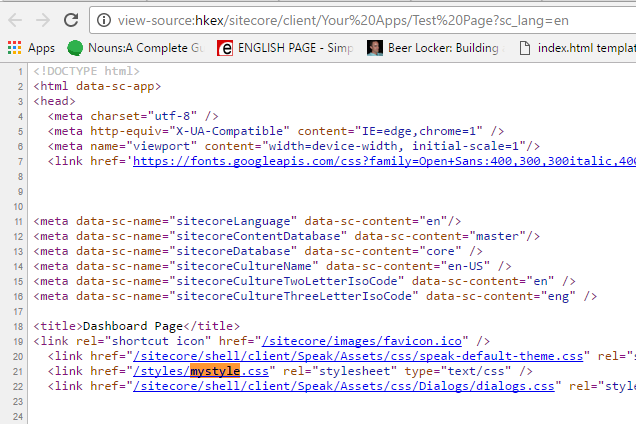
When a request comes in, Sitecor maps URL to an item in the content tree, and dynamically assembles presentation

3 db that are installed by default: Web, Master, and Core

Foundation Features – content versioning, multi language, device

What is the name of the digital marketing management part of the Experience Platform that collects and aggregates contact information?
xDB

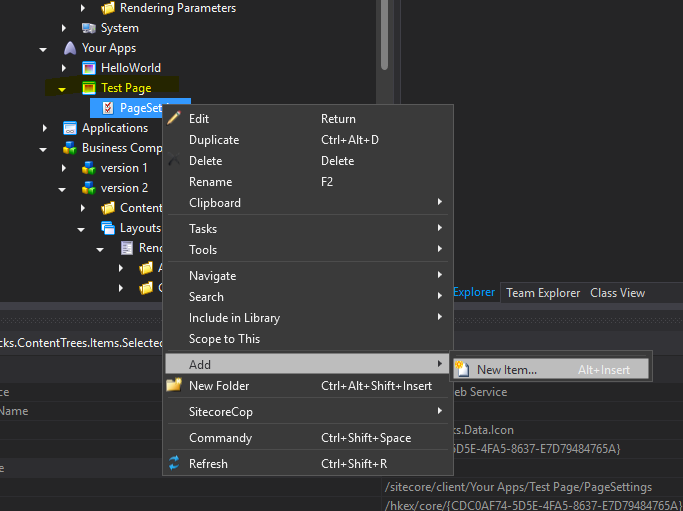
Creating Data Templates

– item is unit of data in SiteCore
– has fields organized into field sections. Field section mean group of fields

Data templates – needed to create item
– fundamental building block in Sitecore
– define a type of item
– determine what field sections, field types, and field names compose an item
– field types determine the editor control used in the tools. i.e Image, Rich Text…etc

Deciding the Data Structure Architecture

project should start with focus on designing your data structure (like sql schema)

Building Data Templates

Data Analysis, then build base Templates
Other templates inherit fields from base templates.

Content Base (base template for other templates)
– Heading
– Main Content
– Main Image

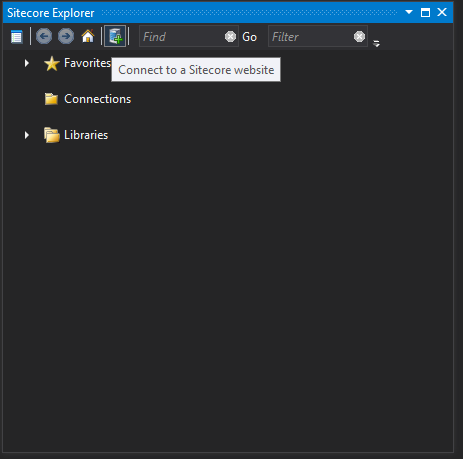
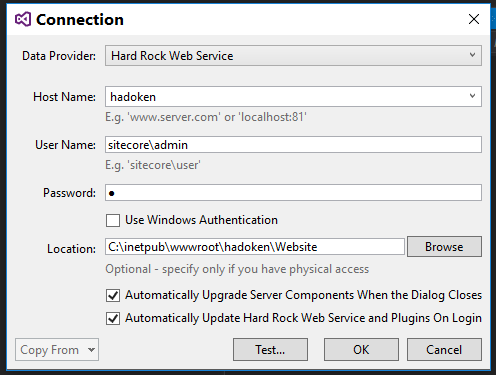
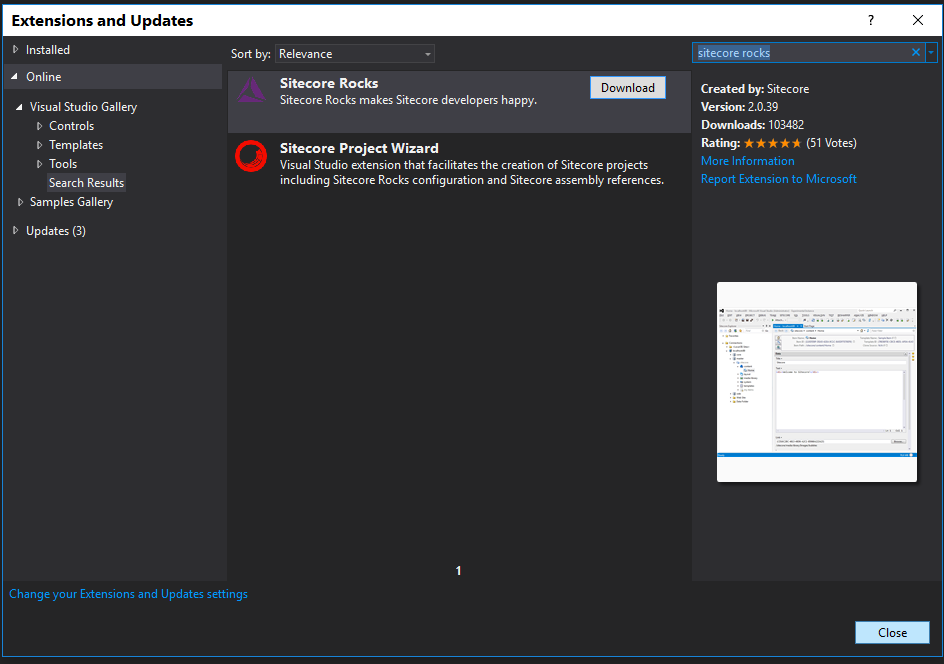
Easiest way is to use Sitecore Rocks.

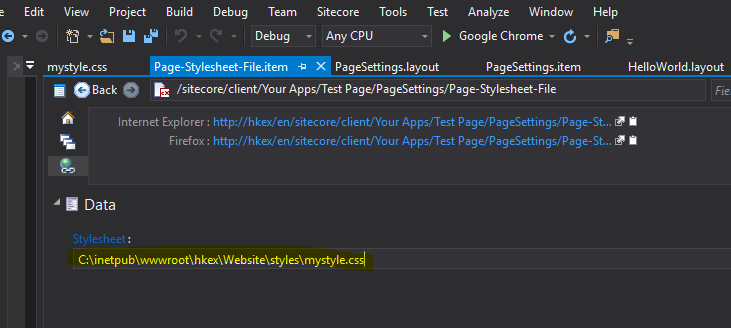
Field Source – extra configuration. Different meaning for different field types.

Image – field source means where you can select images
Rich Text –

An inherited field source, cannot be overridden

An item’s type is determined by “Data template” used to create it.

What is an item composed of?
Field sections and fields

What do you need to specify when creating a new field?
field name, and type.

Inherited Structure

Field names should be “unique”, but field sections with the same name will “merge”.

System define fields by ID. but you only see the name. So try to have unique field names.
So in your derived template, make sure you don’t have the same field name.

However, if your section name is same, its okay, because the parent template and the derived template’s section will merge.

iN WHICH SCENARIO WOULD U use data template inheritance?
When fields are repeated in multiple data templates?

Why is it important to think of your data template creation and inheritance structure from the beginning?
Refactoring template inheritance may cause data loss.

By default, all data templates eventually inherit from which sitecore data template?

standard template.

What happens if the same field name is used in 2 separate inherited data templates?

fields do not merge
both fields will appear (with different ID, but same string)

Standard Values allow you to define defaults

Standard Values Item – Manually create

Child item of the data template
Includes the data template fields and all inherited fields
Always named __Standard Values

Standard Values and Inheritance

Tokens

Tokens are replaced the moment an item is created.

$name, $id, $time, $parented
you can add your own tokens programmatically

i.e:

Heading:
$name

Item is created
Item Name: Holiday

Heading:
“Holiday”

Describe the standard values item:

always named __Standard Values
child item of owning data template
is a special instance of an item – contains all inherited fields

What type of settings can be applied to standard values?
default field values, default insert options, default presentation, default Workflow

What are two types of default field values?

dynamic ( uses tokens ) and static.

How do tokens work?
Tokens are replaced when an item is created. For example, there are tokens for the name of the item or the ID of the parent item.

Name 3 tokens:

$name, $date, $id $parentID

What are Insert Options

Authors require a list of allowed item types (data templates)
Developers and admins are less restricted

Insert Options…
Define allowed child items
Allow authors to build multiple levels of content in the tree
Reduce risk of human error
Usually defined on standard Values
Can be overridden on an item

Insert Options

List of data templates that can be created/inserted under a specific item.

Where should Insert Options be configured?

On the data template’s standard values which can be overridden at item level.

Standard Values – is a child item of a data template and is the mechanism for defaults when items are created.
Field – single line text, rich text, image, general link…etc. type determines the interface that the author sees for editing that field.

Data template vs Standard Values

Data Template – field sections, fields, template icon, base template inheritance

Standard Values – default field values, default insert options….

Data Templates – inheritance, icon,
Data Template Standard Values – Default Values, Insert Options, Tokens

Presentation details?

Configuration that determines what an item looks like when requested by the browser

Break designs into units of reusable functionality.

Creating a Layout

One Layout for all items in our site

A Layout is a canvas or the ‘scaffolding’ for a site.
The training site BasicSitecore defines a single shared Layout for all items within the site.

Assign Layout on standard values (consider setting Layouts on base templates)

A layout is
an .aspx file on the file system
a corresponding Layout definition item in the tree
Linked by the Path field

Note: the item and the file can be referred to as a “layout”

Assigning a Layout
Items must have a Layout to be viewed as web pages

Items must have a Layout to be viewed as web pages
Layouts are part of an item’s presentation details
Recommended practice – assign layouts to the data template’s standard values
An item can have one layout per device ( mobile, print, rss )

Layout – .aspx file

Layout definition item connected to a layout file?
Path field on the layout definition item points to the location of the .aspx file

What is a Component?

Sublayout – (sitecore’s wrapper for a Web User Control)
XSLT Rendering
Sitecore Web Control

All components consists of…

Definition item in Sitecore:

/sitecore/Layout/Sublayouts
/sitecore/Layout/Renderings

File on the file system:

.ascx(Sublayout)
.xslt (XSLT rendering)

Linked by a Path field on definition item

A Sitecore Sublayout is:

– most commonly used component in a web forms implementation
– .ascx file on the file system