Category Archives: Uncategorized

DNY Node API (6 – Users)

dnyNodeAPI-Users source

First we sign in. Make sure you select post.
Use signin as url. Make sure you have the Body tab selected.
Then select radio button raw, and JSON application/json at the pull down.

Put the body below, where you specify the email and password using json:

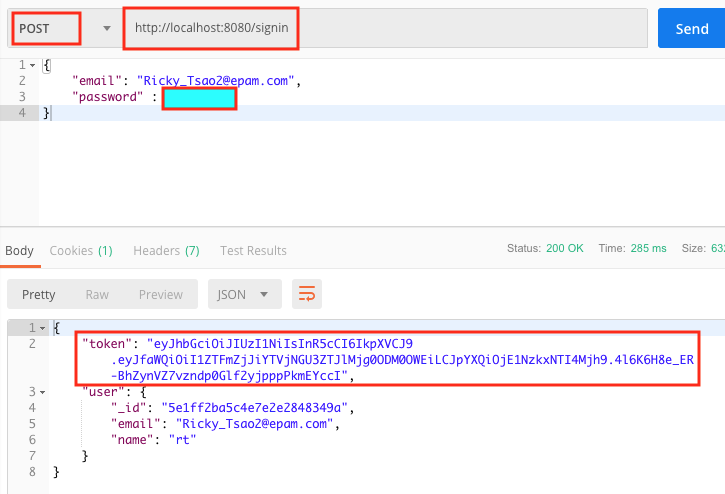
Then press send. If the user exists, you’ll get a result back with a token property. Copy the value of the token.

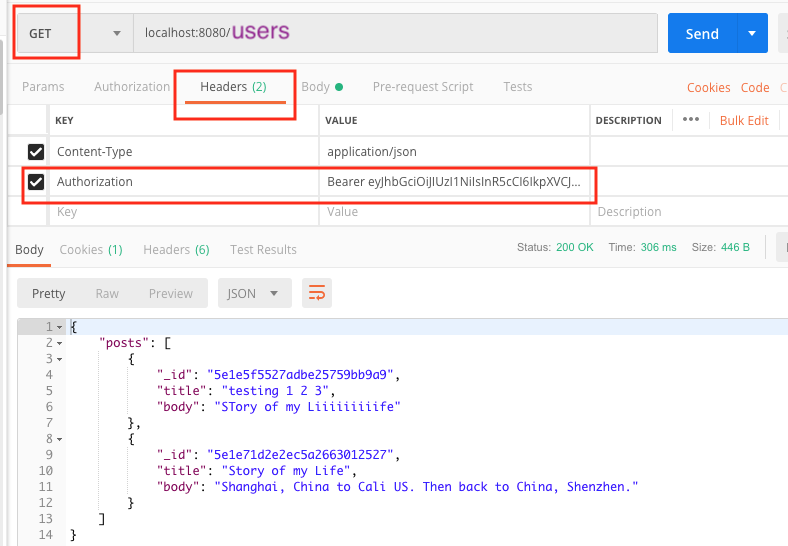
Select Headers tab. Make sure there is a key Authorization. For the value type in “Bearer “, with a space behind it, then paste the token. Then change the url to /users so that we can get a list of all users.

You’ll see a lot of find the user that matches the user you’ve just authenticated and copy the id. Paste the id behind localhost:8080/user/{id}, then change the http verb to PUT. In the Body, make sure you specify the JSON key/value of whatever you want to change. So if you want to change the name property to something just go:

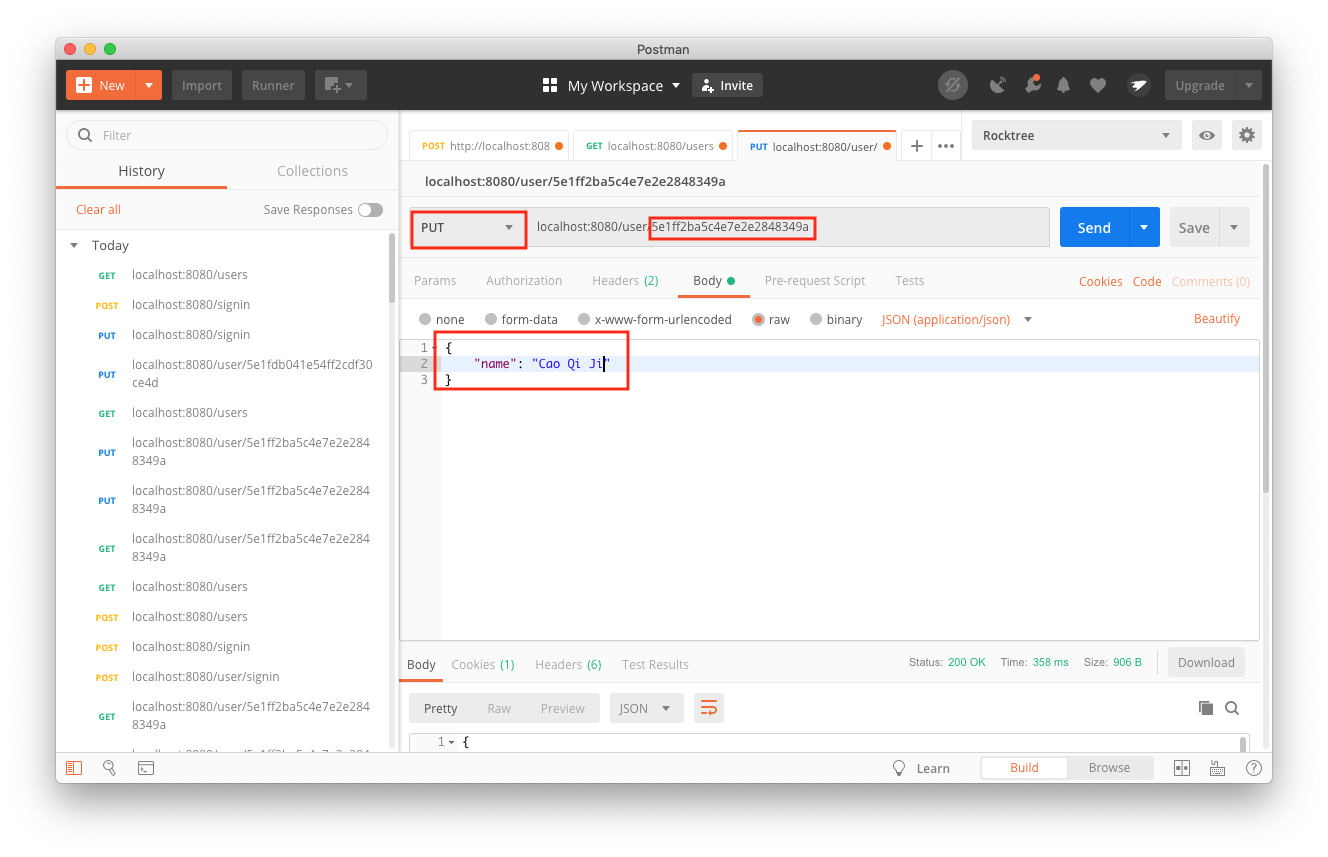
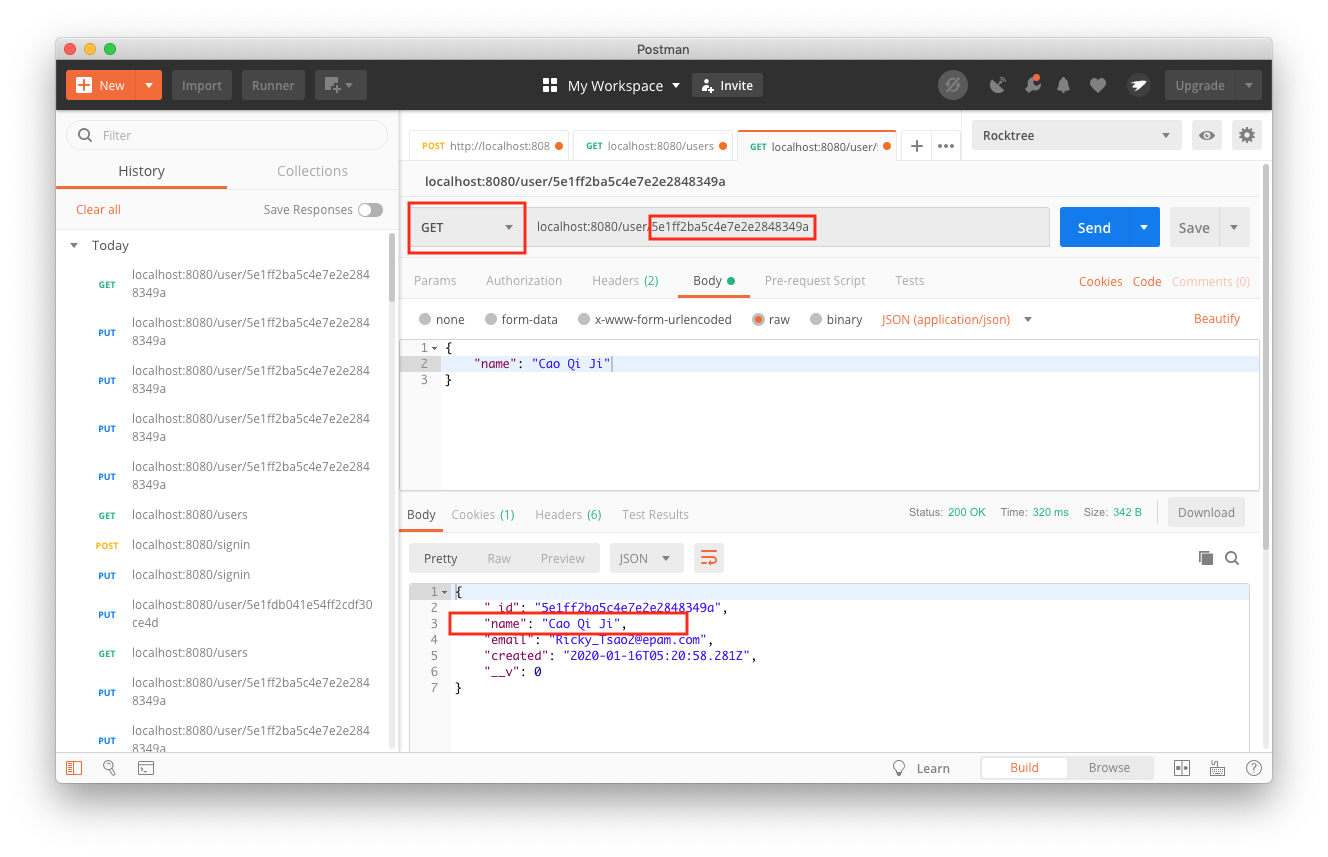
Let’s double check to make sure your update took place. Make sure you select ‘Get’, use the ID of the user that you’ve authenticated, and run it. You’ll see that the authenticated user’s name have been updated.

DNY Node API (3 – validator)

down dnyNodeAPI-validator

install the package:
npm i express-validator

In package.json, change to 5.3.1

re-install everything:
npm install

create validator folder. Then create index.js file:

Forkify Web app (part 5 – Displaying the recipe view)

forkify-part5 source

install npm modules: npm install
run web app: open command line and type ‘npm run start’

We implement our files according to MVC paradigm:

We first create a recipe view file

src/js/views/recipeViews.js

We use fractional module to calculate integer display of fractions: npm install fractional –save

This is so that we can apply the effects to ingredient.count and ingredient.unit

renderRecipe is used in our controller (index.js) to display html when we click on an item. We use the html from the template, and then add data to it via the recipe object.

As you can see, when we fetched data for the recipe successfully, we then render the recipe.
src/js/index.js

src/js/models/Recipes.js

Forkify Web app (part 2 – fetching data and presenting it)

forkify-part2 download

The url to fetch data is https://forkify-api.herokuapp.com/api

We get GET data like so:
https://forkify-api.herokuapp.com/api/search?q=pizza
https://forkify-api.herokuapp.com/api//get?rId=47746

src/js/models/Search.js

We use Axios library for data fetching:

1) We await the Promise object to be done
2) then we extract the status to make sure its all OK
3) we finally log the result

The default http grammar is GET. axios(…) automatically use this if we only give it an url.

We will be using this Search’s getResults in the view. However, we need to set up utility functionality first.

src/js/views/base.js

This is just a way to get the DOM element of a certain class or id. Typically, we use document.querySelector, and then we store it in a literal object like so:

Once we get the DOM element, we can use textContent, innerText, innerHTML to get the content.

src/js/views/searchView.js

The whole point to this searchView is to create a renderResults function that our controller can use.
We implement a renderResults function that outputs HTML for rending the content. We render the content. It takes in an recipe object and then uses the object’s properties along with the HTML. We also shorten the incoming titles to the length we want by using reduce.

Other purpose is to clear textfields and such:

– clearResults
– clearInputs

We first import the base. Then we simply access value, or innerHTML, according to what we want. From there we can clear certain HTML controls.

component prop ‘key’

https://medium.com/@albertogasparin/forcing-state-reset-on-a-react-component-by-using-the-key-prop-14b36cd7448e

it helps React identifying a component but it also can be used to tell React that the component identity has changed, forcing a full re-instantiation of that component

On change, React will discard the current component instance and create a new one with a fresh state.

Permutation in code

A permutation is an act of arranging members in a set in all possible orders.

For example, for 1 2 3:

1 2 3
1 3 2
2 1 3
2 3 1
3 1 2
3 2 1

A total of 6 combinations.

Mathmetically it is denoted as 3! = 3 * 2 * 1.

This means that if I had 3 things, There are 3 of 2 of 1 way in which I can arrange them.

Mathematically we’d say 3! = 3 * 2 * 1 = 6 permutations
4! = 4 * 3 * 2 * 1 = 24 permutations
…etc

In order to put this permutation into code, each column is a for-loop.
When we process the next recursion, we subtract 1 from n, we call recursion( n – 1 ).

In other words:

At n = 3, which is column 3, there are three ticks. We loop through each of them.

For each index of the 3rd column, we call recursion with n – 1.

This brings us to n = 2, at the 2nd column. There are two ticks. We loop through them and call recursion with n – 1 for each of those ticks.

The recursion brings us to n = 1, at column 1. We display whatever is there.

If you were to run through it all, you’d log 6 times.

Hence what we’re essentially doing is 3 * 2 * 1 = 6 combination.