ref – https://www.youtube.com/watch?v=PhggNGsSQyg
https://coursetro.com/posts/code/148/RxJS-Observables-Tutorial—Creating-&-Subscribing-to-Observables
ref – https://www.youtube.com/watch?v=PhggNGsSQyg
https://coursetro.com/posts/code/148/RxJS-Observables-Tutorial—Creating-&-Subscribing-to-Observables
nestjs, vuejs, mongodb
https://scotch.io/tutorials/building-a-modern-app-using-nestjs-mongodb-and-vuejs
rxjs
https://rxjs.dev/
ref – https://www.atlassian.com/git/tutorials/merging-vs-rebasing
say you’re on your main branch. and you do a git pull for the latest.
However, you’ve been working your feature branch.
By using rebase, you can cut your branch from its root, and snap it onto main’s HEAD:
git checkout feature
git rebase main
git commit -m “git rebase” .
git pull
git push

simply fix the merge conflicts, then:
|
1 2 |
git add . git rebase --continue |
eventually you’ll be done with the rebase, then do
git status
to see what the next steps are.
Belongs-To-Many associations are used to connect sources with multiple targets. Furthermore the targets can also have connections to multiple sources.
|
1 2 |
Project.belongsToMany(User, {through: 'UserProject'}); User.belongsToMany(Project, {through: 'UserProject'}); |
This will create a new model called UserProject with the equivalent foreign keys projectId and userId. Whether the attributes are camelcase or not depends on the two models joined by the table (in this case User and Project).
Defining through is required. Sequelize would previously attempt to autogenerate names but that would not always lead to the most logical setups.
This will add methods
to Project, and
to User
Similarly,
|
1 2 3 4 |
models.User.belongsToMany(models.Building, { through: models.UserBuilding, as: 'buildings' }) |
This will add methods
to User
like this:
|
1 2 3 4 |
const user = await ctx.models.User.findByPk(userId, {transaction}) await user.addBuilding(building, { transaction }) await user.getBuildings() await user.setBuildings(params.buildings, {transaction}) |
There are also remove version of the generated methods like so:
|
1 |
await user.removeBuilding(building, { transaction }) |
ref –
https://developer.mozilla.org/en-US/docs/Web/JavaScript/Reference/Operators/Spread_syntax
|
1 |
let objClone = { ...obj }; // pass all key:value pairs from an object |
|
1 |
[...iterableObj, '4', 'five', 6]; // combine two arrays by inserting all elements from iterableOb |
|
1 2 |
let parts = ['shoulders', 'knees']; let lyrics = ['head', ...parts, 'and', 'toes']; |
[“head”, “shoulders”, “knees”, “and”, “toes”]
|
1 2 3 4 5 6 7 8 |
let obj1 = { foo: 'bar', x: 42 }; let obj2 = { foo: 'baz', y: 13 }; let clonedObj = { ...obj1 }; // Object { foo: "bar", x: 42 } let mergedObj = { ...obj1, ...obj2 }; // Object { foo: "baz", x: 42, y: 13 } |
push the changes on top of the stash
git stash
or
git stash push -m “my_stash”
apply the latest stash
git stash apply
To create a new branch and switch to it at the same time, you can run the git checkout command with the -b switch:
$ git checkout -b iss53
Switched to a new branch “iss53”
ref –
First we create a native iOS project.
click on tab option iOS, select App.
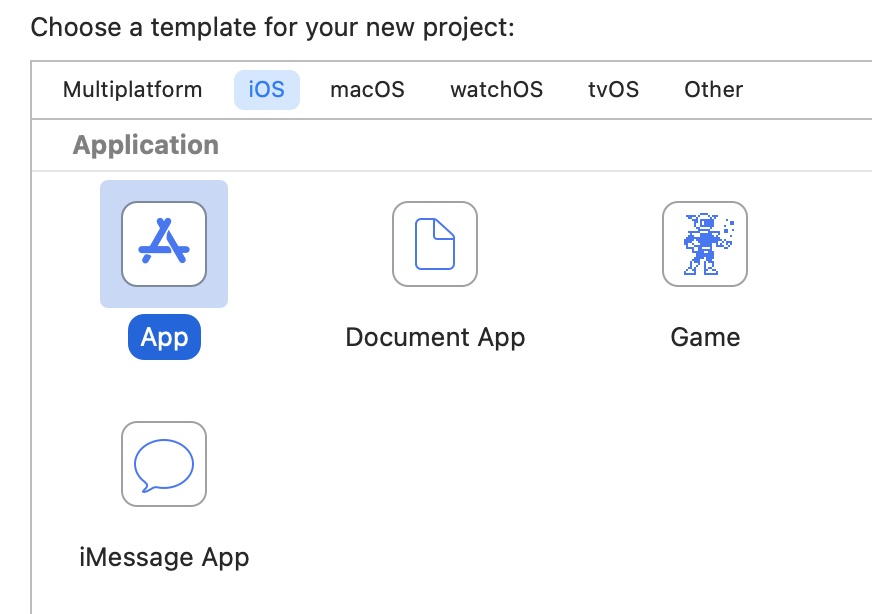
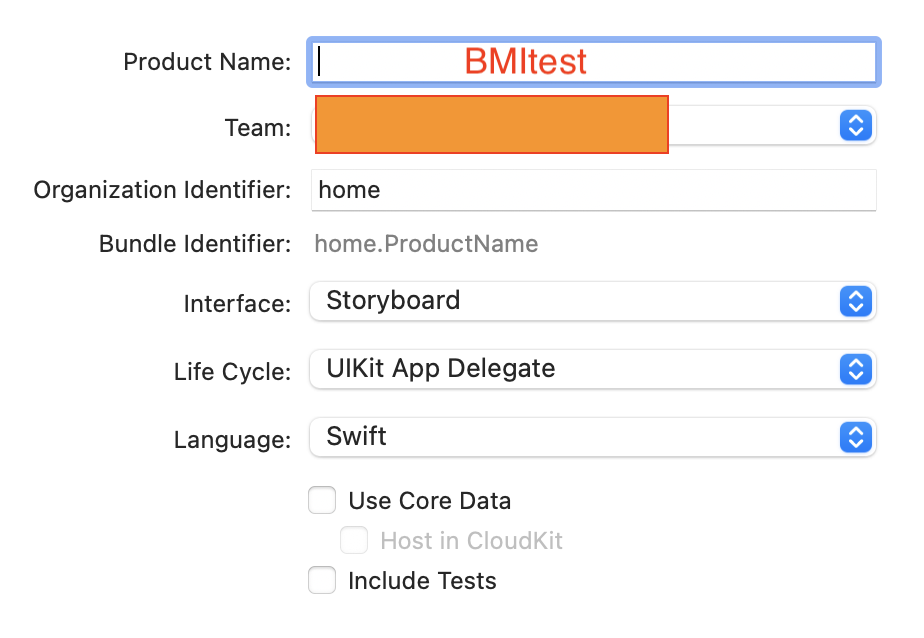
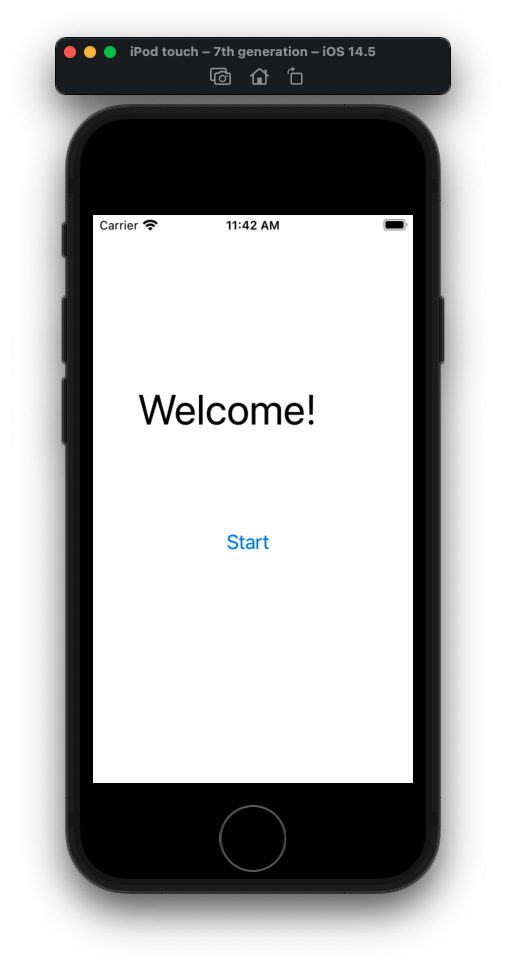
Create a text Welcome, and a button.
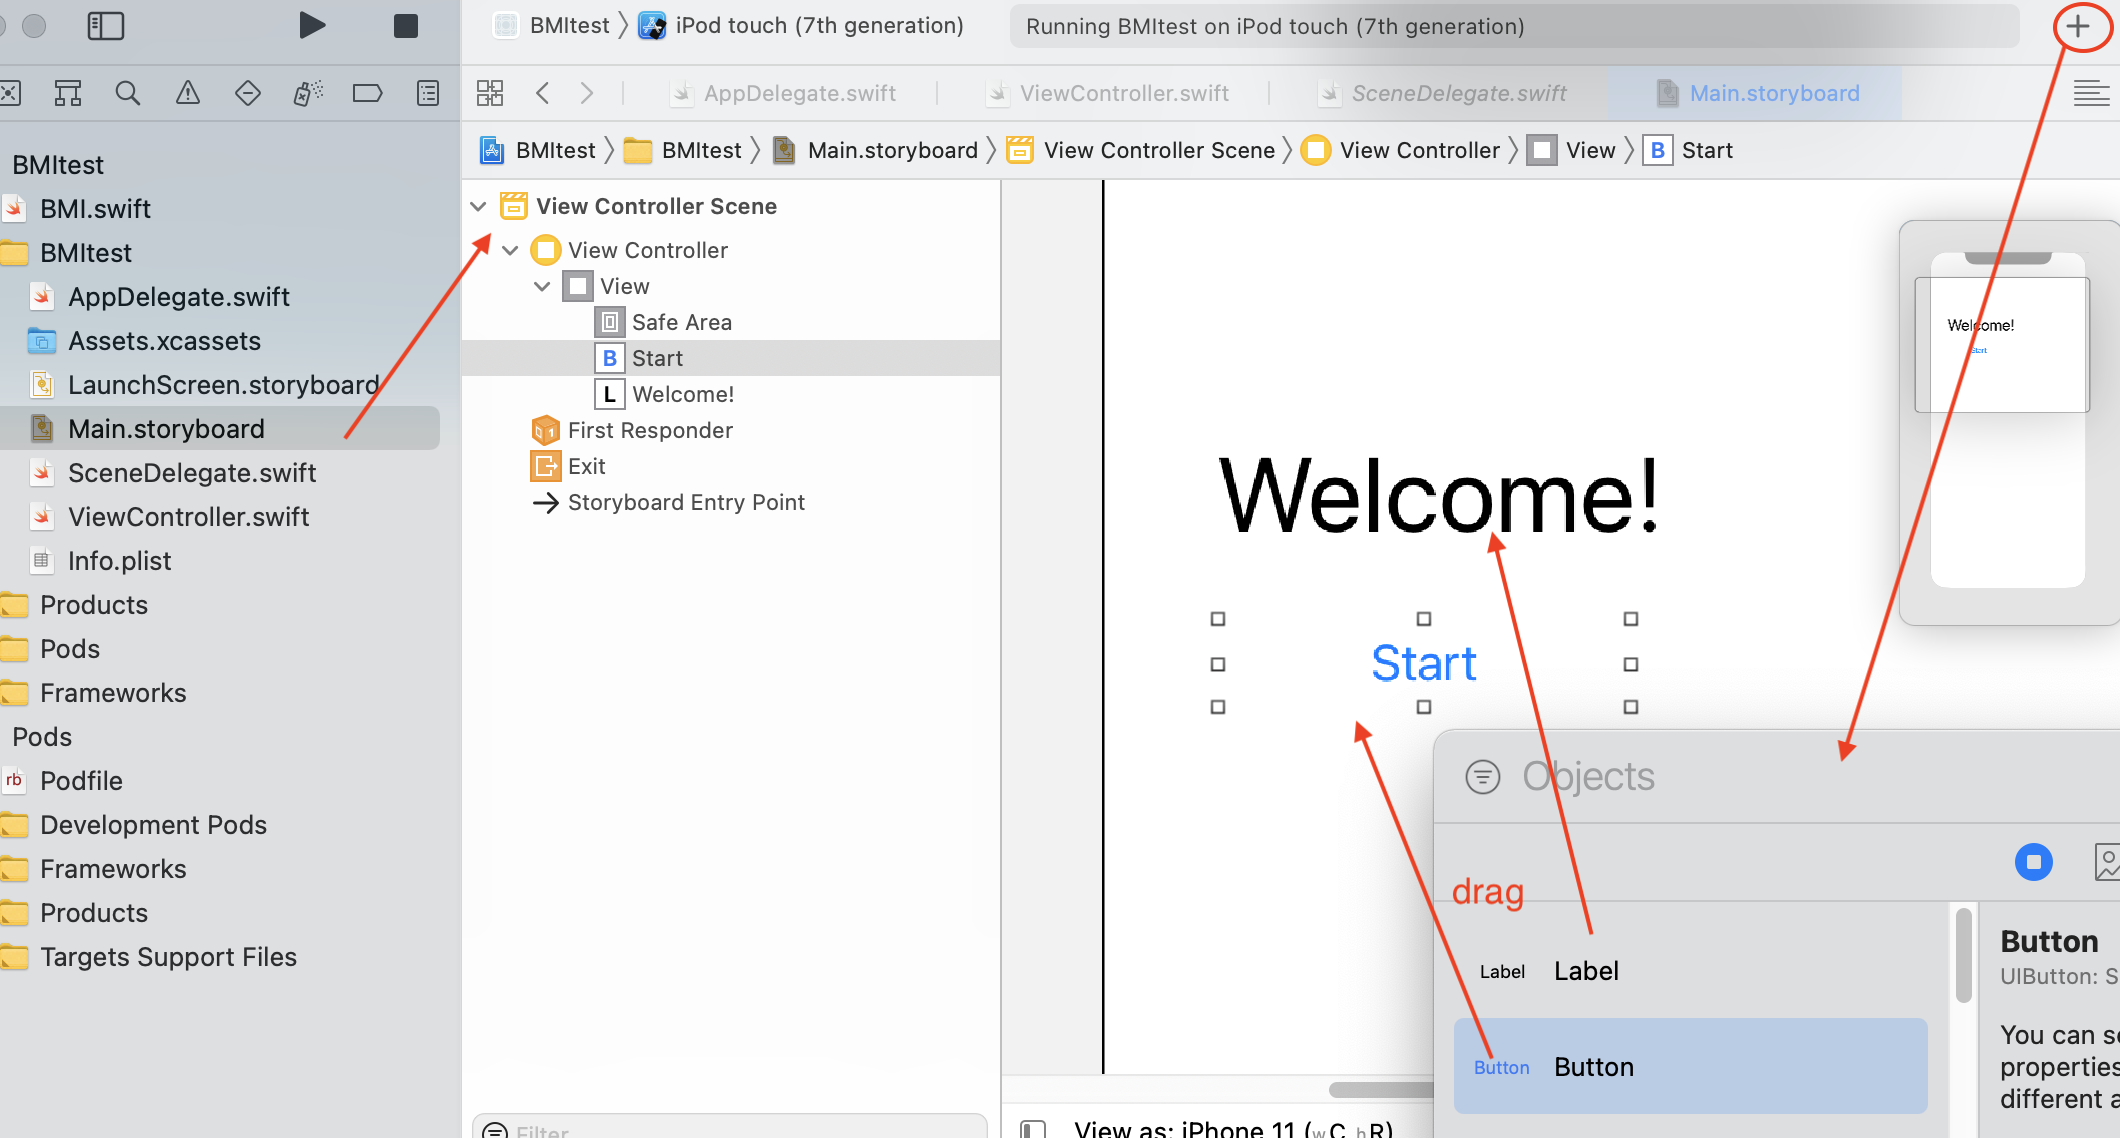
Right click on the start button and let’s implement a handler of the event touch up inside
Open up a side window and make sure ViewController.swift is open next to our Main.storyboard. Your can literally drag the event handler into ViewController.swiftConnect a button handler like so:

ViewController.swift
|
1 2 3 4 5 6 7 8 9 |
@IBAction func calculateBtn(_ sender: Any) { let flutterEngine = (UIApplication.shared.delegate as! AppDelegate).flutterEngine let flutterViewController = FlutterViewController(engine: flutterEngine, nibName: nil, bundle: nil) flutterViewController.modalPresentationStyle = .overFullScreen present(flutterViewController, animated: false, completion: nil) } |
(your directory)/BMI_Calculator/BMItest/AppDelegate.swift
|
1 2 3 4 5 6 7 8 9 10 11 12 13 14 15 |
import UIKit import Flutter import FlutterPluginRegistrant @UIApplicationMain class AppDelegate: FlutterAppDelegate { lazy var flutterEngine = FlutterEngine(name: "my flutter engine") override func application(_ application: UIApplication, didFinishLaunchingWithOptions launchOptions: [UIApplication.LaunchOptionsKey: Any]?) -> Bool { flutterEngine.run(); GeneratedPluginRegistrant.register(with: self.flutterEngine); return super.application(application, didFinishLaunchingWithOptions: launchOptions); } } |
Save the project.
create folder bmi_calculator in a directory
copy and paste the iOS native project we just created into this folder.
Make sure you are in bmi_calculator folder.
|
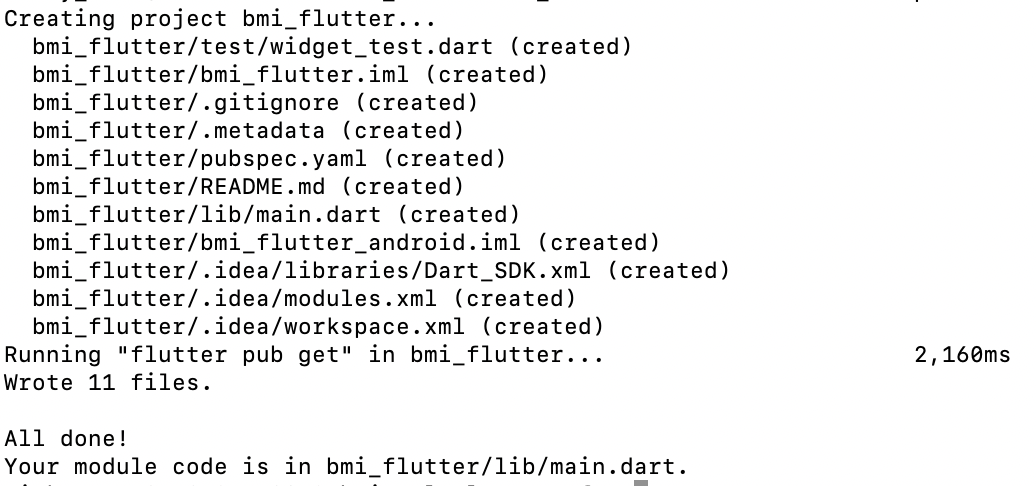
1 |
flutter create --template module bmi_flutter |
Let’s make sure our app runs correctly by double clicking on .xcodeproj file and running the app.
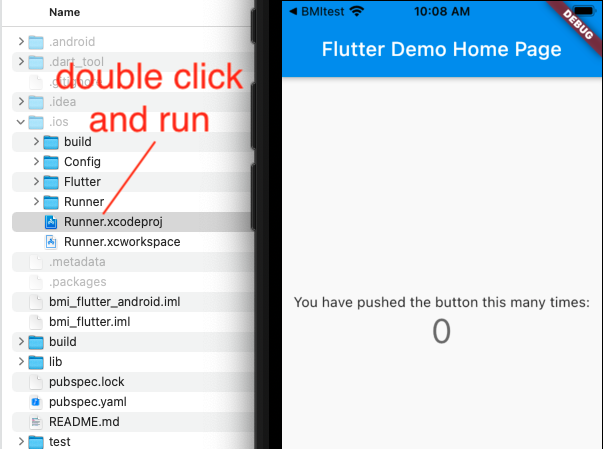
This screen will later be used and appear in our iOS project.
cd into the previous created BMI_calculator and create a pod file:
pod init
You’ll have a directory like so:
bmi_calculator/
├── bmi_flutter/
│ └── .ios/
│ └── Flutter/
│ └── podhelper.rb
└── BMI Calculator/
└── Podfile
In the Podfile:
|
1 2 3 4 5 6 7 8 9 10 11 12 13 14 |
# Uncomment the next line to define a global platform for your project # platform :ios, '9.0' flutter_application_path = '../bmi_flutter' load File.join(flutter_application_path, '.ios', 'Flutter', 'podhelper.rb') target 'BMItest' do install_all_flutter_pods(flutter_application_path) # Comment the next line if you don't want to use dynamic frameworks use_frameworks! # Pods for BMItest end |
flutter_application_path = ‘../bmi_flutter’
This is so that in your xcode project, it will go one directory up into bmi_calculator, and look for bmi_flutter.
load File.join(flutter_application_path, ‘.ios’, ‘Flutter’, ‘podhelper.rb’)
Once it finds bmi_flutter folder, it will go into folder .ios, folder Flutter, and finally access the podhelper.rb file
Now run pod install in BMI_calculator.
Make sure you see the log messages where it says installing flutter…etc:
Downloading dependencies
Installing Flutter (1.0.0)
Installing FlutterPluginRegistrant (0.0.1)
Installing my_flutter (0.0.1)
Now, reopen the project using the file with .xcworkspace extension.
You’ll see some warnings about converting it to Swift. Go ahead and do that.
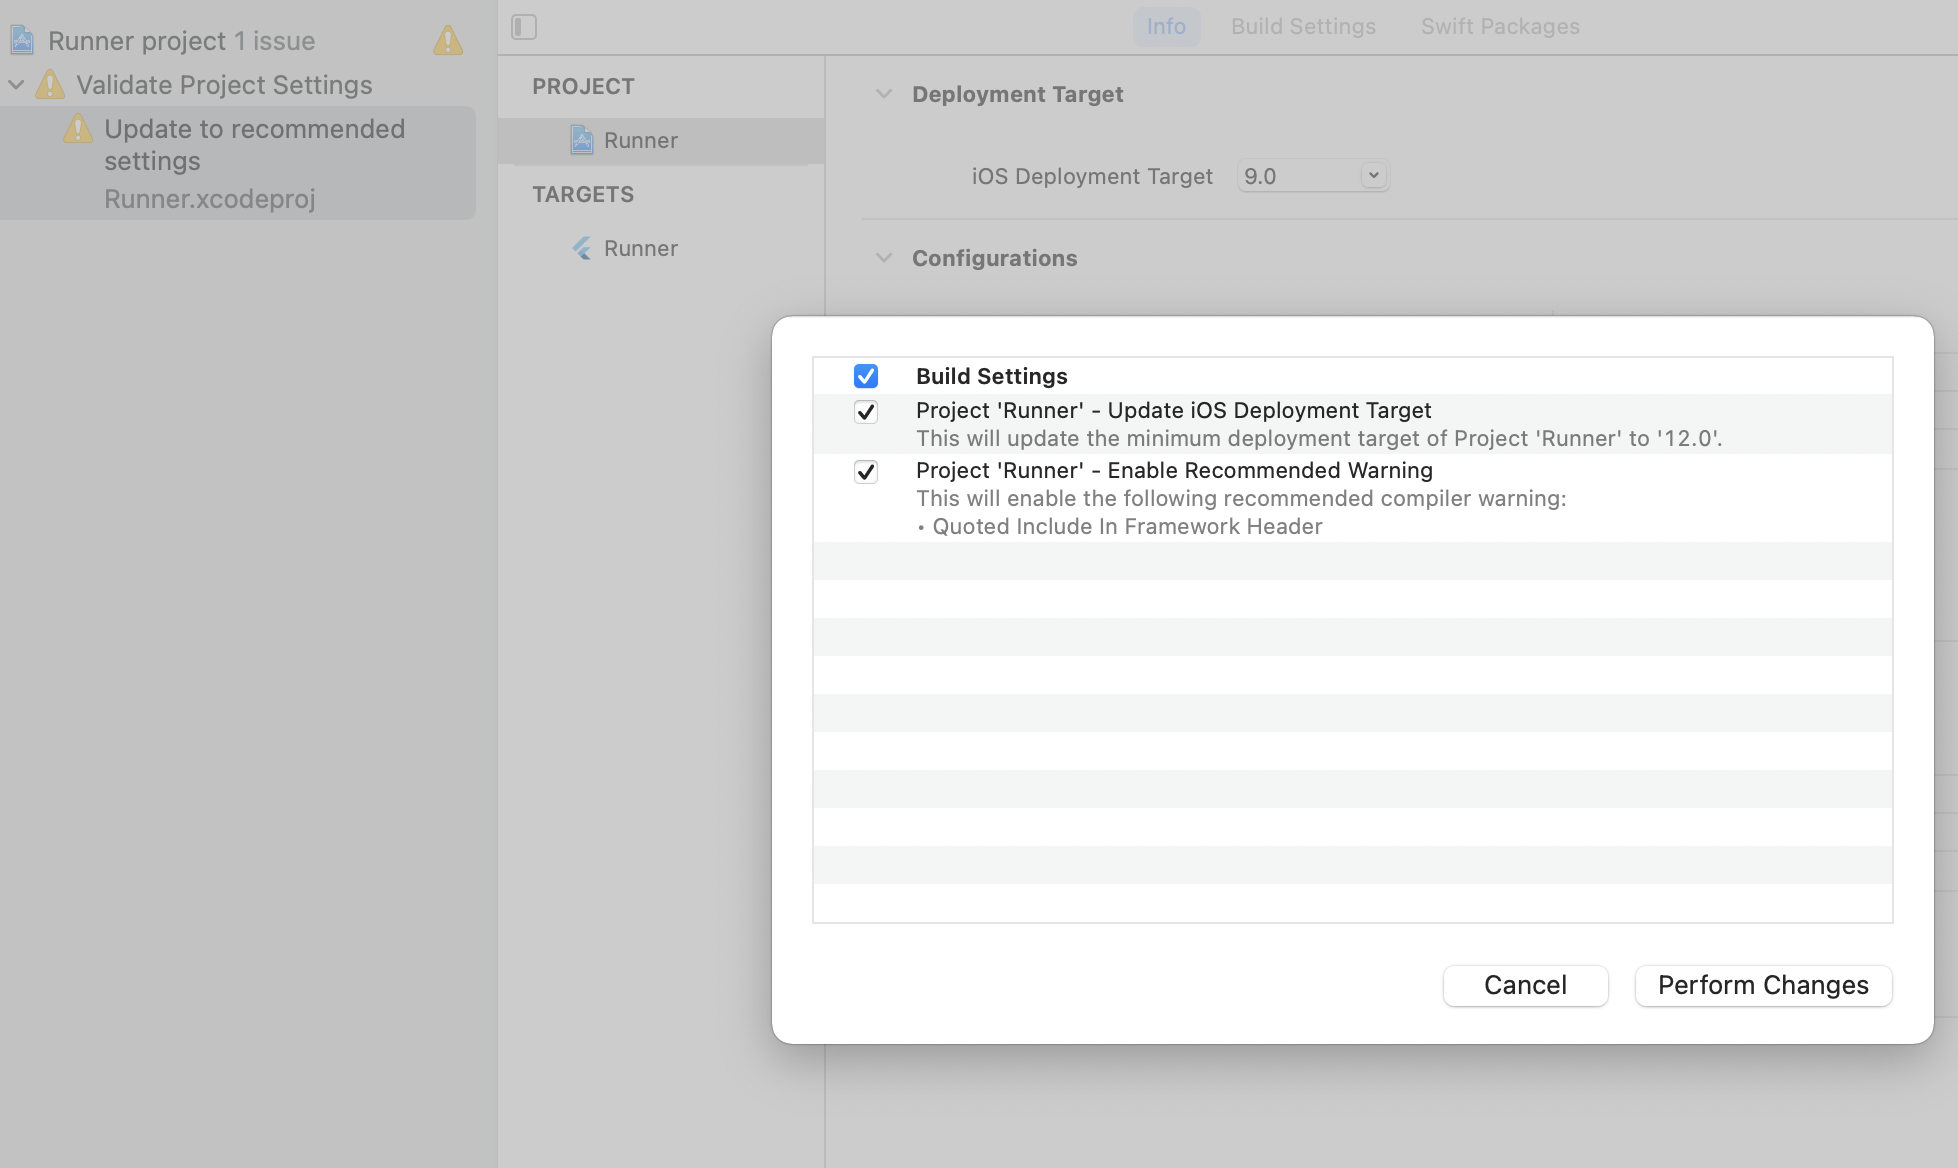
Also be sure that your provisioning is correct.
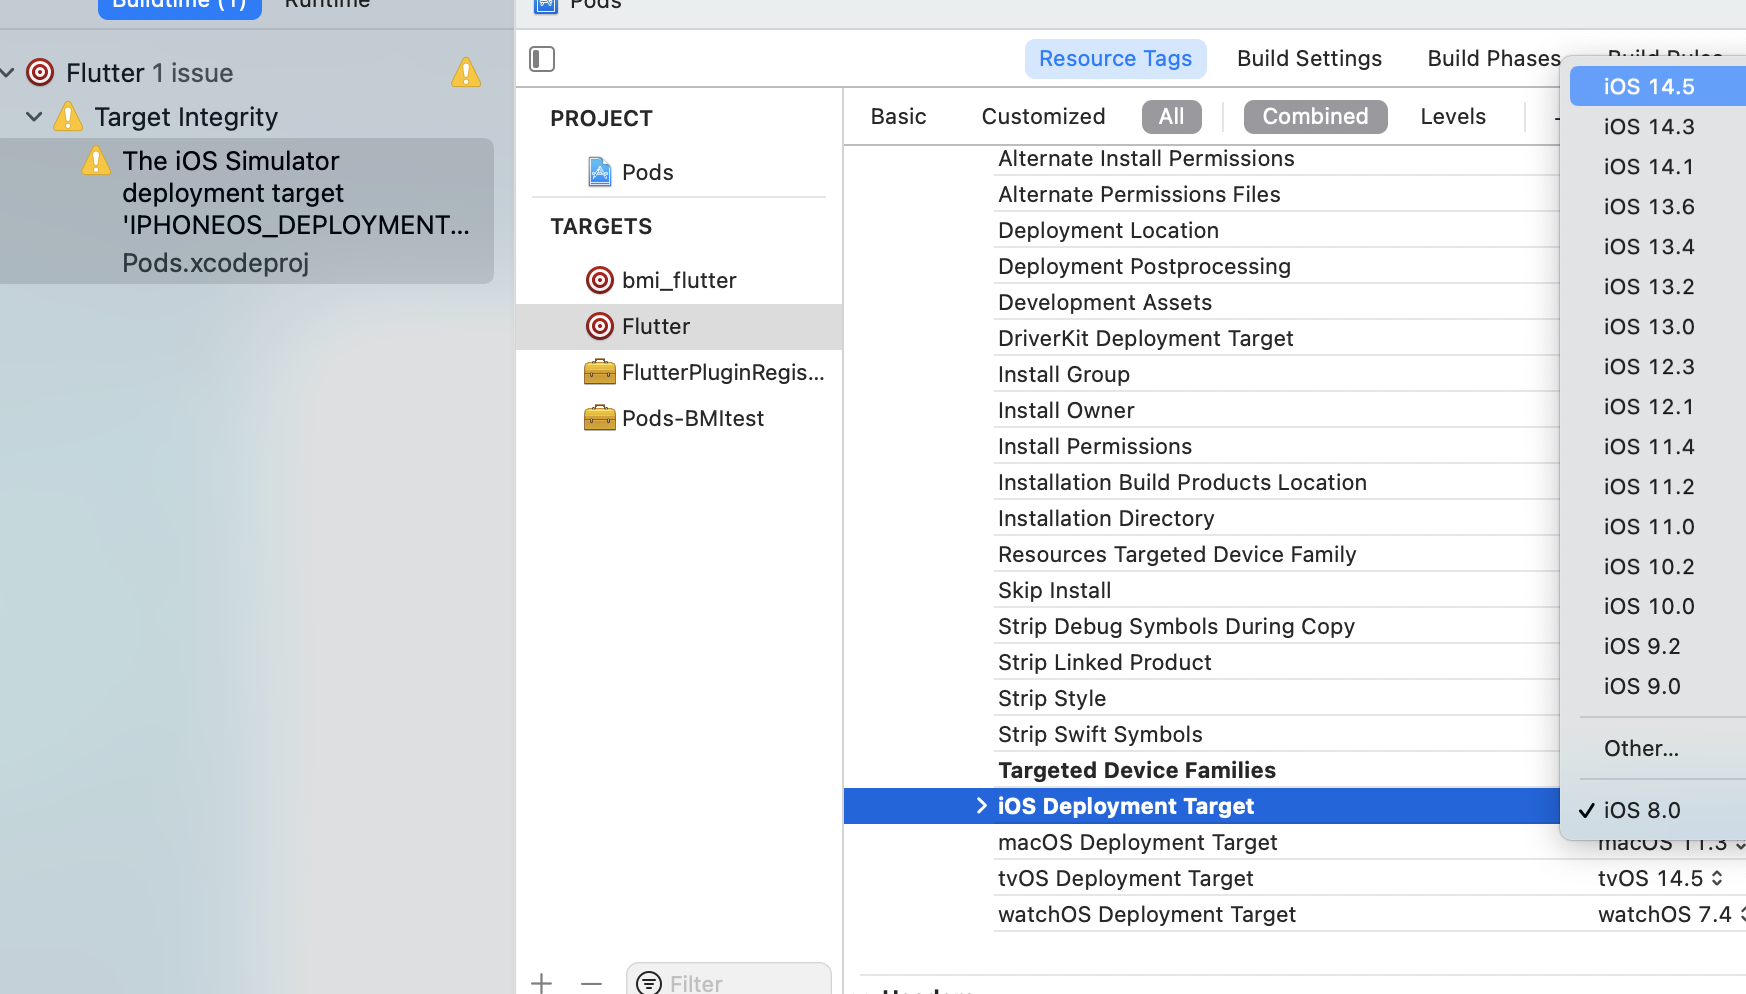
Now make sure you press run and it should work on your simulator.
Now, when you click on the start button, you’ll see Flutter demo app come up.
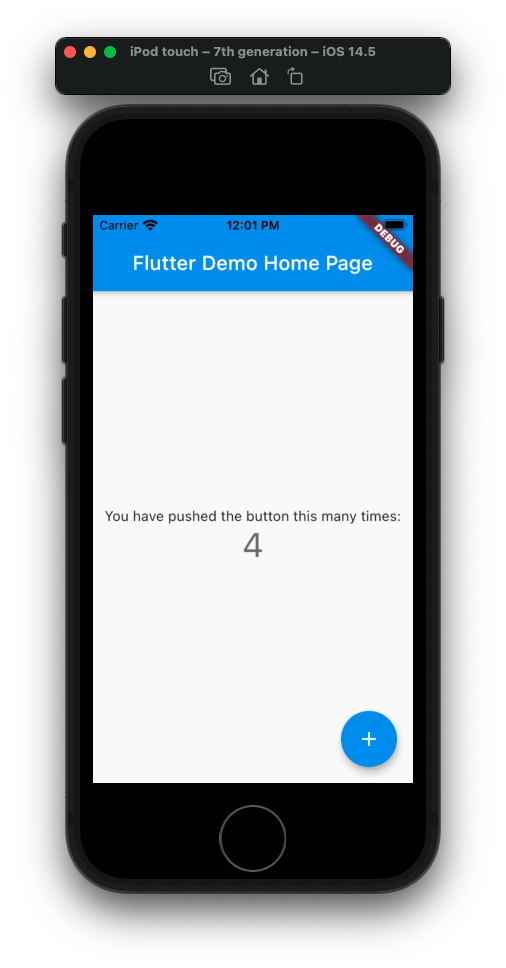
If you get errors that says can’t find Flutter for your header files, make sure you do a clean build and then build in your xCode.
https://www.twilio.com/blog/2017/08/http-requests-in-node-js.html
|
1 2 3 4 5 6 7 8 9 10 11 12 13 14 15 16 17 18 |
const https = require('https'); https.get('https://api.nasa.gov/planetary/apod?api_key=DEMO_KEY', (resp) => { let data = ''; // A chunk of data has been received. resp.on('data', (chunk) => { data += chunk; }); // The whole response has been received. Print out the result. resp.on('end', () => { console.log(JSON.parse(data).explanation); }); }).on("error", (err) => { console.log("Error: " + err.message); }); |