Category Archives: Uncategorized

Polling with Node JS and Vue

ref – https://www.technouz.com/4879/long-polling-explained-with-an-example/
https://github.com/zaarheed/long-polling-example

Short Polling

Polling at intervals

  1. The client sends a request
  2. Server returns a response of either data or no data
  3. Client receives the response. If there is data, does something with it
  4. Client sleeps for an interval and repeats

The connection here is not continuous. It is at an interval. i.e 5 seconds.
This means we get a result every 5 seconds. However, our result can be ~5 seconds old.

For example,

seconds:
0, client makes a request,
0.1, server responds with empty response
0.2, client receives empty response, data is updated on the server side

1,
2,
3,
4,

5, client makes a request
5.1, server responds with updated data
5.2, client receives the updated data.

Thus, this data is ~5 seconds old.

Making repeated requests like this wastes resources, as each:

– new incoming connection must be established
– the HTTP headers must be parsed
– a query for new data must be performed
– and a response (usually with no new data to offer) must be generated and delivered.

The connection must then be closed, and any resources cleaned up.
This process gets repeated and it very inefficient.

Long Polling

Long polling is a technique where the server elects to hold a client’s connection open for as long as possible, delivering a response only after data becomes available for a timeout threshold has been reached.

With long polling it is almost immediately.
During long polling, we send a request. The request will take say..100 milliseconds. The server gets the data and sends it back, which say takes 200 milliseconds. So it is 300 milliseconds.

This is almost ‘real time’-ish.

On the client side, only a single request to the server needs to be managed. When the response is received, the client can initiate a new request, repeating this process as many times as necessary.

The only difference to basic polling is that a client performing basic polling may deliberately leave small time window between each request so as to reduce its load on the server. And it may responds to timeouts.

With long polling, the client may be configured to allow for a longer timeout period (via Keep-Alive header) while listening for a response.

Note the timeout seconds is ten seconds. This means, ten seconds is the maximum time the server has to return something.

The server

Client

Using TypeScript with React JS

ref – https://blog.logrocket.com/using-typescript-with-react-tutorial-examples/

download demo

The key to TypeScript is that it’s a statically typed script. Programming languages can either be statically or dynamically typed; the difference is when type checking occurs. Static languages variables are type-checked.

TypeScript allows you to define complex type definitions in the form of interfaces. This is helpful when you have a complex type that you want to use in your application, such as an object which contains other properties. This results in strict checks, which reduces the number of possible bugs you might have produced without it.

JSX stands for JavaScript XM. It allows us to write HTML code directly in our React project. Using TypeScript with React provides better IntelliSense, code completion for JSX.
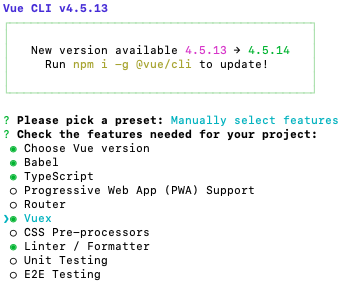
Basic Setup


mkdir typescript-react-project
cd typescript-react-project
npm init

How does TypeScript compile React code?

TypeScript always checks for a file called tsconfig.json in the project root folder for instructions. When it finds the tsconfig.json file, it loads the settings defined in the file and uses them to build the project.

A TypeScript project is compiled in one of the following ways:

By invoking tsc with no input files, in which case the compiler searches for the tsconfig.json file starting in the current directory and continuing up the parent directory chain.

By invoking tsc with no input files and a –project (or just -p) command line option that specifies the path of a directory containing a tsconfig.json file, or a path to a valid .json file containing the configurations

touch tsconfig.json

The JSON configuration above defines two major sections: the compilerOptions and exclude parameters.

In the compilerOptions, a target of es6 has been set. This means the JavaScript engine target will be set to es6 but will compile down to es5 as the target.

Notice that there is also a key called jsx, which is set to react. This tells TypeScript to compile JSX files as React files. This is similar to running tsc  –jsx react.

The outDir is the output folder after compilation.

In the exclude block, node_modules is being defined for it. TypeScript will not scan the node_modules folder for any TypeScript file while compiling.

If you’re familiar with TypeScript and its configuration, you might wonder why the include section is missing. This is because we’re going to configure webpack to handle taking in the entry files, passing them to TypeScript for compilation, and returning a bundled JavaScript script for browsers.

Configuring Webpack

npm install webpack webpack-cli ts-loader

What is ts-loader?

As its name implies, ts-loader is the TypeScript loader for webpack. Put simply, it’s a plugin that helps webpack work well with TypeScript.

Just like TypeScript, webpack also checks for a file called webpack.config.js for configuration.

If it doesn’t already exist, create a new file called webpack.config.js and add the following code:

Adding npm scripts

In your package.json, edit your scripts attribute like so:

After all the configurations were done above, it’s time to create the main entry point file of our project, but before we do that, we need to install types definition for libraries installed.


npm install react react-dom @types/react @types/react-dom

Next, create a new folder src and then a file in the src folder called index.tsx in the root and add the following code:

Above is a simple React setup, except that it is using TypeScript. To compile the file, run the command below in your terminal:

npm run magic

A build folder with a file named bundle.js has been created.

Does this newly created bundle work as expected? Create a new index.html file that references the new build to find out:

double click on index.html and you should see a simple page appear.

Creating React components in TypeScript

src/component/FirstComponent.tsx
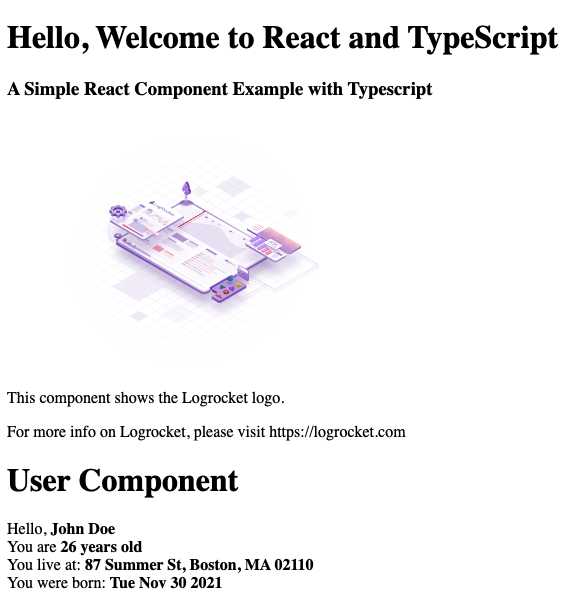
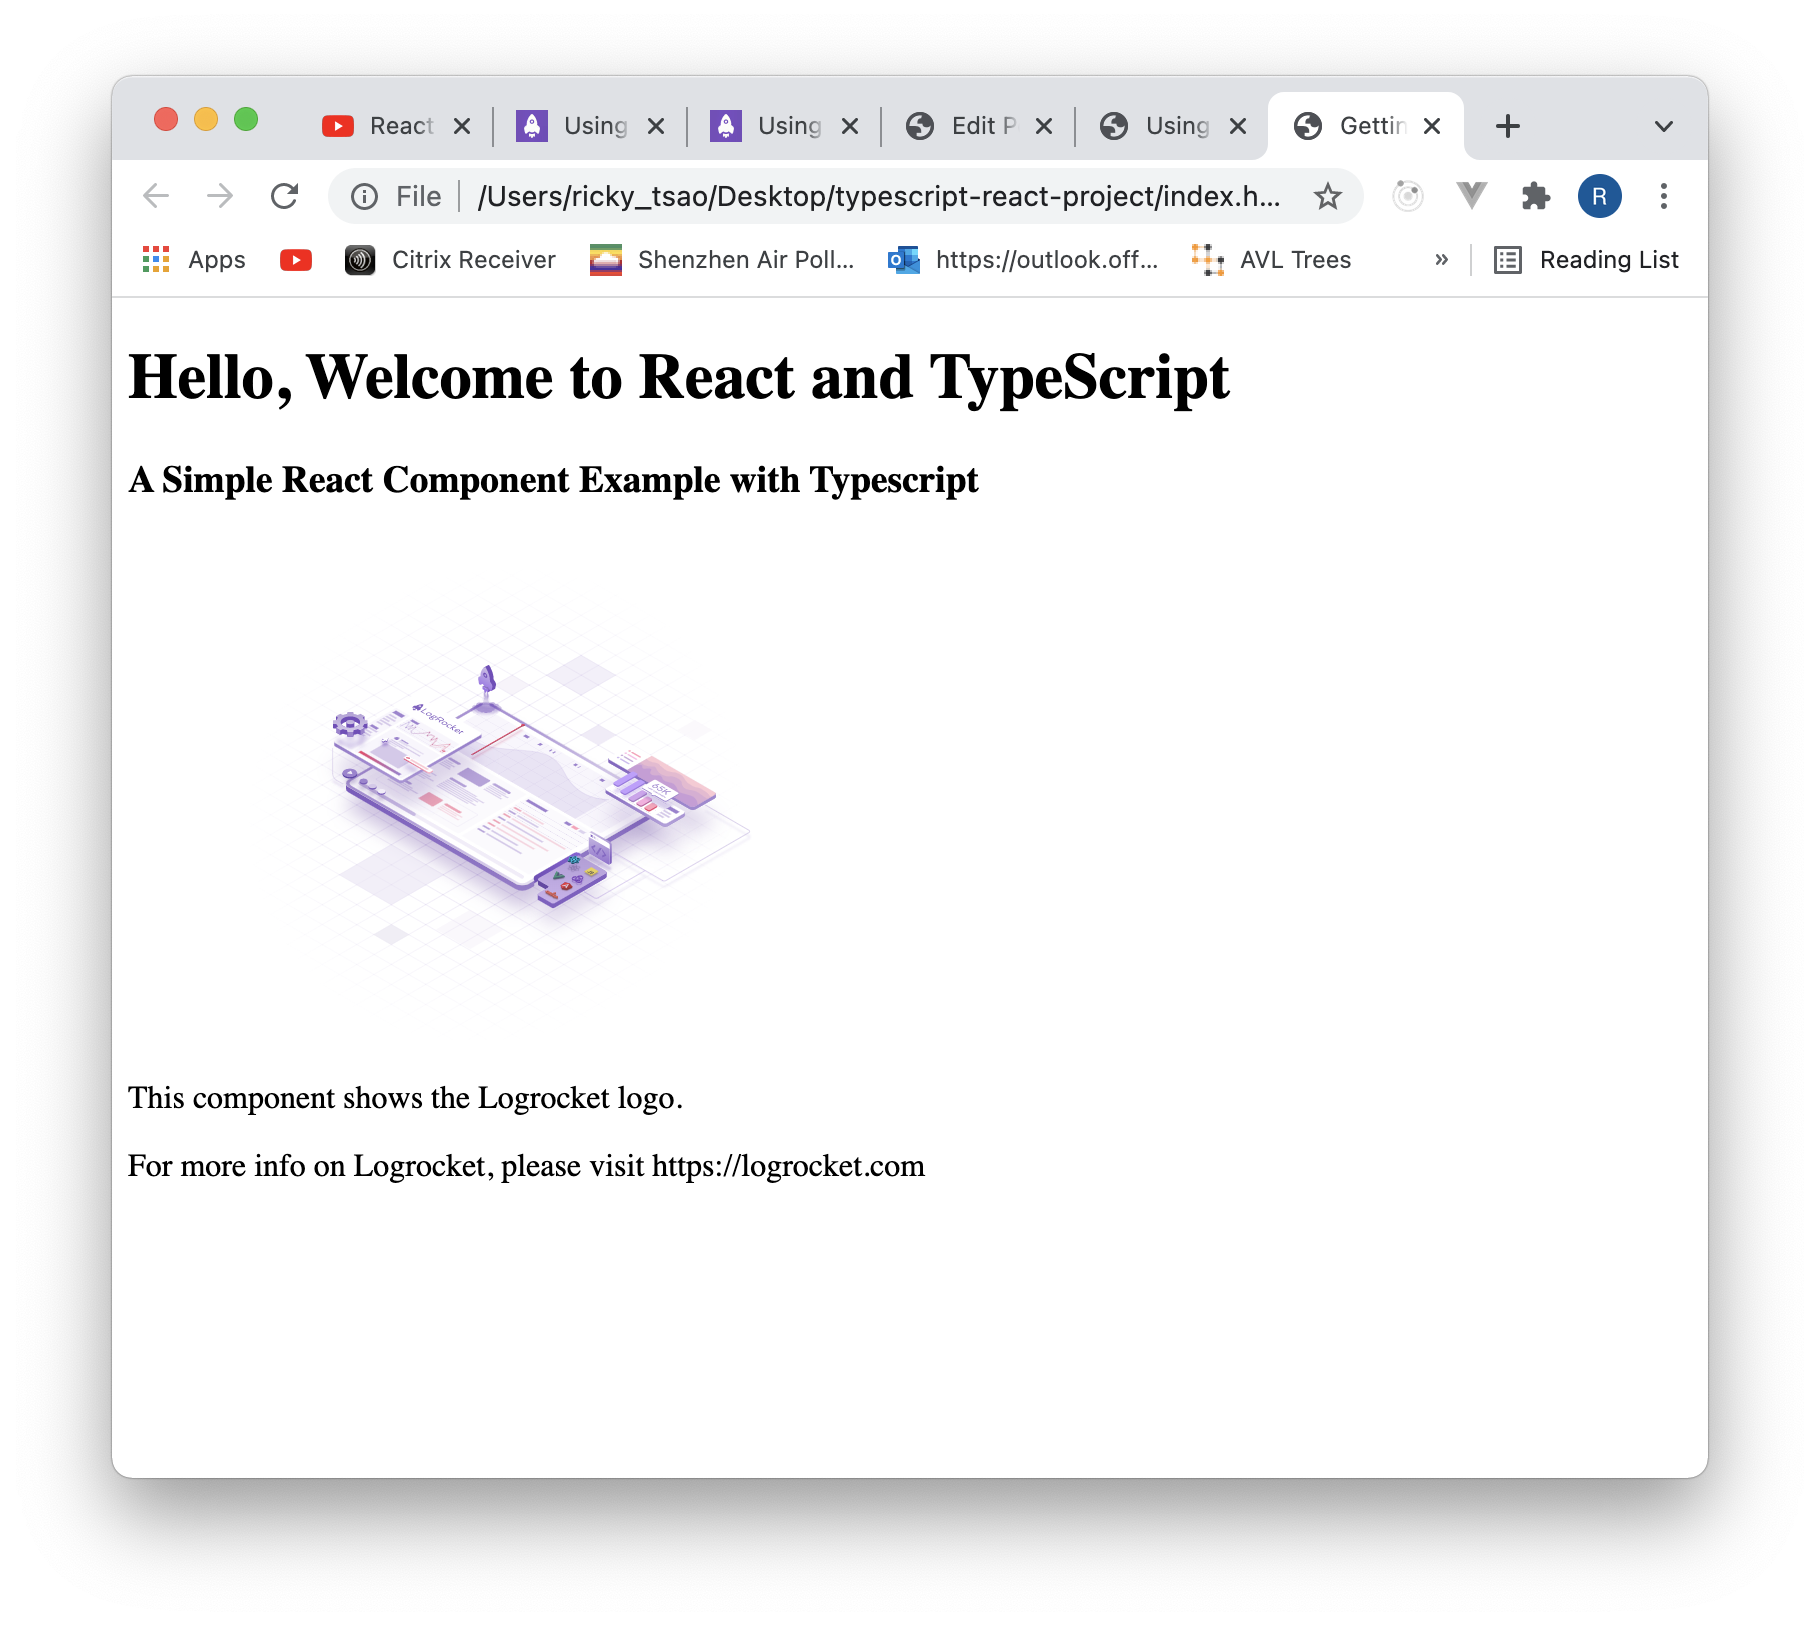
To make this new component accessible to React, we need to import and use the component in the base index.tsx file. Update the index.tsx file to:

npm run magic

output:

Using TypeScript interfaces with React components

One of TypeScript’s core principles is that type checking focuses on the shape that values have. This is sometimes called “duck typing” or “structural subtyping.”

In TypeScript, interfaces fill the role of naming these types and are a powerful way of defining contracts within your code and contracts with code outside of your project.

To see how you can use interfaces with your react components, create a file src/UserInterface.ts in the src folder and add the following code:

The code block above defines a simple User interface, which will be passed in as props into a new component. Because this interface is strongly typed, notice you cannot pass an integer for the name key, as the value is a string.

Create a new component in our components folder called UserComponent.tsx and add the following code:

The UserInterface created earlier on has been imported and passed down as the props of the UserComponent. In the constructor, we checked that the props passed are of the UserInterface type and in the render function, the data will be displayed on our page.

After creating our UserComponent, update the index.tsx file:

npm run magic

Using Typescript with React Native

ref – https://blog.logrocket.com/using-typescript-with-react-native/

source download

Open up a terminal

npx react-native init TypeScriptTemplate –template react-native-template-typescr

Once we’ve finished creating the React Native typescript template project, let’s go ahead with running the project.

cd into the ios folder:

npm run ios

You’ll probably run into some issues.

TroubleShooting

First make sure you delete the pod.lock file, and pod folder. Then reinstall all the pod dependencies by going:

pod install

In /Users/{your name}/Desktop/{your project}/node_modules/react-native/scripts/generate-spec.sh

put this line at the top:

When I installed a new version of xCode, there were two installations. The default was still pointing to the old version, so I followed the direction on the terminal and removed the old one.

Last but not least, make sure you restart your computer so the changes to the environment can take place.

Starting Development

Create a folder structure like src/components in the root directory and create a Header.tsx component in the components folder.

src/components/Header.tsx

React.FC means functional component. We want to create a React Functional Component that takes in a parameter with type Props

Props is defined as an interface with the property title and of type string

This means that in our App.tsc, we will be using it like so:

Thus, we can use instantiate this functional component and use typescript to type the prop property. In other words, because we’re using TypeScript, we are now able to define what our component should take in, how it should take it in, and how many to take.

The benefit of doing it this way is that we get better IntelliSense and some validation when we’ll use the component ( e.g. when the title is not passed to the component, there’s going to be an instant error).

Thus, if we were to use Header without putting any prop named title in, we’d get some errors:

If you tried to assign a number (or any other data type that isn’t a string) you’ll get a different error. This is TypeScript trying to help you catch bugs before they happen.

Adding Items

Create a new component, AddItem.tsx, to your /src/components folder and paste the code below:

Getting and Setting our Array of Items

First, we want to create interface IItem. It is a type that says I must have two strings, one called item, the other called quantity.

We will declare an array of this IItem, where each element contains an item string and quantity string.

Next we see type Props.

It has shoppingList, which gets an array [] of type IItem, as mentioned previously. This automatically GETS the data.

In order to SET an array of IItem, React guarantees that dispatch function identity is stable and won’t change on re-renders.

https://reactjs.org/docs/hooks-faq.html#how-to-avoid-passing-callbacks-down

1) Thus, we must declare type React.Dispatch because this property will be called inside of a button handler. It calls a set function, which is defined by React.SetStateAction.

2) Thus, we want to declare SetStateAction:

It’s an action state that initializes to iItem [].

How The iItem array is used

create functional component called AddItem
type Props says the first is called ‘shoppingList’, that
must be of type IItem array which Sets
the second is called ‘shoppingList’, which is an array of iItem

Hence, in App.tsx, it must be used this way:

How AddItem Functional Component is created

String is used in our JSX to contain the item name from a textfield. Once it has been entered, and add btn as pressed, our addItem function will see if this item exists.

Same for quantity.

simple styles for the textfields

Showing the Items

Create another file in /src/components named Item.tsx.

We import type from iItem in AddItem file. That way we force the parameter type to be of type iItem. After all, we are displaying the item and need the data passed in to conform to that type.

and the CSS theme for it

The app should look like this:

MySQL in Docker

ref – https://www.factorialcomplexity.com/blog/how-to-run-mysql-on-macos-with-docker

You’ll see your local-mysql app entry appear on your docker.

Click on the CLI button

Now you’re in.

type:
show databases

to see existing database

Computed Values in Vue

Todo methods vs computed properties

3. Computed Property
Computed properties are also functions but they are different from methods. They run only once per page load, and it will re-run only if any of it’s dependent variable changes.

The difference is that computed properties are cached based on their reactive dependencies. A computed property will only re-evaluate when some of its reactive dependencies have changed. This means as long as message has not changed, multiple access to the reversedMessage computed property will immediately return the previously computed result without having to run the function again.

In comparison, a method invocation will always run the function whenever a re-render happens.

Vue 3 with Typescript – 6 to 7

Computed Values

ref – https://www.youtube.com/watch?v=TwN36HU-NQM
hyrule-jobs-6 demo

JobsList.vue

Now that w have orderedJobs data structure, let’s use it in our template:

Hylia Font & Final Styles

ref – https://www.youtube.com/watch?v=6n4myAZwdxg

Vue 3 with Typescript – 4 to 5

download demo

Types and Props

inside components folder, create JobsList.vue

type “ts” + click on bottom option

There should be boilerplate code. Let’s add template and style.

Now we declare and import in file App.vue.
then put it inside of components object to use it.

get rid of our placeholder template code and replace it with our component. The jobs data that we have in setup should now be passed inside the props as well:

Implementing JobList

We make an object for props property. Then declare jobs property. This property is the options of how jobs is declared. We say it is required, and of type Array.

In our template, we put the necessary html and a ul. For the li, we cycle through jobs using v-for. It needs a unique key prop. We have it in jobs data array as id.

JobsList.vue

If you were to run the site, you’ll see the list of titles.

Next we declare props for the component. If you were to use say Array for prop jobs, it doesn’t know what properties are available for each job because in props jobs declaration, we only declared it
as Array.

JobsList.vue

Hence, no code suggestions when you use it in template.

The solution is that we need to type our props better.

Using Vetur for template interpolation

JobsList.vue

Now, you’ll be able to see different options when you try to access properties of job object.
In settings, make sure Vetur > Experimental: Template Interpolation Service is checked

JobsList.vue

Functions

ref – https://www.youtube.com/watch?v=usSBsgWNUZk

We want jobs to be reordered by salary, title..etc.

add event handler to each of them.

create file types/OrderTerm.ts

first create this function

App.vue

First look at order reference. We pass it into JobList so that when a button is pressed, an event happens, and manipulates the order ref.
The change in order ref can be evaluated in JobList.

Since it has been set up in App.vue, we must implement this in JobList.vue

We declare order prop.

components/JobList.vue

in the template:

App.vue

Vue 3 with Typescript – 1 to 3

Part 1

ref – https://www.youtube.com/watch?v=JfI5PISLr9w

Why Use Typescript
– type errors are caught at compile time
– easier to read the code
– better debugging

vue create hyrule-jobs

Use space bar to select manually select features.

Want to use TypeScript
use 3.x
DO NOT want class style component syntax
DO want to use Babel
Pick linter: Basic
Lint on Save
In dedicated config files

cd hyrule-jobs

Code . to open it with Visual Studio Code

npm run serve

File layout

Open the src folder.
notice main.ts

It is a typescript file.

shims-vue.d.ts – tells typescript all about vue files so it can better understand single file components
don’t change any of it.

tsconfig.json – typescript compiler

Look at src/App.vue
script tag has lang attribute for ts. That’s because we’re using typescript inside of it.

Go into components, delete HelloWorld.vue

Go into assets, delete logo.png

In App.vue, remove all code in template tag. Leave a div with text ‘Link’ in it.
remove HelloWorld import
remove HelloWorld from components

remove styles from style tags.

App.vue

create assets > global.css

Register css in main.ts

npm run serve

You will see text.

Part 2

ref – https://www.youtube.com/watch?v=UDAVj_vlAr8

Declare own data ‘name’ and display it in our template:

App.vue

create methods to set name:

Test by running browser again.

Using Union Types

For data property, we must use type casting. If it was a single type, it gets inferred. But what if we want to use multiple type such as number OR string?

create changeAge method:

duplicate button, and change it for age. Use number 30 for the parameter. Can also use string “30” for the parameter.

Part 3

ref – https://www.youtube.com/watch?v=H-hXNym2CK8

https://stackoverflow.com/questions/61452458/ref-vs-reactive-in-vue-3

  • reactive() only takes objects, NOT JS primitives (String, Boolean, Number, BigInt, Symbol, null, undefined)
  • ref() is calling reactive() behind the scenes
  • Since reactive() works for objects and ref() calls reactive(), objects work for both BUT, ref() has a .value property for reassigning, reactive() does not have this and therefore CANNOT be reassigned

therefore…

Use ref() when..

  • it’s a primitive (for example ‘string’, true, 23, etc)
  • it’s an object you need to later reassign (like an array)

ref() is good for objects that need to be reassigned, like an array.

If we were to do the same with reactive, we’d have to reassign property posts

reactive() Use-Case
A good use-case for reactive() is a group of primitives that belong together:

the code above feels more logical than

Let’s try grouping name and age in an object and passing it to reactive. Notice that its more natural when we use the variable state? Even better if we change it to personState, because properties name and age group together better.

We then set properties like so:

using refs

Create custom type

create folder called types in src
in types folder, create jobs.ts

job.ts

use it inside App component

src/App.vue

Check the output