Tutorial material code
code source
Download the folder and go to HTTP-APP folder.
npm install
npm start
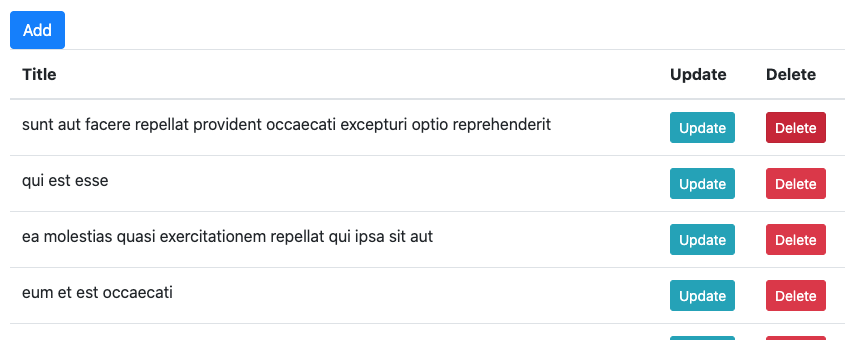
You’ll see the project’s basic UI.
Install Axios: npm install axios@0.18.1
Open a browser and enter http://jsonplaceholder.typicode.com/posts
You’ll see that it returns a bunch of test data. We’ll be using this in our app.
In our code, we’re going to use Axios to fetch data from this url. Axios returns a promise object. This promise object holds the
result of an async operation.
|
|
const promise = axios.get(apiEndpoint); |
When we log the promise object at that instnace, it will say pending, but it resolves when it succeeded, and fails when it rejects. A promise object has function then() which can get the results of this async operation, but this is the old (es5) way.
The modern es6 way is to use async/await. We put await in front of our async operation like so:
|
|
const response = await axios.get(apiEndpoint); |
Make sure you match it up with an async keyword in front of our function. Execution does not continue within the function until the response receives data. However, execution does asynchronously continue on to process other code outside of the function.
When data is received and the promise object resolves, execution continues from the await line. You can log the response object and see all the data. We then destructure and extract data we need from this response object.
|
|
const { data: posts} = response; |
Finally, we then set the data onto the state so the code can reflect the updated UI
App.js
|
|
async componentDidMount() { const promise = axios.get(apiEndpoint); console.log(promise); // Promise object, which resolves or rejects const response = await promise; // always make sure outer function has async keyword console.log(response); // the actual data object. const { data: posts} = response; this.setState({ posts }); } |
Adding Data
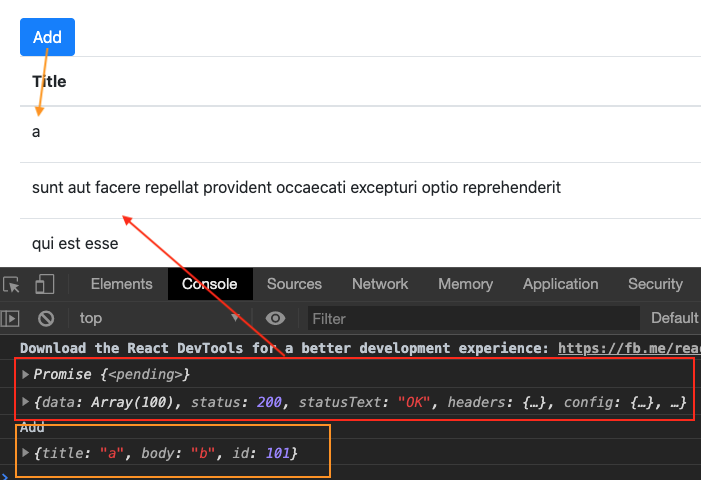
Now, using our previous knowledge, lets implement handle add. By analyzing the object from our previous get, we know that each object has properties title and body.
We first create a literal object with properties title and body.
|
|
const obj = { title: 'a', body: 'b' }; |
We then use axios’s post function. First parameter specifies the URL.
Second specifies the object we’re sending.
|
|
const { data: post } = await axios.post(apiEndpoint, obj); |
Finally, when it finishes posting the object to the server, it will return that object back to let us know it succeeded.
We should update our local UI by creating a new array with this updated post, and fill in the rest with this.state.posts.
Then set the array back to state.
1 2 3 4 5 6 7 8 9 10 11 12 13 14 15 16 17 |
handleAdd = async () => { console.log("Add"); const obj = { title: 'a', body: 'b' }; const { data: post } = await axios.post(apiEndpoint, obj); // newly created post console.log(post); // update to our local const posts = [post, ...this.state.posts]; this.setState({ posts }); }; |
So essentially, what’s happening is that we get all the data first. After some time, the Promise object resolves via await and returns us a response object with the data. We populate the basic UI with it.
We then add a post by clicking the ‘Add’ button. We write a handler for that button and use axios.post to tell the backend to add our data. Once the Promise object resolves via await, it returns the post we want to add.
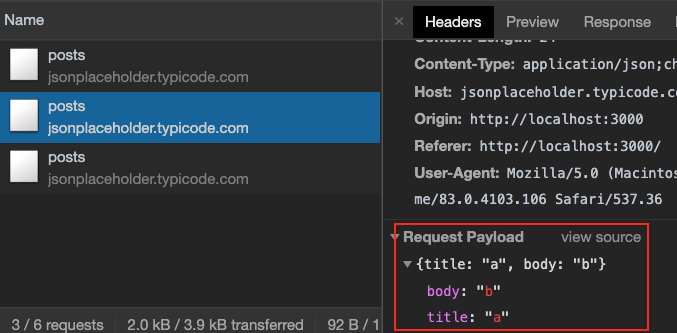
If we were to add three times, we notice it in our UI. Click on ‘Network’ and we see three posts.

Click on the first one and notice request method. Usually the request method is GET, POST, PUT, DELETE..etc. The reason why there is an OPTION there is because Chrome is preflighting the request to look for CORS headers.
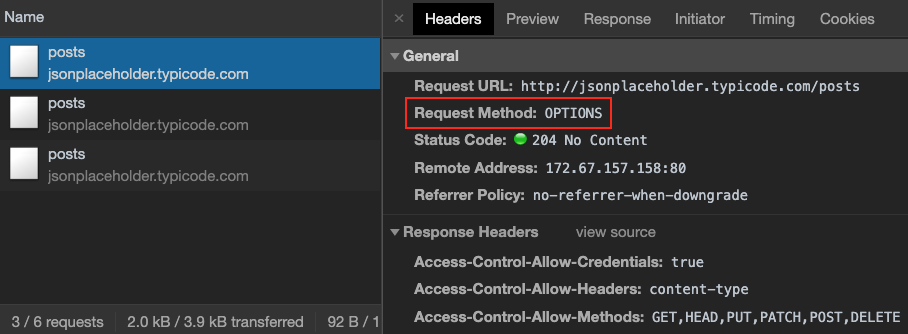
If the request is acceptable, it will then send the real request. If you’re doing this cross-domain, you will simply have to deal with it or else find a way to make the request non-cross-domain.
If you click on the header, you’ll see the request payload that’s being sent.
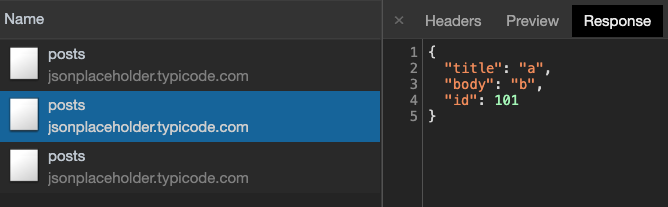
When your request is successful, you’ll see the response object that the server sends back to you.
Updating the Data
1 2 3 4 5 6 7 8 9 10 11 12 13 14 15 16 17 18 19 |
handleUpdate = async post => { console.log("Update", post); post.title = 'UPDATED'; // put updates the whole object const {data} = await axios.put(apiEndpoint + '/' + post.id, post); console.log(data); // server response // patch (update various properties) // axios.patch(apiEndpoint + '/' + post.id, { title: post.title}) const posts = [...this.state.posts]; const index = posts.indexOf(post); posts[index] = {...post}; this.setState({ posts }); }; |
Optimistic Updates with Error handling
1 2 3 4 5 6 7 8 9 10 11 12 13 14 15 16 17 18 19 |
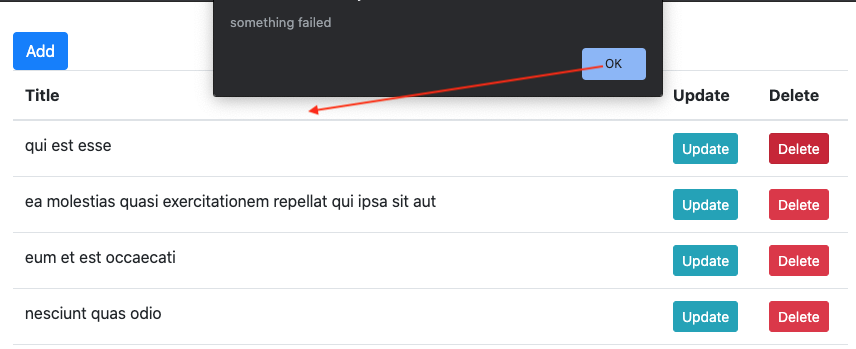
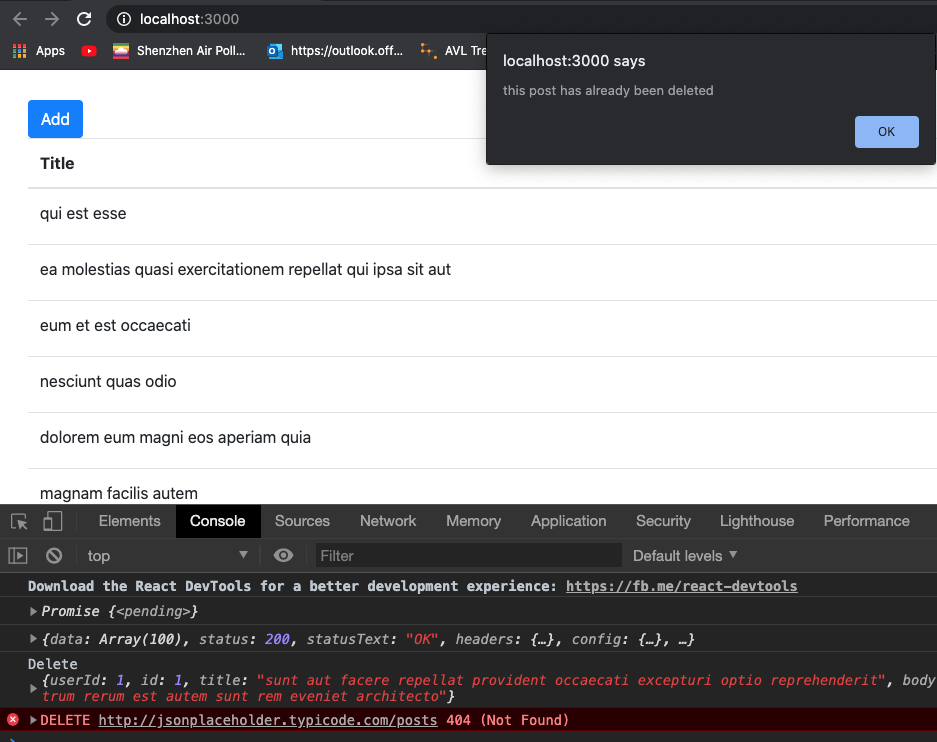
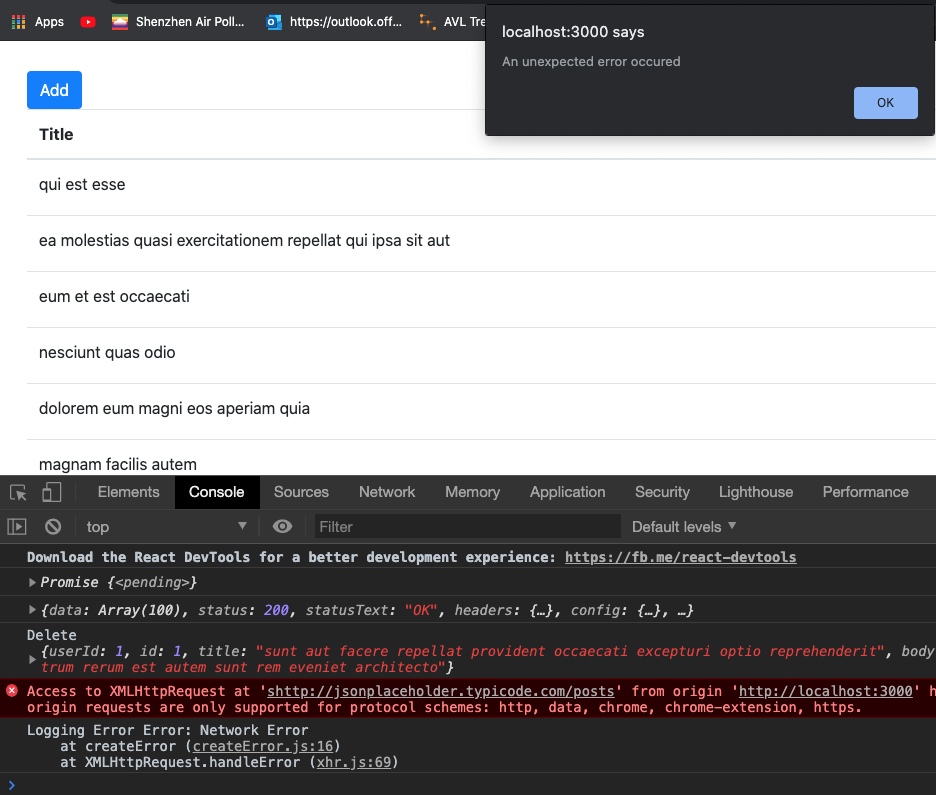
handleDelete = async post => { console.log("Delete", post); const originalPosts = this.state.posts; // filter out all the posts that IS NOT THIS post const posts = this.state.posts.filter(p => p.id !== post.id); this.setState({ posts }); try { await axios.delete(apiEndpoint+'/'+post.id); throw new Error(''); } catch (ex) { alert('something failed'); this.setState({ posts: originalPosts }); } }; |
If we were to simply add, update, or delete from the server, and then update our UI to reflect those actions, there is a small wait time on the UI. This is because we’re waiting for the server to update us with a response, and then to update our UI.
In order to remedy this issue, we flip them. We
1) update the UI first
2) Then execute the async operation.
If all goes well like 99% of the time, great. If not, we can revert.
The revert process is:
1) create a reference to the original state
|
|
const originalPosts = this.state.posts; |
2) update the UI
3) try/catch on the async operation. When you catch the exception, make sure you setState back to the original
|
|
try { await axios.delete(apiEndpoint+'/'+post.id); throw new Error(''); // simulated error } catch (ex) { alert('something failed'); this.setState({ posts: originalPosts }); // sets everything back } |
Thus, when we run the app, we see the original list. When we delete, it deletes the local right away.
Our simulated error makes the alert box appear. Once we click on the ‘ok’ button, our code setState property posts back to the original.