Category Archives: Projects
Yono – Period Tracking
Updating of the calendar’s view for given Changing Status
The MeStatusViewController needs to communicate with CalendarViewController whenever a user has changed status. We do this by notifications because we are communicating ViewController to ViewController in a MVC setting.
MeStatusViewController
|
1 2 3 4 5 6 7 8 9 10 11 12 13 14 15 16 17 18 19 20 21 22 23 24 |
- (void)viewWillDisappear:(BOOL)animated { //dispatch a serial thread to update the status [[LogicSingleton sharedInstance] updateUserSettingsColumn:@"status" withValue:self.status usingEmail:APPDELEGATE.currentUser.email onUpdatedBlk:^void(BOOL updated, NSString *newValue) { ... ... if(updated){ ... ... //POST A NOTIFICATION to CalendarViewController. [[NSNotificationCenter defaultCenter] postNotificationName:UpdateCalendarViewNotification object:nil]; } }]; [super viewWillDisappear:animated]; } |
Once an update is notified by MeStatusViewController, we call CalendarViewcontroller’s updateCalendarView using previously saved period history.
CalendarViewcontroller
|
1 2 3 4 |
-(void)updateCalendarView { [self updateCalendarViewWithPeriodDates:self.periodHistoryArray]; } |
When we update the calendar, notice we get the status of the app. Hence we’ll either get “Period Tracking” or “Trying to Conceive”. We process the period dates according to either these status.
CalendarViewcontroller
|
1 2 3 4 5 6 7 8 9 10 11 12 13 14 15 16 17 18 19 20 21 22 23 24 25 26 27 28 29 30 31 32 |
-(void)updateCalendarViewWithPeriodDates:(NSArray*)dates { if(dates) { ... ... self.periodHistoryArray = dates; //let's always retain the incoming array of periods self.status = [[LogicSingleton sharedInstance] getUserSettingsColumn:@"status" usingEmail:APPDELEGATE.currentUser.email]; if([self.status compare:@"Period Tracking"]==NSOrderedSame) { //process for period tracking, ONLY DISPLAY PERIODS self.periodProbabilities = [[PeriodProbabilities alloc] initWithFlowRangeArray:dates]; } else { //process for Trying to Conceive self.cycleProbabilities = [[CycleProbability alloc] initWithFlowRangeArray:dates]; .... .... .... [self.datePickerView reloadData]; [self.calendarDayView reloadData]; [self.calendarDayView scrollToItemAtIndex:365 animated:YES]; } else { } } |
iCarousel dates
The dates on the iCarousel, is calculated this way:
|
1 2 3 4 5 6 7 8 9 10 11 12 13 14 15 |
for ( int i = 365; i > 0; i--) { //create date component and set month to 1 NSDateComponents *components = [[NSDateComponents alloc] init]; //[components setMonth:-1]; [components setDay: -i ]; //using existin calendar, add 1 month to date 'now' NSDate * dateToAdd = [calendar dateByAddingComponents:components toDate:now options:0]; DateInfo * dateInfoObj = [[DateInfo alloc] initWithDate:dateToAdd andProbability:0.0f]; [self.daysCarouselDictionary setValue:dateInfoObj forKey:[NSString stringWithFormat:@"%u", carouselIndex++]]; } |
component setDay to -365 and then uses dateByAddingComponents:toDate: will generate a NSDate 365 days prior to today.
For example, if today is 5/22/15, then the result would be 5/22/14
-364 5/23/14
-363 5/24/14
…all the way until we have one full year of nsdates from 5/23/14 to 5/22/15.
As each date is generated, we insert it into daysCarouselDictionary.
daysCarouselDictionary is used in iCarousel delegate methods for data display.
We generate 2 years of dates, where today is smack in the middle.
Hence continuing from previous example, we then generate a future year
1 5/24/15
2 5/25/15
….
365 5/22/16
Thus, that is how we fill the iCarousel with those perspective dates.
Coloring of the period dates
CalendarViewController.m
|
1 2 3 4 5 6 7 8 9 10 11 |
- (BOOL)datePickerView:(RSDFDatePickerView *)view shouldColorDate:(NSDate *)date { if([self.status compare:@"Period Tracking"]==NSOrderedSame) { return [self.periodProbabilities isDatePeriod:date]; } else { return [self.cycleProbabilities isDateFirstPeriod:date]; } } |
Flow Dates ( period dates )
Taking in flow dates and updating your Calendar
The app starts and the user presses on the flow dates button on the top right.
User enters 2 different flow dates and clicks on “Save History” on the top left.
PeriodHistoryViewController’s “Save History” is a back button. Its responder is:
|
1 2 3 4 5 6 7 8 9 10 11 12 13 14 15 16 17 18 19 20 21 |
- (void)onBackButtonTouch:(UIBarButtonItem *)sender { //if there's only 1 flow date, we ask for an average cycle day length //which then hits if { } //if there's 2 flow dates, process as normal else { //if self.periodHistoryDates is 2 if( [self.delegate respondsToSelector:@selector(updateCalendarViewWithPeriodHistory:)]) { [self.delegate updateCalendarViewWithPeriodHistory:self.periodHistoryDates]; } [self.navigationController popViewControllerAnimated:YES]; } } |
After the user selects the average cycle length we hit:
|
1 2 3 4 5 6 7 8 9 10 11 12 13 14 15 16 17 18 19 20 21 22 23 |
-(void)sendSelectedData:(NSString*)data withUnit:(NSString*)unitType { NSLog(@"PeriodHistoryViewController.m - sendSelectedData:%@, type:%@", data, unitType); //save into the database UserSettingsDB * settingsDB = [[UserSettingsDB alloc] init]; if([settingsDB updateColumn:@"ave_cycle_length" withValue:data usingEmail:APPDELEGATE.currentUser.email]) { NSLog(@"PeriodHistoryViewController.m - sendSelectedData - average cycle length updated"); } else { NSLog(@"PeriodHistoryViewController.m - sendSelectedData - ERROR! average cycle length NOT updated"); } //then we just let the app update itself with the data if( [self.delegate respondsToSelector:@selector(updateCalendarViewWithPeriodHistory:)]) { [self.delegate updateCalendarViewWithPeriodHistory:self.periodHistoryDates]; } [self.navigationController popViewControllerAnimated:YES]; } |
Then it goes to MainTabsViewController’s
|
1 |
-(void)updateCalendarViewWithPeriodHistory:(NSMutableArray*)historyArray |
Then, CalendarViewController’s
|
1 |
-(void)updateCalendarViewWithPeriodDates:(NSArray*)dates |
Holistic Element
Holistic Element for the iPad is a lifestyle app that connect its users to the power and joy of healthy living and a balanced lifestyle. The app strives to help users get started in basic traditional cooking, easy interval exercises that they will love to do daily, and articles that educate them in health.
Basically there are 3 sections: education, cooking, and exercises.
Education is basically a professionally well written article with references for further reading.
Cooking involves instructing the user how to cook via a video and image tutorial.


Same goes for exercises.
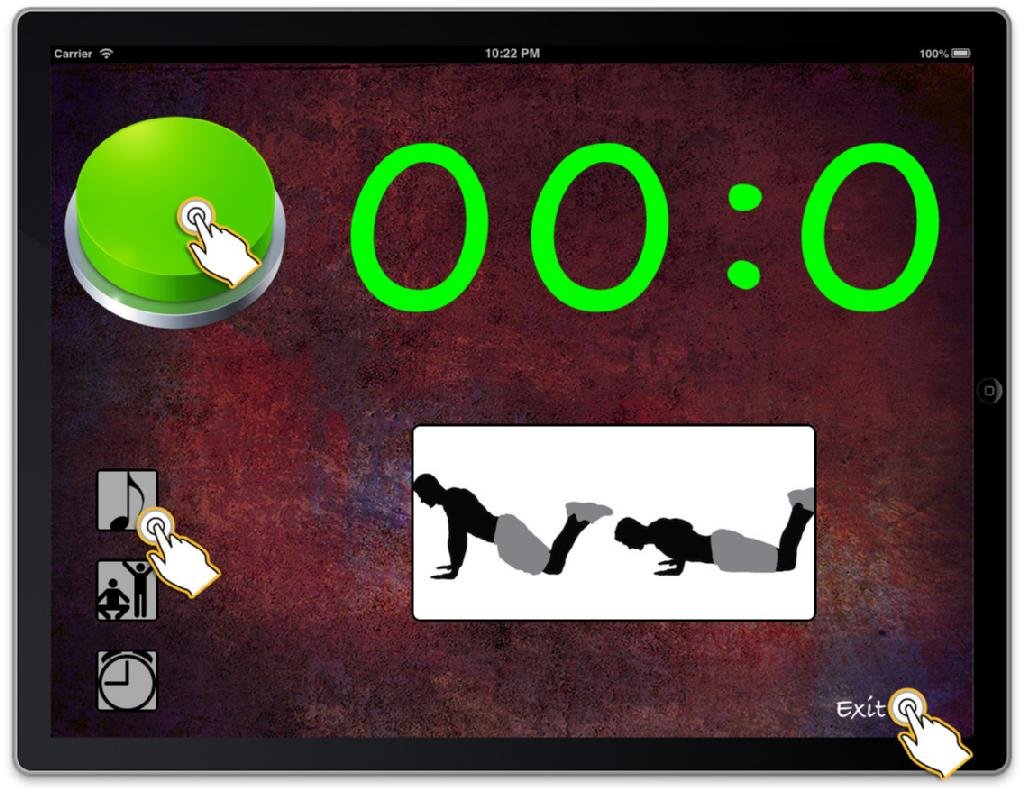
In additional, for exercises, there is a timer workout program that the user can use in their living room.
Face Recognizer using openCV on the iPad
Note:
This project was built using
- openCV 2.4.8
- xCode 5.0.2
- for iOS 7
- iPad air
set up instructions here
download the full source here (26.9MB)
I created 2 sections. The recognition screen and the registration screen.
 We first start off on the main page.
In the MainMenuViewController, I have 2 variables:
- CameraWrapper * cameraWrapper;
- DataModel * dataModel;
The cameraWrapper is basically an object that wraps all the functionality of the openCV camera. What it does it it captures an image repeatedly. Each image is a matrix object cv::Mat. It gets passed to you, and it is up to you to process it, see where the detected face is, and do things to it.
The dataModel holds all the face data structures. Namely, we are trying to save all the user faces into this data structure. We also have a user labels data structure that matches the faces. Finally it has a UpdateViewDelegate that calls whatever UIViewController that conforms to this delegate to update its front end whenever something gets updated int our data model.
For the register view controller, we add faces we’ve detected to our carousel. That way whenever a system has finished collecting user’s faces, it can train it, and thus, be able to recognize the user in the future.
In the case of recognition, our UpdateViewDelegate is all about updating user interface items.
|
1 2 3 4 5 6 7 8 9 10 11 12 13 14 15 16 17 |
@protocol UpdateViewDelegate <NSObject> @optional -(void)showMessageBox:(NSString*)title andMessage:(NSString*)msg andCancelTitle:(NSString*)cancelTitle; // register view controller -(void)addFacesToCarousel; -(void)clearFacesInCarousel; -(void)updateNumOfFacesLabel:(NSString*)strNumber; // login view controller -(void)animateTraining:(bool)flag; -(void)incrementIdentityValue:(float)similarity; -(void)showSimilarity:(float)similarity; -(void)setRecognizeButton:(bool)flag; -(void)setTrainButton:(bool)flag; -(void)showIdentityInt:(int)identity andName:(NSString*)name; @end |
When you push the registration button you open up a UIViewController to register your face.
|
1 2 3 4 5 6 7 8 9 10 11 12 13 14 15 16 17 18 19 20 21 22 23 24 25 26 27 28 |
#pragma mark ------------------- button responders ---------------------- -(void)loginPage { DLOG(@"MainMenuViewController - loginPage"); LoginViewController * loginPage = //[[LoginViewController alloc] initWithCamera:cameraWrapper andThreshold: UNKNOWN_PERSON_THRESHOLD]; [[LoginViewController alloc] initWithCamera:cameraWrapper andDataModel:dataModel andThreshold:UNKNOWN_PERSON_THRESHOLD]; [self.navigationController pushViewController:loginPage animated:YES]; [loginPage release]; } -(void)registerPage { DLOG(@"MainMenuViewController.m - RegisterPage"); unsigned long totalFaces = [dataModel getTotalFaces]; unsigned long numOfProfiles = [dataModel getNumOfProfiles]; DLOG(@"currently in our data model: there are %lu total faces...and %lu profiles", totalFaces, numOfProfiles); RegistrationViewController * registerPage = [[RegistrationViewController alloc] initWithCamera:cameraWrapper andDataModel:dataModel]; [self.navigationController pushViewController:registerPage animated:YES]; [registerPage release]; } |
When you push the recognition button you open up a UIViewController to recognize your face.
Both views repeatedly detect your face.
Face Detection and 2 ways of facial lighting
I’ve used 2 main methods of getting different lighting of the face. For example, one way it to have the user move their face around by controlling the position of their nose with a axis and a yellow dot. Have their nose line up with the yellow dot and then you’ll be able to position their face differently. Thus, you’ll get different facial lighting and thus, our training image set can be much more various. This helps in the recognition phase.
A second way is to use accelerometer. Have the user stand in one spot and snap images from 0 – 360 degrees. That way, you will also get various lighting on the user’s facial structures.
Camera leak…fix and usage
In openCV’s module highhui folder, go to cap_ios_abstract_camera.mm file
i.e, /Users/rickytsao/opencv-2.4.8/modules/highgui/src/cap_ios_abstract_camera.mm
and replace the stop method with this:
|
1 2 3 4 5 6 7 8 9 10 11 12 13 14 15 16 17 18 19 20 21 22 |
- (void)stop; { NSLog(@"cap_ios_abstract_camera.mm - stop"); running = NO; // Release any retained subviews of the main view. // e.g. self.myOutlet = nil; [self.captureSession stopRunning]; //retain count is 2 [captureSession release];//(++) //retain count is 1 NSLog(@"(++) 4/24/2014 cap_ios_abstract_camera.mm, -(void)stop, captureSession released because it was retained twice via self. and alloc in createCaptureSession"); self.captureSession = nil; //retain count is 0, and captureSession is set to nil self.captureVideoPreviewLayer = nil; self.videoCaptureConnection = nil; captureSessionLoaded = NO; } |
Insert the lines where I have (++). This is where we need to release the captureSession one more time. Or else, you will leak memory when you opens and closes the camera one too many times.
Step 1, process the face
Whether we are in registration or recognition, the program is constantly detecting a subject’s face via the method ProcessFace.
Every time camera from the iPad captures an image, it gets passed into our Processface method here. That image is of object Mat.
The method getPreprocessedFace will return the preprocessedFace, which means whether it has detected a valid face or not. Then we see what phase we are in and do recognition, or collect. In our case, since it is registration, we are collecting faces. So whatever face we detect, will be saved into a data structured to be trained later.
|
1 2 3 4 5 6 7 8 9 10 11 12 13 14 15 16 17 18 19 20 21 22 23 24 25 26 27 28 29 30 31 32 33 34 35 36 37 38 39 |
-(bool)ProcessFace:(cv::Mat&)image { // Run the face recognition system on the camera image. It will draw some things onto the given image, so make sure it is not read-only memory! if(m_mode==MODE_END) { DLOG(@"ProcessFace: END PROCESSING IMAGES"); return false; } cv::Rect faceRect; //don't modify the original cv::Mat displayedFrame; image.copyTo(displayedFrame); //we work with displayedFrame from now on cv::Mat preprocessedFace = [self getPreprocessedFace:displayedFrame withFaceWidth:70 withCascadeClassifier:*faceCascadePtr withFaceRect:faceRect]; //DRAW THE FACE! if(faceRect.height > 0){ [self drawRect:faceRect aroundImage:image withColor:cv::Scalar(255, 0, 255)]; } if (m_mode == MODE_RECOGNITION) { [self doModeRecognition: preprocessedFace]; } else if (m_mode == MODE_TRAINING) { [self doModeTraining]; } else if(m_mode == MODE_COLLECT_FACES) { [self doModeCollectFaces:preprocessedFace withFlashRect:faceRect onImage:image]; } return true; } |
As of now, we are collecting face so we use the MODE_COLLECT_FACES phase. This is where we for each image we snap, we inserted it into a data structure called preprocessedFaces.
Before the insertion, we do 3 things to the image. We shrink it to 70×70. Grayscale it. And equalize it. That way, the size of our image is much smaller and easier to work with. Then we pass it into openCV’s detectMultiScale, and it will return a cv::Rect object, detailing, where the face(s) is on the screen. In our case, we are working only with one face. We detect the largest face on the current image.
|
1 2 3 4 5 6 |
faceCascadePtr->detectMultiScale(equalizedImg, faces, searchFactor, minNeighbors, 0|flags, minFeatureSize); |
Then we draw a square around the face.
|
1 2 3 |
if(faceRect.height > 0){ [self drawRect:faceRect aroundImage:image withColor:cv::Scalar(255, 0, 255)]; } |
Once that’s done, we then see what phase we are in:
- MODE_RECOGNITION
- MODE_TRAINING
- MODE_COLLECT_FACES
Since we are in MODE_COLLECT_FACES, we push our image matrix into a data structure.
|
1 2 3 4 |
preprocessedFaces.push_back(colorMat); preprocessedFaces.push_back(colorMirroredMat); faceLabels.push_back(m_userId); faceLabels.push_back(m_userId); |

I used iCarousel to add all the images I took and insert them onto an image carousel. That way, we can scroll through and check out all the images we took. These are the images that were added into our preprocessedFaces data structure.
Also, in previous versions, I simply used the yellow circle to match up to the person’s nose. Thus, angling their face JUST a little so that I can collect different angles of their face. In this version, I use the accelerometer, where the user angles their faces horizontally from 0 to 360.
Training

|
1 2 3 4 5 6 7 8 9 10 11 12 13 14 15 16 17 18 19 20 21 22 23 24 25 26 27 28 29 30 31 32 33 34 35 36 37 38 |
//we pass in grayPreprocessedFaces for paramPreprocessedFaces -(cv::Ptr<cv::FaceRecognizer>)learnCollectedFacesWithFaces:(cv::vector<cv::Mat>&)paramPreprocessedFaces withLabels:(cv::vector<int>&)paramFaceLabels andStrAlgorithm:(NSString*)facerecAlgorithm { DLOG(@"nLearning the collected faces using the [ %@ ] algorithm ...", facerecAlgorithm); bool haveContribModule = cv::initModule_contrib(); if(!haveContribModule) { DLOG(@"nERROR: The 'contrib' module is needed for FaceRecognizer but has not been loaded into OpenCV!"); return nil; } model = cv::createEigenFaceRecognizer(); if(model.empty()) { DLOG(@"nERROR: The FaceRecognizer algorithm [ %@ ] is not available in your version of OpenCV. Please update to OpenCV v2.4.1 or newer.", facerecAlgorithm); } NSArray *paths = NSSearchPathForDirectoriesInDomains(NSDocumentDirectory, NSUserDomainMask, YES); NSString *docs = [paths objectAtIndex:0]; NSString *trainedPath = [docs stringByAppendingPathComponent:@"trained.yml"]; unsigned long numOfFaces = paramPreprocessedFaces.size(); unsigned long numOfLabels = paramFaceLabels.size(); DLOG(@"Training %u faces and %u labels: ", numOfFaces, numOfLabels); //we train on the gray preprocessed faces model->train(paramPreprocessedFaces, paramFaceLabels); //original //MODEL SAVING model->save([trainedPath UTF8String]);//save the model with current data structure DLOG(@"nlearnCollectedFacesWithFaces - training complete...thank you for using FaceRecognizer. :)"); return model; } |
After the faces have been collected, we automatically train those images using
method learnCollectedFacesWithFaces:withLabels:andStrAlgorithm: in DataModel.m.
We train it on a cv::Ptr
|
1 |
identity = model->predict(tanTriggedMat); |
to predict which image matrix below to which identity.
|
1 2 3 4 5 6 7 8 9 10 11 12 13 14 15 16 17 18 19 20 21 22 23 24 25 26 27 28 29 30 31 32 33 34 35 36 37 38 39 40 41 42 43 44 45 46 47 48 49 50 51 52 53 54 55 56 57 58 59 60 61 62 63 64 |
//process when we are in recognition mode -(void)doModeRecognition:(cv::Mat)paramPreprocessedFace { int identity = -1; //if ((preprocessedFaces.size() > 0) && (preprocessedFaces.size() == faceLabels.size())) { if (model && !model.empty()) { cv::Mat grayedPreprocessedFace = [self grayCVMat:paramPreprocessedFace]; //test it out here cv::Mat tanTriggedMat = [self tan_triggs_preprocessingWithInputArray:grayedPreprocessedFace andAlpha:0.1 andTau:10.0 andGamma:0.2 andSigmaZero:1 andSigmaOne:2]; tanTriggedMat = [self norm_0_255: tanTriggedMat]; //reconstructFace should take grayscle ONLY: NOTE : FOR EIGENFACES AND FISHERFAC cv::Mat reconstructedFace = [self reconstructFaceWithCVMat:tanTriggedMat]; double similarity = [self getSimilarityWithMat: tanTriggedMat andMat:reconstructedFace]; //tan triggs DLOG(@"similarity: %f", similarity); [self showSimilarityDelegateView:similarity]; if (similarity < self.threshold) //WE HAVE A MATCH OF AN IDENTITY { try { identity = model->predict(tanTriggedMat); //LET'S PIGEONHOLE OUR IDENTITY. WHEN THE 100% TAKES PLACE, THE HIGHEST IDENTIY IS THE PERSON NSString * key = [NSString stringWithFormat:@"%u", identity]; NSString * name = [nameKeyTable objectForKey:key]; NSString * count = [recognitionCount objectForKey:name]; int iCount = 0; if(count == nil) { count = @"0"; [recognitionCount setObject:count forKey:name]; iCount = 0; } else { iCount = (int)[count integerValue]; iCount++; } [recognitionCount setObject:[NSString stringWithFormat:@"%i", iCount] forKey:name]; DLOG(@"---------------------------------> int id: %u, name: %@, count: %i", identity, name, iCount); } catch(cv::Exception e) { e.formatMessage(); } //tell our UIVIEWCONTROLLER to increment identity approval value (0 to 100) for similarity [self incrementIdentityValueOnDelegateView:similarity]; //tell our UIVIEWCONTROLLER to show the identity of this person //[self showIdentity: identity]; } } } |
