Category Archives: Node JS

Node JS with mySQL using Sequelize and Express

ref – https://www.esparkinfo.com/node-js-with-mysql-using-sequelize-express.html

source download

setup MySQL

Make sure your mySQL is installed on a mac like this:
http://chineseruleof8.com/code/index.php/2016/05/17/install-mysql-and-use-terminal-to-use-it/’

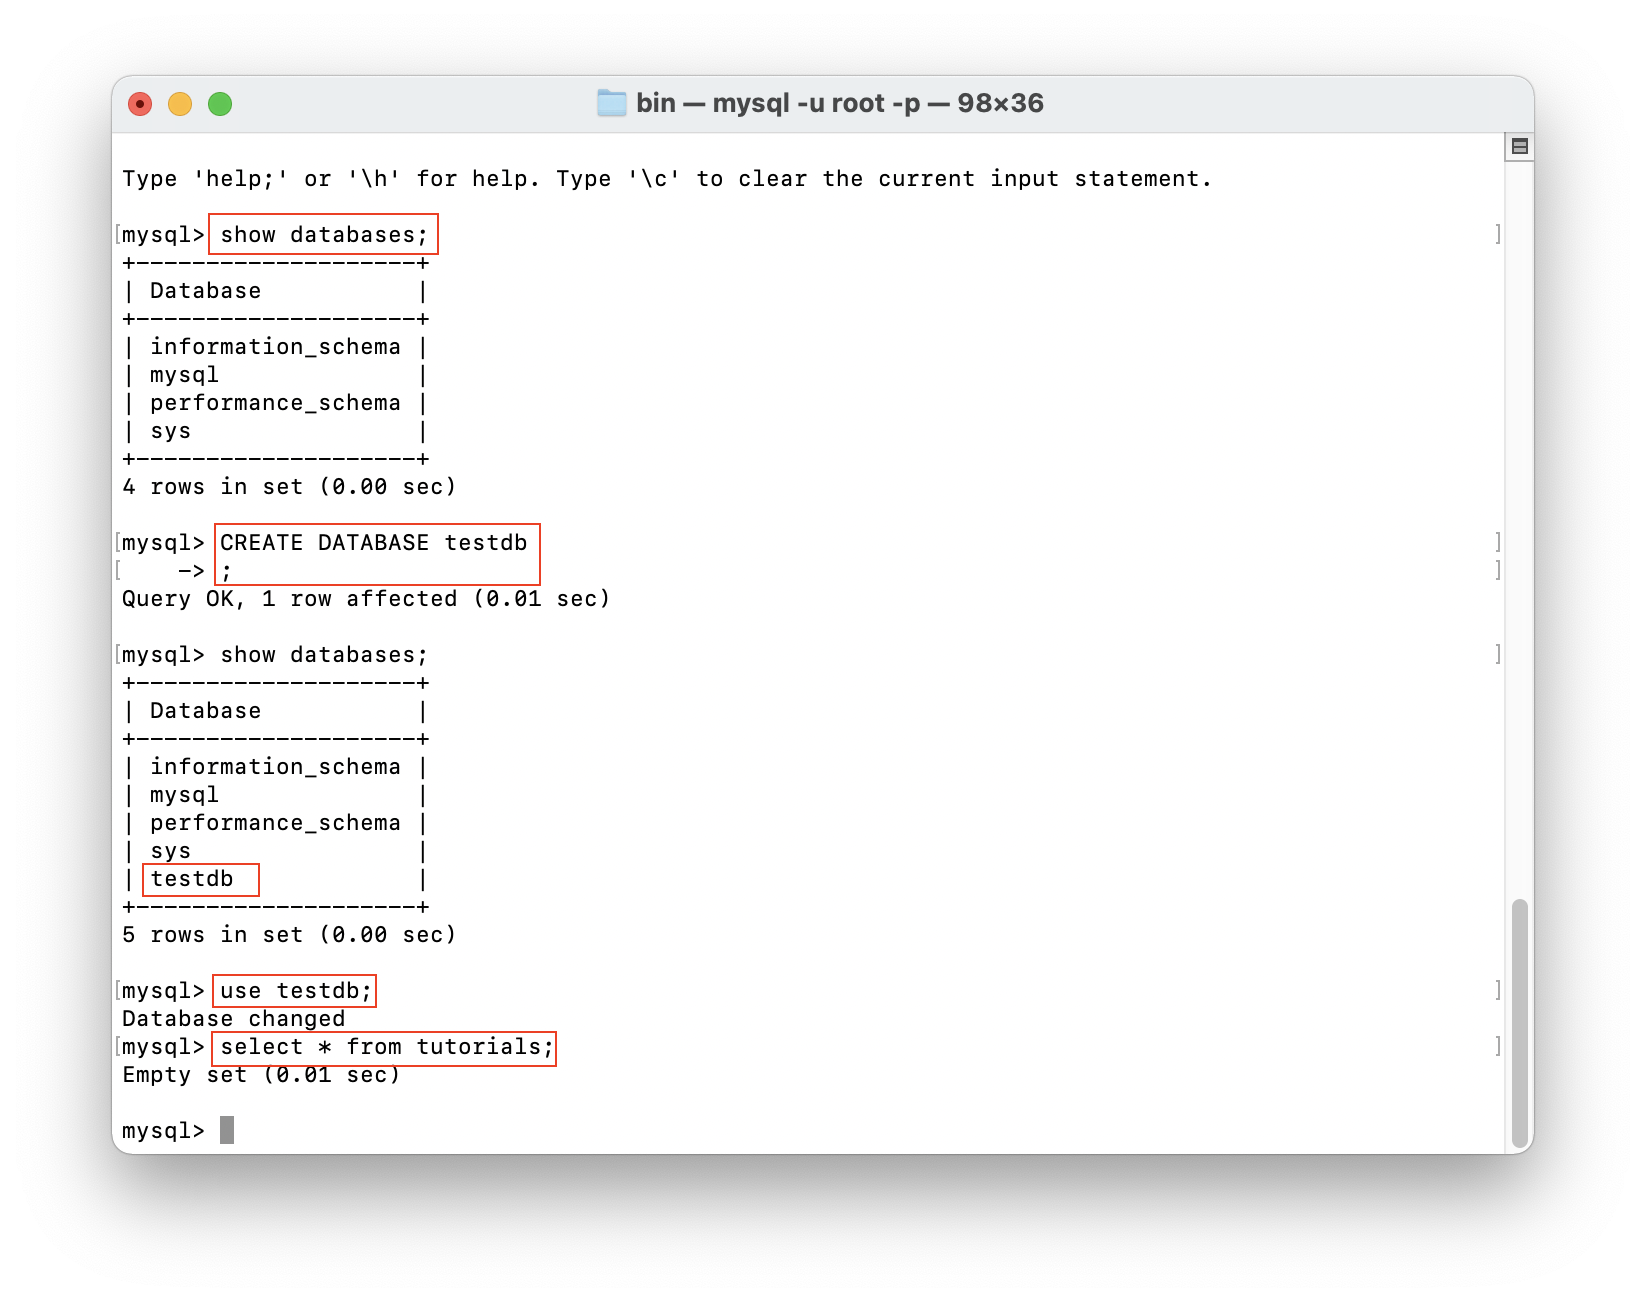
When you set up your mySQL, create a database called testdb

Node JS

$ mkdir nodejs-express-sequelize-mysql
$ cd nodejs-express-sequelize-mysql

name: (nodejs-express-sequelize-mysql)
version: (1.0.0)
description: Node.js Rest Apis with Express, Sequelize & MySQL.
entry point: (index.js) server.js
test command:
git repository:
keywords: nodejs, express, sequelize, mysql, rest, api
author: esparkinfo
license: (ISC)

Setting Up Express JS Web Server

in the root directory, create server.js

Configuring MySQL Database & Sequelize

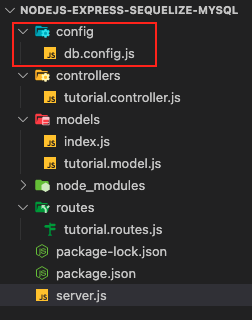
In the root directory, create a config folder.
In that folder, create db.config.js

Note – The first five parameters are intended for MySQL. The pool parameter is optional and is deployed in the Sequelize connection pool config. The parameters are explained below.

max -maximum number of connections permissible in a pool
min – minimum number of connections permissible in a pool
idle – maximum time, in terms of milliseconds, that a connection can be held idly before being released
acquire – maximum time, in terms of milliseconds, that the pool seeks to make the connection before an error message pops up on screen

Sequelize

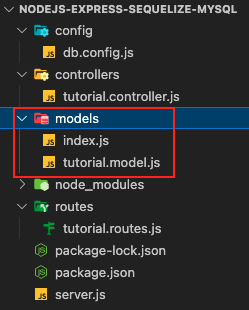
In the root directory, create a models folder

In the models folder, create index.js by entering the following code :

models/index.js

In MySQL databases, this model represents tutorial tables. The columns are automatically generated, a few of which are id, description, createdAt, and published.

tutorial.model.js

Then in server.js, we require this model, and use

What happens is that in in model/index.js, we allocated a new Sequelize object and initialized it with a mysql database connection using our db configuration. We import this functionality into our server.js. We call the sync function with the force option set to true in order to DROP TABLE IF EXISTS before trying to create the table – if you force, existing tables will be overwritten.

You’ll be signed in as db user root with your password before this takes place, so make sure its all correct.

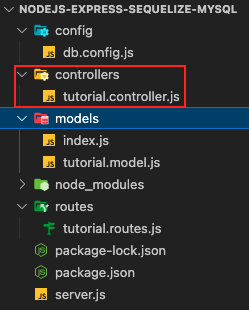
Controller

Routes import Controllers and Controller’s exported functions create, find, update, delete, etc.
Controller’s create will first error check all the incoming parameters, then uses model. Thus controllers are the middleman.

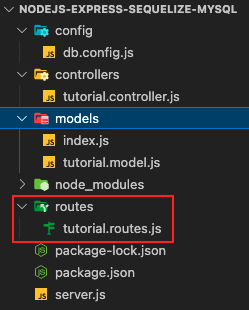
Routes

If the client sends a request for an endpoint via an HTTP request such as POST, DELETE, PUT, or GET, the user must determine how the server responds.

Such a response from the server is possible by setting up the below routes:

/api/tutorials: GET, POST, DELETE
/api/tutorials/:id: GET, PUT, DELETE
/api/tutorials/published: GET
To create a tutorial.routes.js inside the app/routes folder, the user performs the following steps:

In order to use routes, remember to put

in server.js, right above code for port.

Hence, our server.js has code for routes, which routes to middleman controller, which then uses models to make changes to the database.

In the end, your server should look like this:

server.js

Using Postman to test

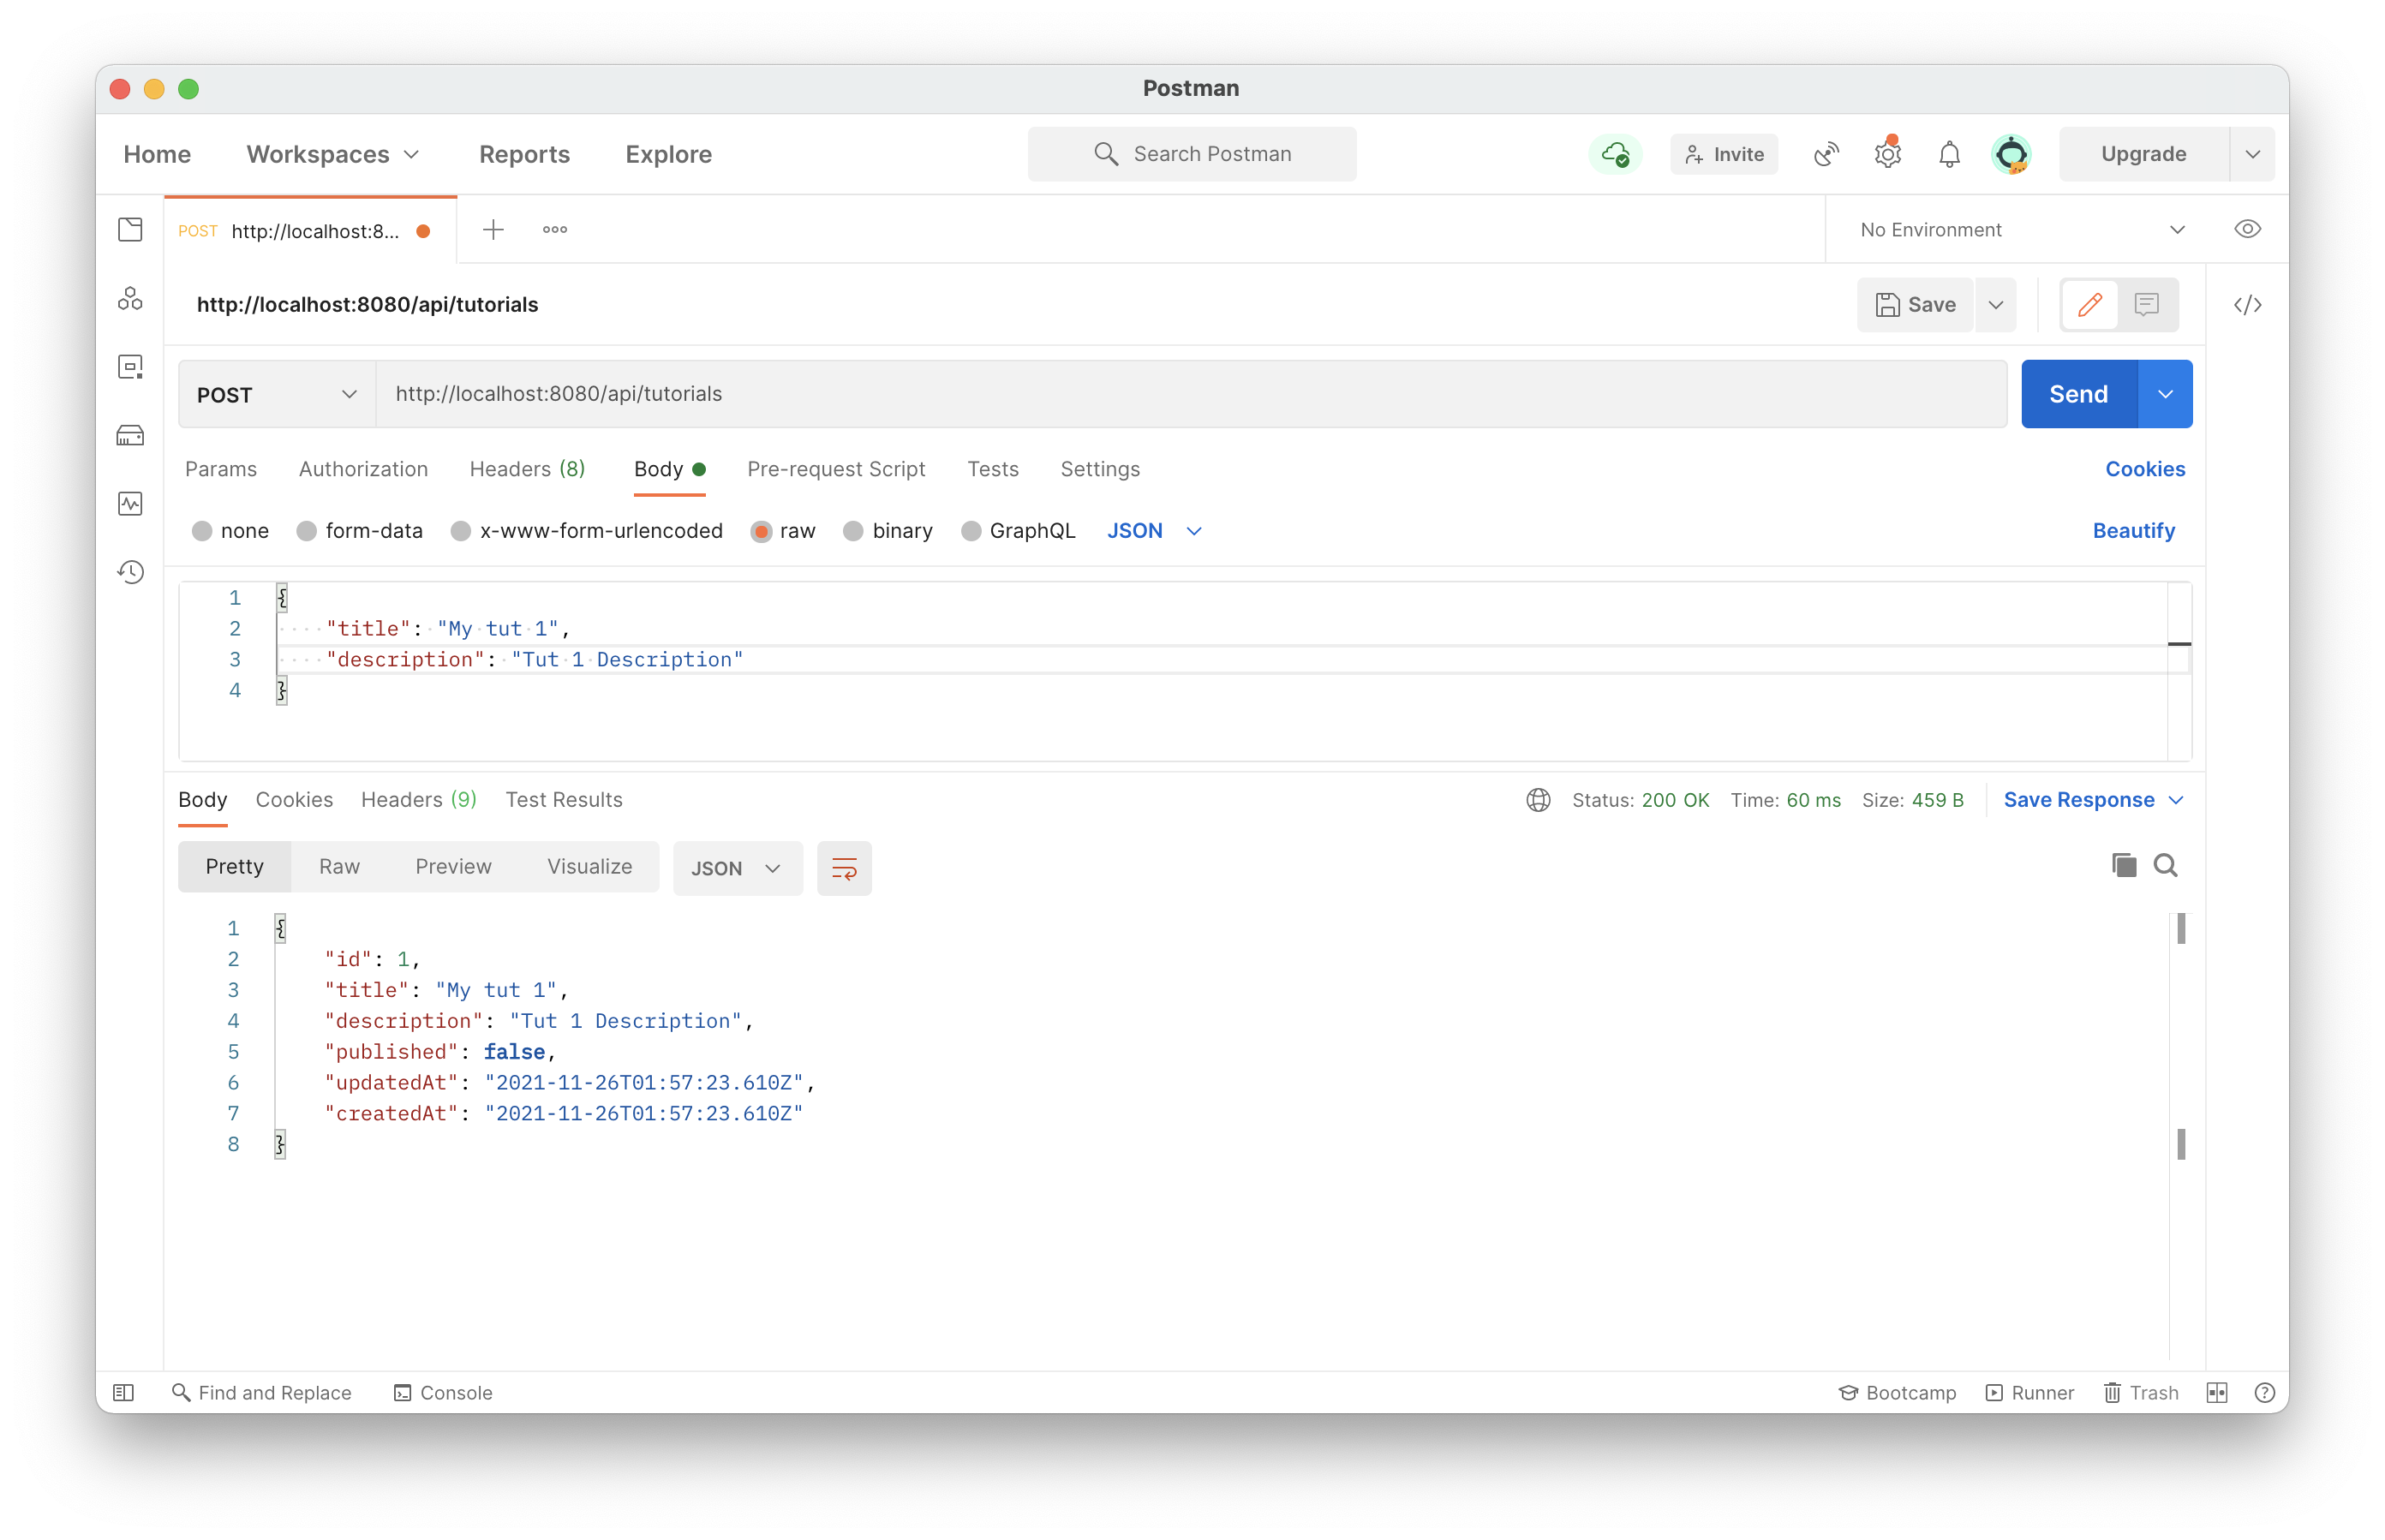
In Postman, new tab:

POST on http://localhost:8080/api/tutorials

Body, raw, then select JSON.

In the body:

In your database terminal, to see what you’ve inserted, get all results:

select * from tutorials;

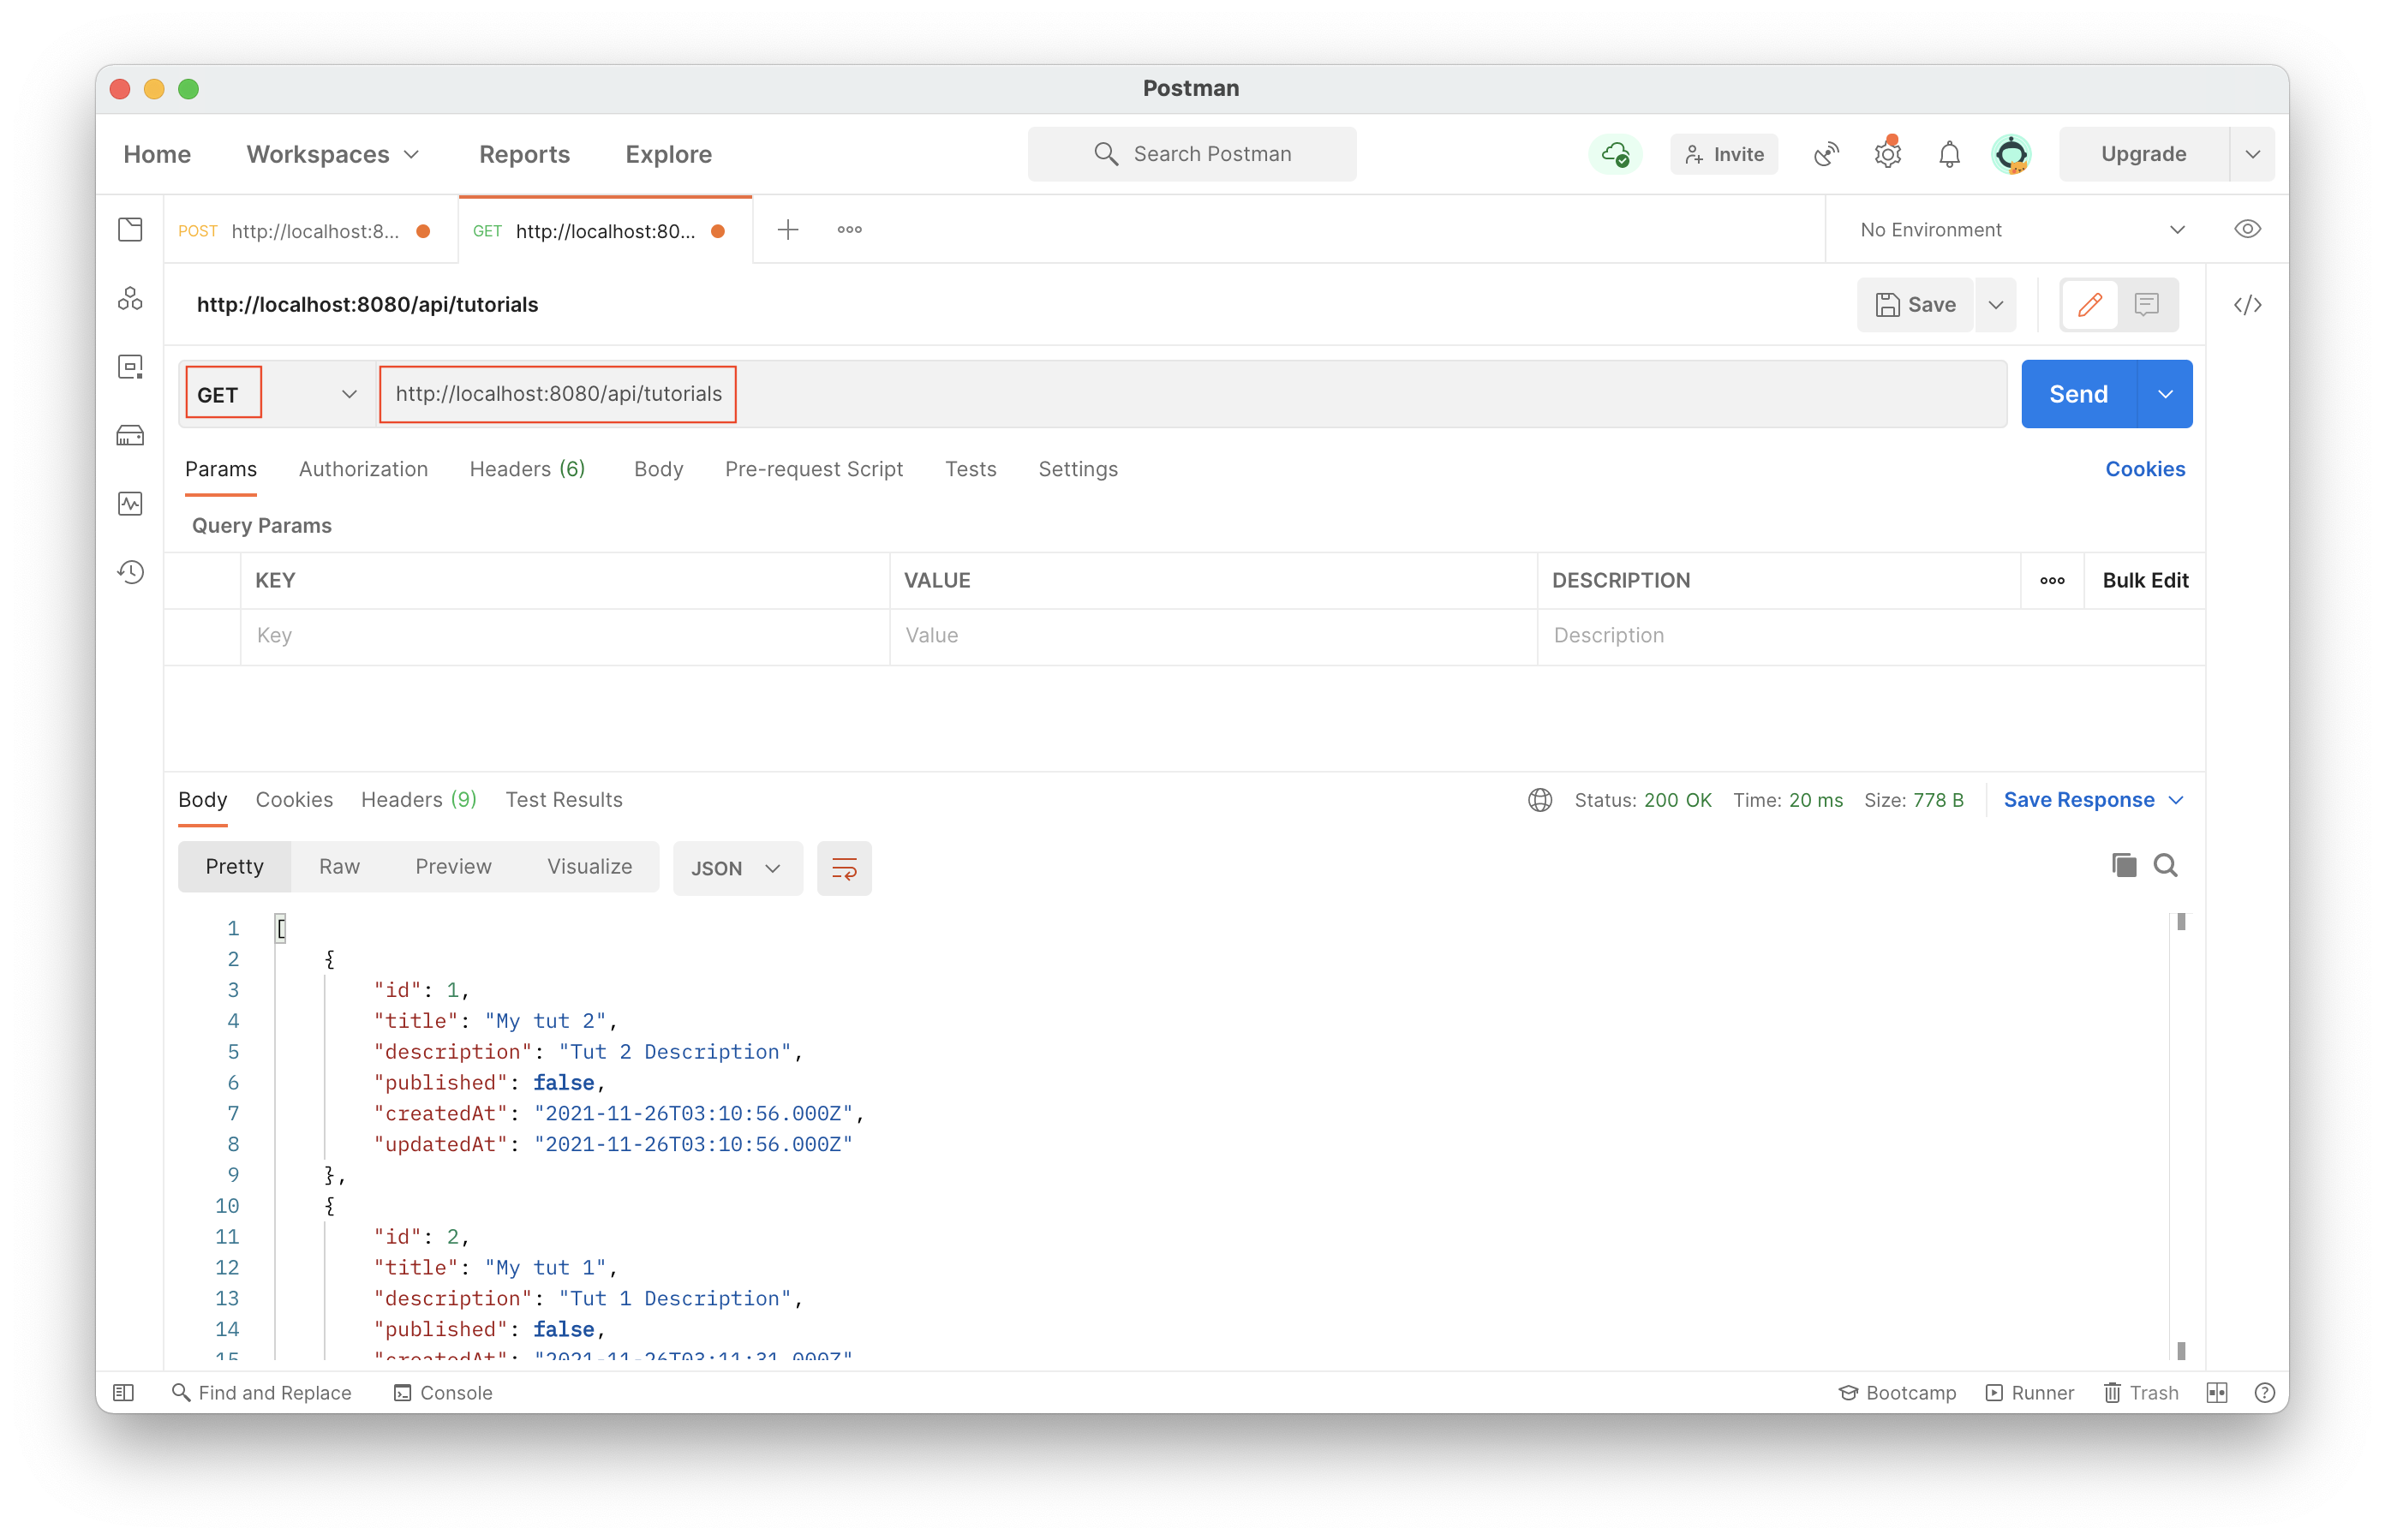
Get all tutorials

Get specific tutorial

GET on http://localhost:8080/api/tutorials/2

Finding All Tutorials where Title=”node”

GET on http://localhost:8080/api/tutorials?title=tut

Find all published posts

GET on http://localhost:8080/api/tutorials/published

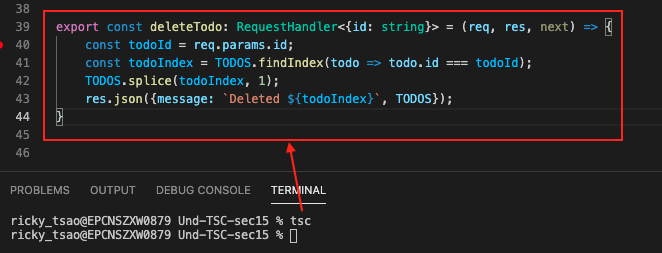
Delete depending on request param id

DELETE on http://localhost:8080/api/tutorials/2
Debug typescript in Node JS

demo download

Create REST API with Typescript


mkdir Und-TSC-sec15
cd Und-TSC-sec15

Create Node Project
npm init
You’ll then have a package.json file.


You’ll then have a tsconfig.json file.

In tsconfig.json:

Now let’s install the needed modules:

standard web server independencies:
npm install –save express body-parser

development independencies:
npm install –save-dev nodemon

create src folder:
mkdir src
cd src
touch app.ts

When you are done, type tsc to compile the typescript into javascript.

Then you can debug it. Put a breakpoint there and make sure you’re on the index file. In our file, we’re on app.ts.

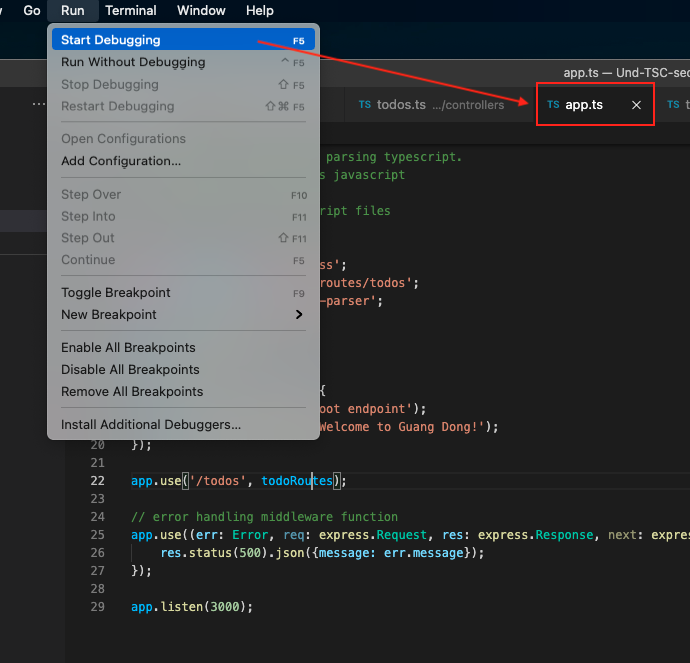
Once you’re on that file, go to Run > Start Debugging. You’ll see the bottom status bar turn orange. This means the server is running.

Click on View > Terminal, and you’ll see the terminal pop up. Then click on debug console. You’ll be able to see the console log from the node js app appear.

Creating Routes


cd src/routes
touch todos.ts

We extract Router from express. We can then register routes to hit functionality.
We set up the router to receive POST, GET, PATCH, and DELETE on ‘/’.
Each HTTP request will get mapped to certain functionalities that we declare in controllers/todos file.

routes/todos.ts

Finally, we need to connect our router to our server for endpoint /todos.

app.ts

Add additional routes

First, we create a class Todos so we have a structure to work with. We export a class Todo so other modules can import it, and then new it to create an instance of Todo.

Then import the class so that we get a simple data structure going.

We create functionality by implementing a function createTodo.
Note that we use RequestHandler interface, which contracts us to use
req, res, and next parameters.

controllers/todo.ts

Since it takes care of a POST request, we use parse the body property in the request
object to get the body data. The body data’s key is text.

In order do that we need to import the body-parser package in app.ts, and then extract json.
This is so that we parse the body using json.

app.ts

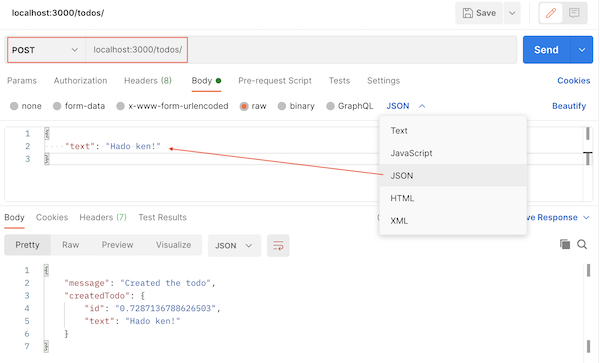
Open up your postman and query it like so:

child processes in Node JS 2

getCount.js

index.js

tasker.js

queue.js

child process in Node JS

ref – https://www.digitalocean.com/community/tutorials/how-to-launch-child-processes-in-node-js

Creating a Child Process with fork()

index.js

Fork is a variation of spawn. To create a process that’s also a Node Process.

Main benefit of fork over (exec, spawn) is that fork enables communication between the parent and child process.

CPU intensive tasks (iterating over large loops, parsing large JSON) stop other JS code from running. If a web server is blocked, it cannot process any new incoming requests until the blocking code has completed its execution.

1) Now run the server
2) run /hello (1st time)
3) run /total
4) run /hello (2nd time)

So we’ll only see the result from the first /hello. The slow function will block other code, and that’s why we won’t see the 2nd /hello.

The blocking code is slowFunction.

So how do we solve this?

Move blocking code to own module:

getCount.js

Since it will be run with fork, we can add code to communicate with the parent process when slowFunction has completed processing. Let’s send a message to the parent process with JSON message.

– Why look for message ‘START’? Our server code will send the START event when someone access the ‘/total’ endpoint.
– Upon receiving that event, we run slowFunction().
– we use process.send() to send a message to the parent process.

index.js

getCount.js

Run the app: node index.js

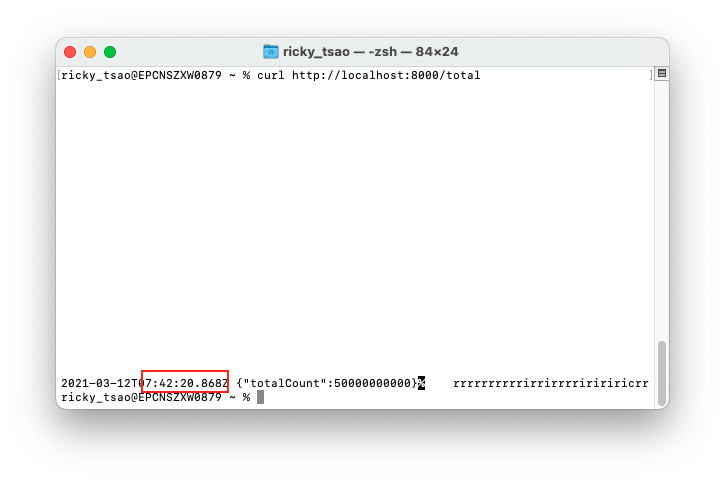
Open a 2nd terminal and type: curl http://localhost:8000/total
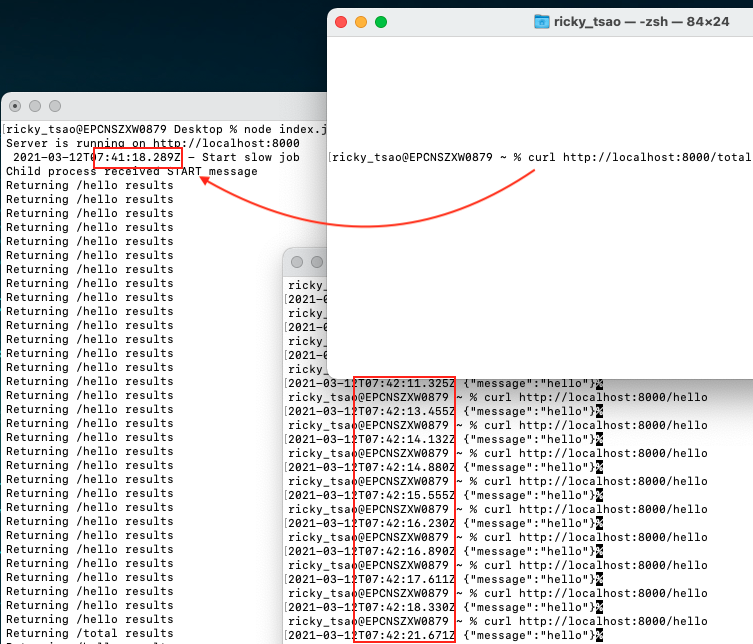
This will start up a long running task at say 7:41:18.

Open a 3rd terminal and type: curl http://localhost:8000/hello

Hi it a bunch of times. As you can see, it is running concurrently and not blocking the main JS code. This is because its a child process that’s running it concurrently. From the time stamp, you will also see that it’s happening after 7:41:18.

Then when the long task is done, it stops at 7:42:20. This proves that the /hello logs before 7:42:20 were all done concurrently with the task at /total.

Worker Thread with Node JS

mkdir spawnEx
then ls into that directory

set it up all default
npm init

create an index.js file
touch index.js

Open it up with VCode
Code . index.js

copy and paste the code like so:
index.js

Then we create the run file. use worker_threads to extract Worker object. We create a new worker whenever we call runService().

run.js

Create a worker class.
touch worker.js

worker.js

test.txt

I will show the time at milliseconds of when the worker has written to the text.txt file. As you scroll down using the right hand scroll bar, you’ll notice this millisecond increase. This is the increase of time, and you’ll see exactly which worker was executing at that time.

When you should use Node JS

ref – https://livecodestream.dev/post/when-you-should-and-should-not-use-nodejs-for-your-project/

A multi-threaded program has a pool of threads that run concurrently to accept requests. The number of threads used by the program is limited by the system’s RAM or other parameters. So, the number of requests it can process at a given time is limited to this number of threads.

Whereas the single-threaded Node.js program can process any number of requests at a given time that are in the event queue to be executed. Node’s event loop uses a single-threaded implementation when handling events. Each event is handled one after another in the order they arrive by a single processor thread. The requests received to a Node web server are served in the order they were received.

However, there is a downside to Node.js being single-threaded. The single-threaded implementation makes Node a bad choice for CPU-intensive programs. When a time-consuming task is running in the program it blocks the event loop from moving forward for a longer period. Unlike in a multi-threaded program, where one thread can be doing the CPU-intensive task and others can handle arriving requests, a Node.js program has to wait until the computation completes to handle incoming requests.

Node.js introduced a workaround for this problem in version 10.5.0: worker threads. You can read up more on this topic to understand how to use worker threads to solve this problem for CPU-intensive programs.

You may now have a question? How can a single thread handle more events at a given time than a thread pool if events are handled one after another and not concurrently? This is where Node’s asynchronous model steps in. Even though the Node’s event loop implementation is single-threaded, it achieves a concurrent-like behavior with the use of callbacks.

Assume you want to connect to a separate API from your Node server to retrieve some data.

You send a request to this particular API from the server. You also pass a callback function with the instruction on what to do when the response from the API is received.

After executing the task that makes the request to the API, the Node program doesn’t wait for the response from the that API. Instead, after sending the request, it continues to the next step of the program. When the response from the API arrives the callback function starts running, and therefore handles the received data. In this manner, the callback function runs concurrently to the main program thread.

In contrast, in a synchronous multi-threaded program, the thread sending making the API call waits for the response to arrive to continue to the next step. This does not stall the multi-threaded program because, even though this one thread is waiting, other threads in the thread pool are ready to accept receiving requests.

The asynchronous feature is what makes the single-thread of the Node.js program quite efficient. It makes the program fast and scalable without using as many resources as a multi-threaded application.

Naturally, this makes Node a good fit for data-intensive and I/O intensive programs. Data-intensive programs are focus on retrieving and storing data, while I/O-intensive programs focus on interacting with external resources.

When to Use Node.js?

Now back to our main question. When should you use Node.js for your projects? Considering the main features of Node.js and its strengths, we can say

– data-driven
– I/O-driven
– event-driven
– non-blocking

applications benefit the best from a Node.js implementation.

Especially, web backends that follow microservices architecture, which is now growing in popularity, are well suited for a Node implementation. With the microservices architecture, sending requests from one microservice to another becomes inevitable. With Node’s asynchronous programming, waiting for responses from outside resources can be done without blocking the program thread.

Unlike a multi-threaded program, which can run out of threads to serve incoming requests because many threads are waiting for responses from external resources, this I/O-intensive architecture does not affect the performance of the Node application. However, web servers that implement computational-heavy or processes-heavy tasks are not a good fit for Node.js. The programming community is still apprehensive of using Node with a relational database given Node tools for relational databases are still not as developed as compared to other languages.

Heavy Computational Applications

If your application is likely to run tasks that involve heavy computing and number crunching, like running the Fibonacci algorithm, Node.js is not the best language to turn to. As discussed above, the heavy computation blocks the single-thread running in the application and halts the progress of the event loop until the computation is finished. And it delays serving the requests still in the queue, which may not take as much time.

If your application has a few heavy computational tasks, but in general benefits from Node’s characteristics, the best solution is to implement those heavy computational tasks as background processes in another appropriate language. Using microservices architecture and separating heavy computational tasks from Node implementation is the best solution.

Dockerize Node app

ref – https://nodejs.org/en/docs/guides/nodejs-docker-webapp/

Creating the Node App

First, npm init, which crates a package.json file.

Then npm i express

Your package.json file should look something like this:

Or you can just touch a package.json file, and run npm install. If you are using npm version 5 or later, this will generate a package-lock.json file which will be copied to your Docker image.

Then, create a server.js file that defines a web app using the Express.js framework:

In the next steps, we’ll look at how you can run this app inside a Docker container using the official Docker image. First, you’ll need to build a Docker image of your app.

Dockerize it

A Dockerfile is a text document that contains all the commands a user could call on the command line to assemble an image. Using docker build users can create an automated build that executes several command-line instructions in succession.

Create an empty file called Dockerfile in the main directory (where your package.json file is):

Open the Dockerfile in your favorite text editor

The first thing we need to do is define from what image we want to build from. Here we will use the latest LTS (long term support) version 14 of node available from the Docker Hub:
FROM node:14

Next we create a directory to hold the application code inside the image, this will be the working directory for your application:


# Create app directory
WORKDIR /Users/ricky_tsao/Desktop/dockerizeNode

This image comes with Node.js and NPM already installed so the next thing we need to do is to install your app dependencies using the npm binary. Please note that if you are using npm version 4 or earlier a package-lock.json file will not be generated.


# A wildcard is used to ensure both package.json AND package-lock.json are copied
# where available (npm@5+)
COPY package*.json ./

# Install app dependencies
RUN npm install
# If you are building your code for production
# RUN npm ci –only=production

Note that, rather than copying the entire working directory, we are only copying the package.json file.

To bundle your app’s source code inside the Docker image, use the COPY instruction:

# Bundle app source
COPY . .

Your app binds to port 8080 so you’ll use the EXPOSE instruction to have it mapped by the docker daemon:

EXPOSE 8080

Last but not least, define the command to run your app using CMD which defines your runtime. Here we will use node server.js to start your server:

CMD [ “node”, “server.js” ]

Dockerfile

.dockerignore file

Create a .dockerignore file in the same directory as your Dockerfile with following content:


node_modules
npm-debug.log

Building your image

Go to the root directory that has your Dockerfile and run the following command to build the Docker image. The -t flag lets you tag your image so it’s easier to find later using the docker images command:

docker build -t rtsao6680/node-web-app .

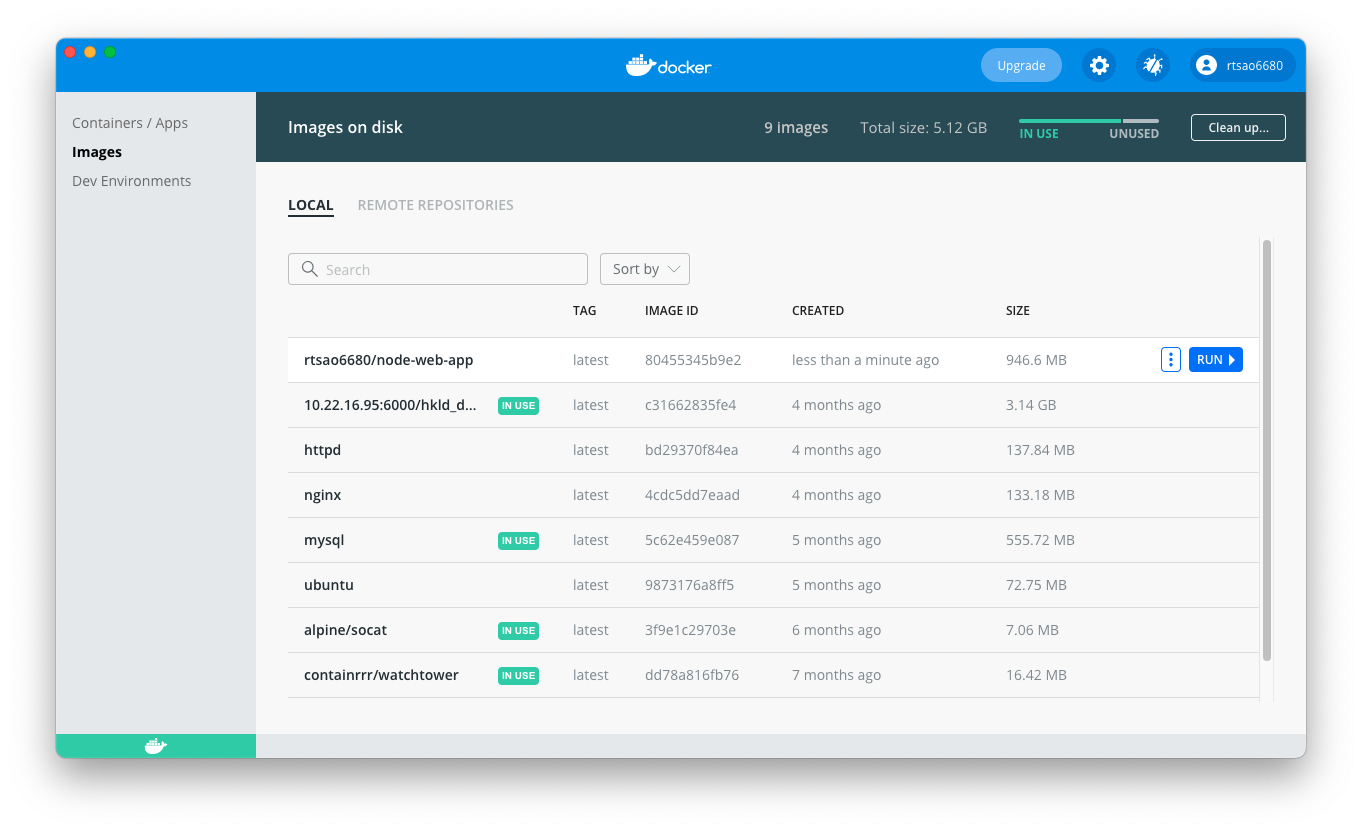
Your image will now be listed by Docker:

Run the image

Running your image with -d runs the container in detached mode, leaving the container running in the background. The -p flag redirects a public port to a private port inside the container. Run the image you previously built:

docker run -p 40000:8080 -d rtsao6680/node-web-app

so now your web will run at localhost:

http://localhost:40000/

In our case, Docker mapped the 8080 port inside of the container to the port 40000 on your machine.

You can check the status of it:

docker ps

Server side rendering (isomorphic React apps) – Data

Server

We start the server side.

At the GET verb of any url..we already have code where we store initial state in our redux. This time, let’s start it off by fetching data.

We create an initial state object, when store fetched data into an array called repositoryNames. Remember that in order to fetch in Node, we need to either use axios, or node-fetch package.

server.js

Notice thunk. Redux Thunk is a middleware that lets you call action creators that return a function instead of an action object. That function receives the store’s dispatch method, which is then used to dispatch regular synchronous actions inside the function’s body once the asynchronous operations have been completed.

Once that is done, we create our store, and place it in Provider component. Then place that into StaticRouter within our appMarkup.

This is so that we can inject it into our HTML component.

We then return this HTML component in our response object to the client.

Client Side

We do the same and apply thunk for the client. Since we already have the store and initial app state, it will match up with what the server has.

Before in App.js, where we declare our mapping to props with initialText and changeText handler, we dispatch a very simple Action object with a literal object like so:

which then get passed to reducers/index.js to be processed like so. The initialText is a simple string so we can do this:

But now, we use action objects defined in actions/index.js for more complicated procedures:

Thus, now in Home.js, we declare mapDispatchToProps with the action object getRepositoryNames:

ref – https://reactjs.org/docs/hooks-effect.html

That way, we can use getRepositoryNames inside of Home component. Since Home is a functional component, we use useEffectuseEffect runs after every render!

By default, it runs both after the first render and after every update. Instead of thinking in terms of “mounting” and “updating”, you might find it easier to think that effects happen “after render”. React guarantees the DOM has been updated by the time it runs the effects.

This is the basic case in our example.

Hence we check for props repositoryNames. If its valid, we’ll display it. If it isn’t, we’ll fetch the data so it can be rendered.

Also, useEffect has a nifty feature where it can look at a state variable. If that state changes, it will run the effect. In our case, it would fetch. Hence, I put two use cases of this:

1) value changes after each click. useEffect will run every time the button is clicked because onClick updates value everytime.
2) value changes once after clicks. So useEffect will run the first time, value updates, runs second time, and that’s it.

GET POST using fetch from client to web api

Using fetch, we get a GET request on a web API using Azure authentication and passport

node server

client

Using fetch, we get a POST request on a web API using Azure authentication and passport

node server

client

Passing a form data to the Web API with no authentication

client

DNY client (12 – basic site)

dnyNodeAPI-basic-site
npm install to install all node modules
Then, npm run dev to run the server

dny-client-basic-site
npm install to install all node modules
Then, npm run start to run the client

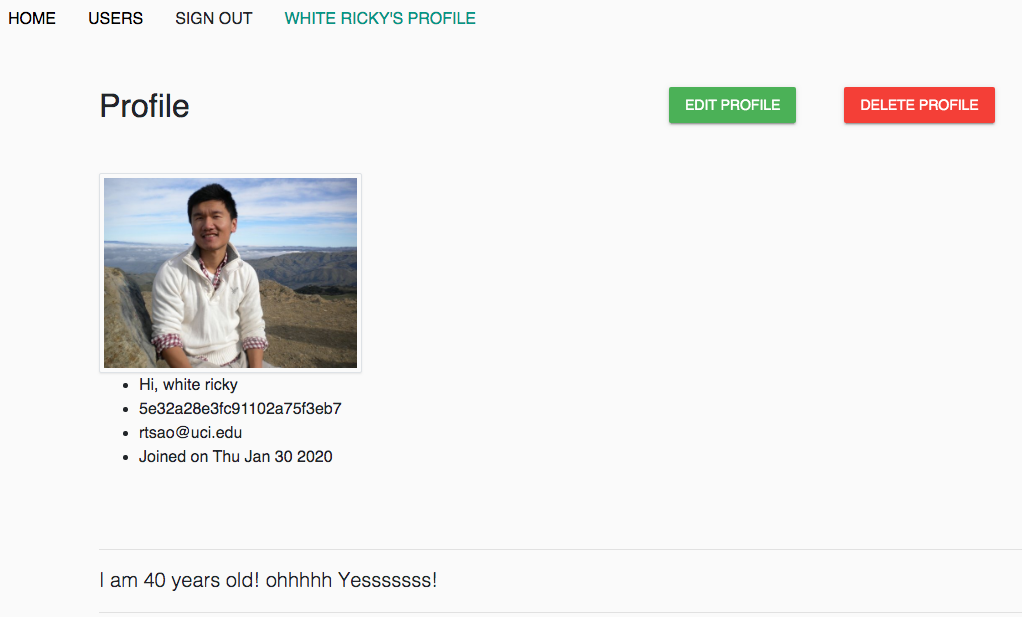
So far we have a basic site with these functionalities:

Create a user

POST on http://localhost:8080/signup
body: JSON.stringify(user)

src/auth/index.js

src/user/Signup.js

When the user successfully creates an account, we will show a link to sign in.

Authenticate a user

POST on http://localhost:8080/signin
body: JSON.stringify(user)

We first use the email and password to try to get user user data and a token back, which are both packaged into a object called ‘data’. Once we get the data, we pass it into AuthenticateUser, which will store it via localStorage at property ‘jwt’. Thus, we can always access the value at property ‘jwt’. We get this value, which has properties token and user, which we can use.

src/user/Signup.js

Once we get the token and user data successfully into the localStorage, we redirect to the main page.
The main page’s component is Home

Also, we have a Menu for navigation and showing/hiding of links according to authentication.

Menu

Basically, we use IsAuthenticated to read localStorage’s jwt value. If it’s available, we show what we want to show, like the sign-out link, user’s name, id.

User Profile

GET on http://localhost:8080/user/${userId}

The main idea is that we must give the userId so the backend knows which user to fetch. We also need to give a token so that the backend can authenticate it.

There is a situation where if you’re on someone else’s (say tom’s) profile, and you click on the user profile (john) link in the Menu, the Profile’s component render function will be called first, which will fetch and render tom’s data again. But soon after, your click on john’s profile link will trigger john’s data to be fetched also. Hence, there will two fetches.

Edit user profile

PUT on http://localhost:8080/user/${userId}
body: user

Editing is basically about updating the user on the backend.

Once we update the user, we must remember to update the localStorage with the latest retrieved user data.

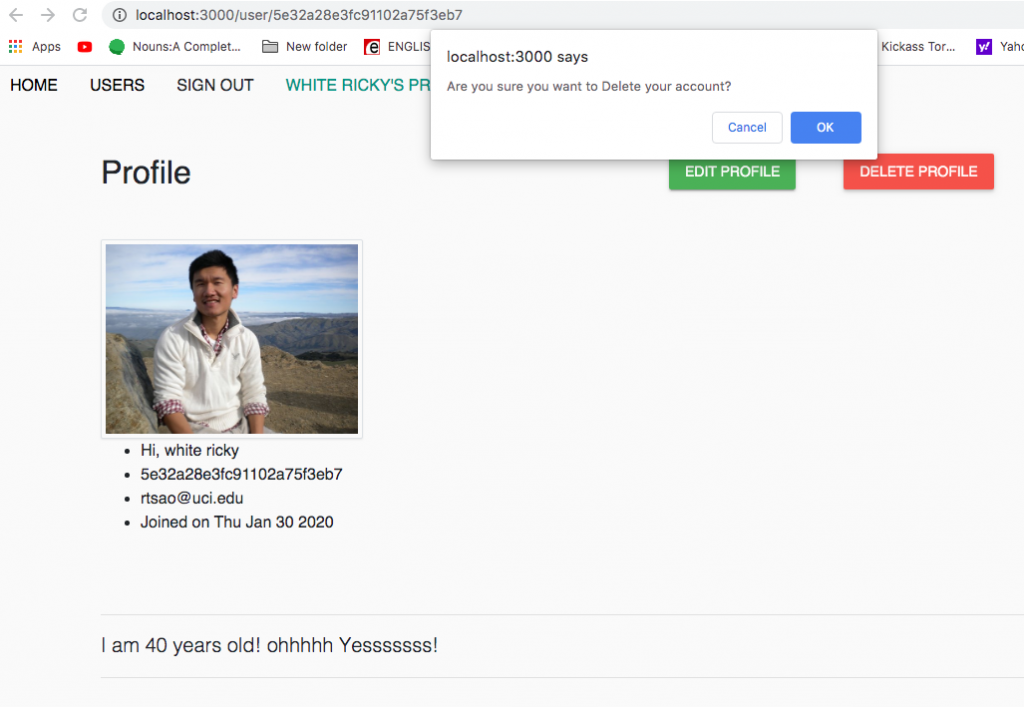
Delete user profile

removeUser does a fetch for Delete on http://localhost:8080/user/${userId}
where SignOutUser does a fetch for GET on http://localhost:8080/signout

Here, we tell the backend to clear cookie for this particular client. Cookies are stored per-user on the user’s machine. A cookie is usually just a bit of information. Cookies are usually used for simple user settings colours preferences ect. No sensitive information should ever be stored in a cookie.

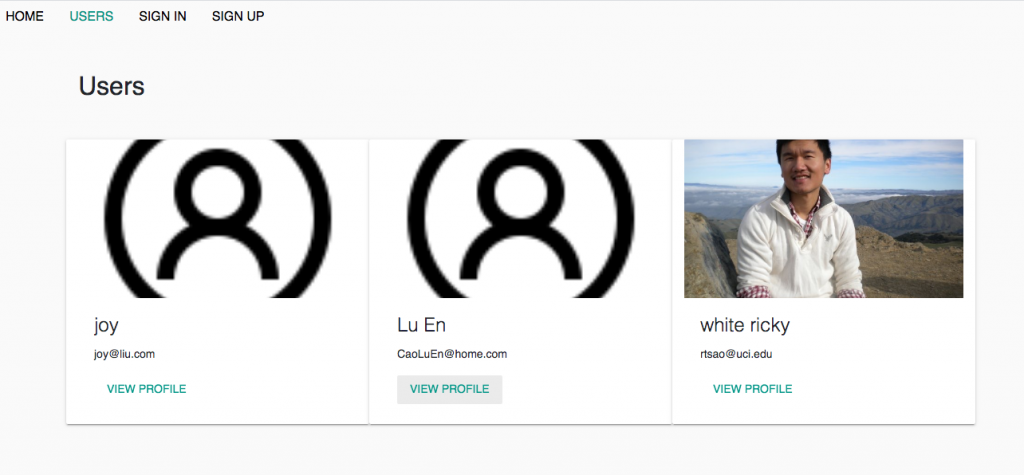
View all users

GET on http://localhost:8080/users