Category Archives: Configurations

Mac: Install MySQL and use Terminal to use it

ref – http://www.cyberciti.biz/faq/mysql-command-to-show-list-of-databases-on-server/

Determine Kernal bit 32 or 64 for Mac


See whether you have the 32 or 64 bit processor

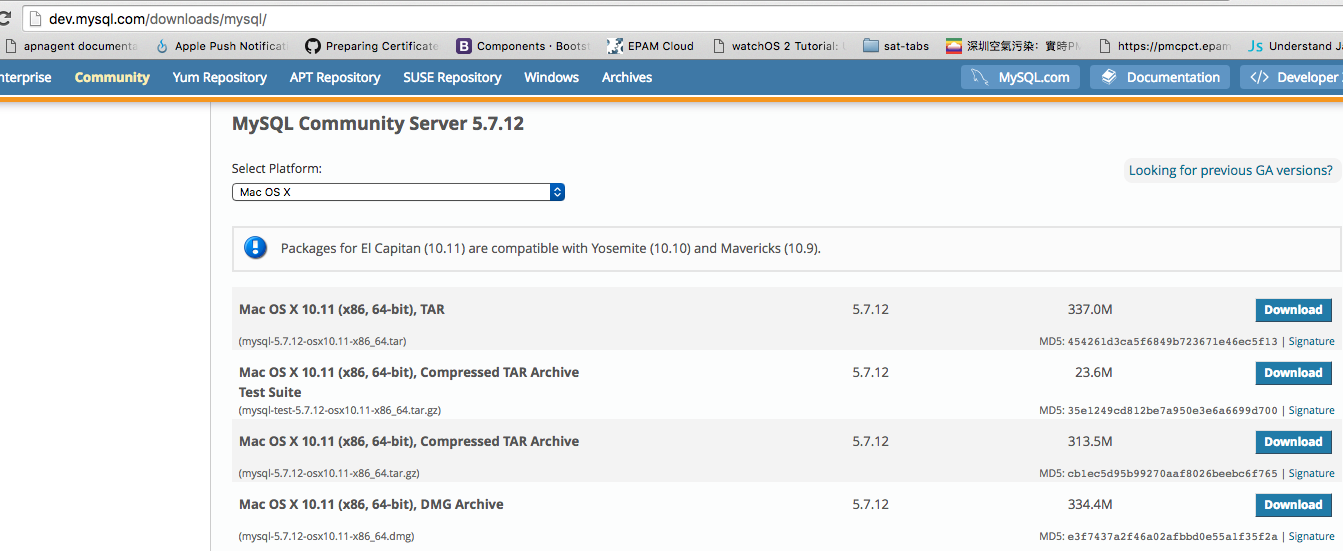
Go download the mysql dmg file from mysql’s developer page:

http://dev.mysql.com/downloads/mysql/

dmg_file_install

Locate the DMG file compatible for your machine and download it

mysql_mac

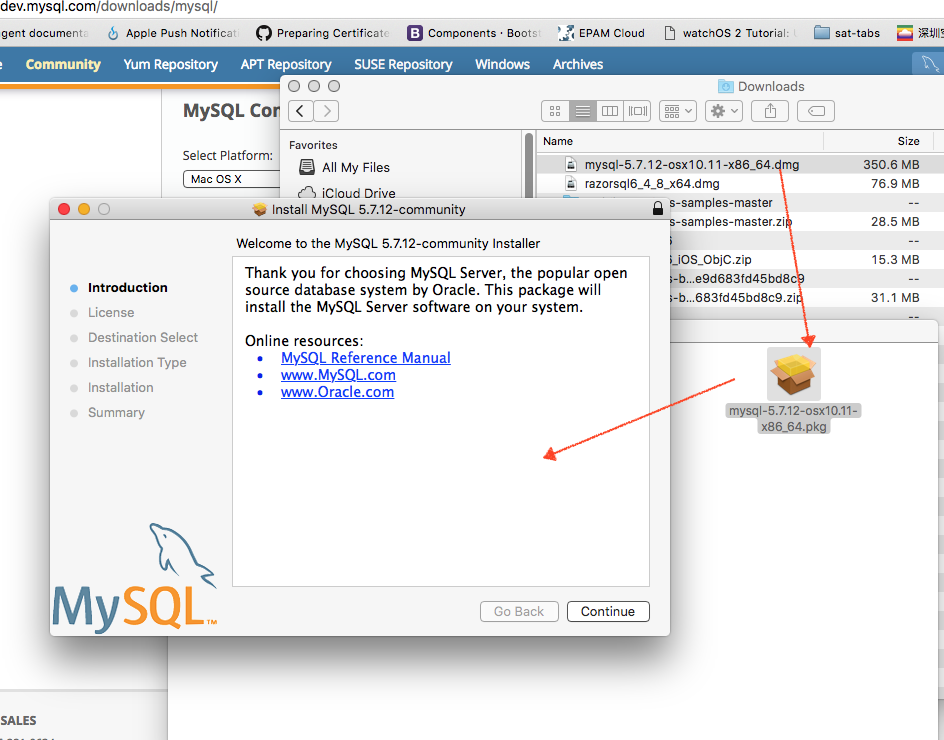
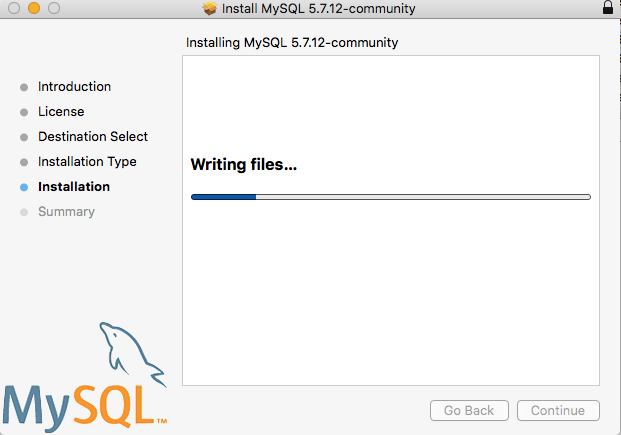
Let’s double click on the .dmg file, and double click the .pkg file to install it. Leave all the default options and continue through the installation wizard.

sql_installing

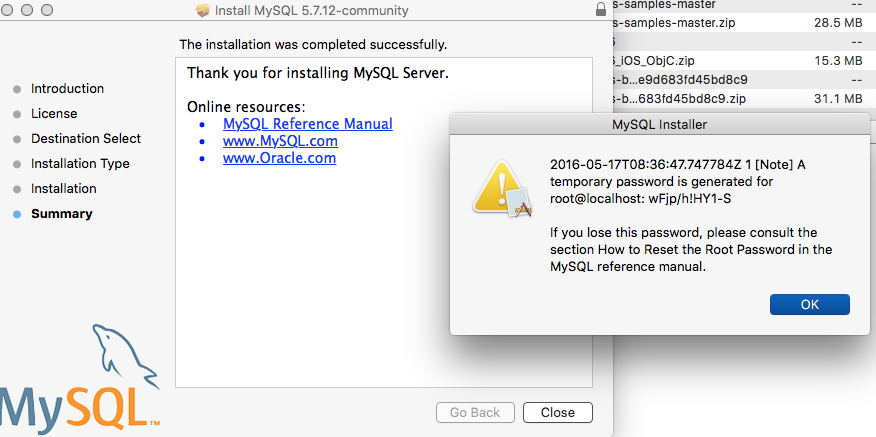
At a certain point, you’ll be given a default password. copy and paste it into a note editor because you’ll need it for the first log in, later in time.

Once you logged in the first time, you will be prompted to create a new password.

default_pwd

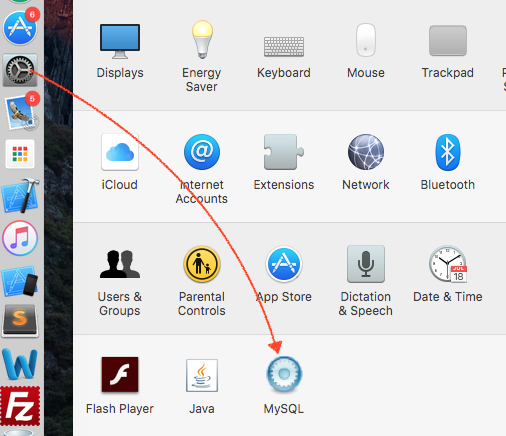
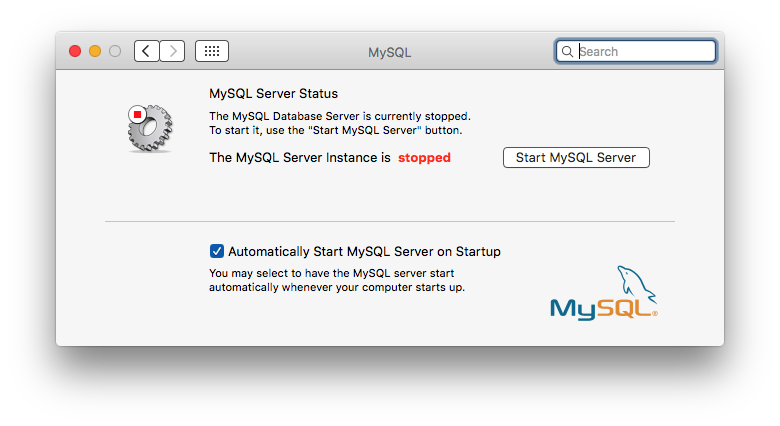
Go to your preferences, and you’ll see the SQL icon. Click on it and start the SQL server

preferences_mysql

start_mysql

Working with SQL in terminal

Open up the terminal.
Then go to the location:


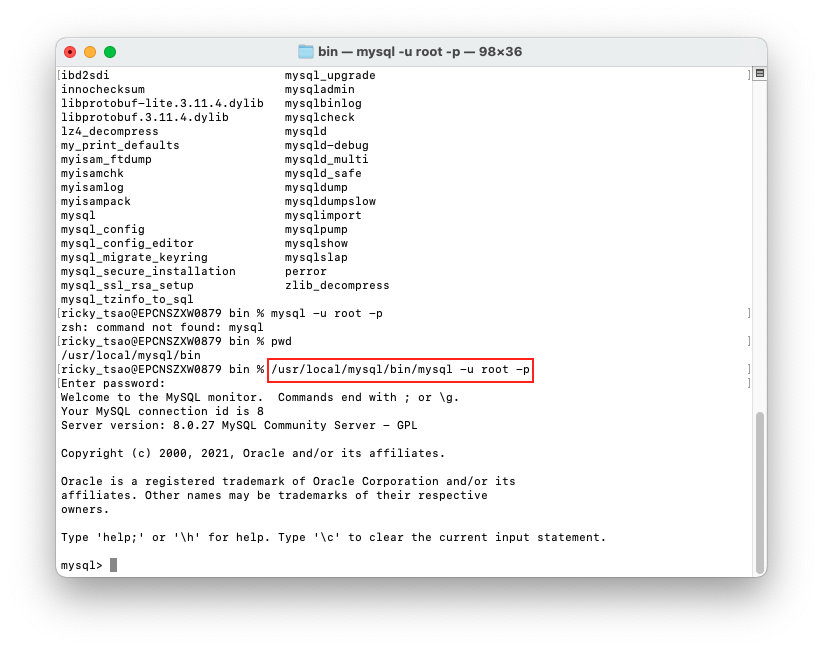
cd /usr/local/mysql/bin

You’ll see all your mysql run commands in there.


/usr/local/mysql/bin/mysql -u root -p

enter your password

Showing all Database(s)

Let’s see all the databases in the SQL server.

mysql> show databases;

+——————–+
| Database |
+——————–+
| information_schema |
| mysql |
| performance_schema |
| sys |
+——————–+
4 rows in set (0.00 sec)

mysql>

Switch to Database

There are 4 databases so far. Let’s choose one and see what kind of tables are in there.

mysql> use mysql
Database changed
mysql> show tables;

Create a Database

But, we want to create our own custom database. Let’s do so.

mysql> CREATE DATABASE MyLocalDB;
Query OK, 1 row affected (0.03 sec)

Then create a table inside of our database

mysql> use MyLocalDB
Database changed

mysql> CREATE TABLE Persons
-> (
-> PersonID int,
-> LastName varchar(255),
-> FirstName varchar(255),
-> Address varchar(255),
-> City varchar(255)
-> );
Query OK, 0 rows affected (0.35 sec)

Insert a row into your table

mysql> insert into Persons (PersonID, LastName, FirstName, Address, City) values (‘123’, ‘Saor’, ‘Rick’, ‘132 Nowhere street’, ‘Liberty Hall’);
Query OK, 1 row affected (0.07 sec)

Import another project/framework (ADAL) into your project

ref – http://www.insert.io/frameworkios8xcode6/

Let’s say we want to get a project called ADAL from the git repository and then add it to our project as an external framework for us to use.

First, let’s get the project:

git submodule add https://github.com/AzureAD/azure-activedirectory-library-for-objc adal
cd adal
git checkout tags/2.1.0

Optionally, later don’t forget to add this framework to your git, and push it.

cd ..
git add adal
git commit -m “Use ADAL git submodule at 2.1.0”
git push

Locate the ADAL project folder

the adal folder will be downloaded into your root git directory. (the one with the .git hidden folder)
You will see the ADAL project. Inside, you’ll see several folders. Locate the main ADAL folder with the source files by looking for a .xcodeproj file, along with src folder and its header/implementation files.

source_files

Drag the project over

Make sure you drag the .xcodeproj file over to your project space. Open it and you’ll see the src folders and what not. Look in the Products folder. You will see the ADAL.framework. That is what we’ll be importing into our project.

drag_project_over

Select your Target, then Build Phases, then click on Link Binary With Libraries

Also, in Target, then Build Phases, then Target Dependencies, make sure you add the ADAL framework as well

target_link_library

Click on the ADAL framework and import it.

select_it

Make sure you’ve imported the framework. The run the project.

framework_should_appear

Inserting some code

Finally, in your ViewControllelr.m, import the header file and you should get no errors.

add some define strings for the table names in our azure cloud

Let’s create a service so the view controller can communicate with the cloud tables

Set up the service with the table name and query

dyld: Library not loaded

http://stackoverflow.com/questions/24993752/os-x-framework-library-not-loaded-image-not-found

After you’d made sure there are no errors, if you run into an image not found error, it just means that in your Target, General, Embedded Binaries, click the ‘+’ button and add the ADAL ios framework from its original directory. (NOT the one you dragged into your project)

add_embedded_binaries

Using Cocoapods

ref – http://stackoverflow.com/questions/23755974/cocoapods-pod-install-takes-forever

How to install CocoaPods and setup with your Xcode project

https://www.raywenderlich.com/156971/cocoapods-tutorial-swift-getting-started

Install cocoapods

First, install pod:

The verbose option logs progress as the process runs, allowing you to watch the process instead of seeing a seemingly “frozen” screen.

Note: If you have previously installed pod and want to do a re-install do this:

Create a xCode project

Open Terminal and navigate to the directory that contains your project by using the cd command:

cd ~/Path/To/Folder/YourProject

Next, enter the following command:

Go into the root directory of the project.

This creates a Podfile for your project.
Finally, type the following command to open the Podfile using Xcode for editing:

Note: You shouldn’t use TextEdit to edit the Podfile because it replaces standard quotes with more graphically appealing typeset quotes. This can cause CocoaPods to become confused and throw errors, so it’s best to use Xcode or another programming text editor to edit your Podfile.

The default Podfile looks like this:

Delete the # and space before platform, and delete the other lines starting with #.
Your Podfile should now look like this:

This tells CocoaPods your project is targeting iOS 9.0 and will be using frameworks instead of static libraries.
In order to use CocoaPods written in Swift, you must explicitly include use_frameworks! to opt into using frameworks. If you forget to include this, and CocoaPods detects you’re trying to use a Swift CocoaPod, you’ll get an error when you try to install the pods.

Installing your Dependency

It’s finally time to add your first dependency using CocoaPods. Add the following to your Podfile, right after use_frameworks!:

This tells CocoaPods you want to include Alamofire version 4.4.0 – the latest, stable version at the time of writing this tutorial – as a dependency for your project.
Save and close the Podfile.

You now need to tell CocoaPods to install the dependencies for your project. Enter the following command in Terminal, after ensuring you’re still in the directory containing your project and Podfile:

You should see output similar to the following:
Analyzing dependencies
Downloading dependencies
Installing Alamofire (4.4.0)
Generating Pods project
Integrating client project

[!] Please close any current Xcode sessions and use YourProject.xcworkspace for this project from now on.
Open the project folder using Finder, and you’ll see CocoaPods created a new YourProject.xcworkspace file and a Pods folder in which to store all the project’s dependencies.

Adding LumberJack via source code to your project

ref – http://code.tutsplus.com/tutorials/cocoalumberjack-logging-on-steroids–mobile-15287

Go to CocoaLumberJack’s site and download their source code here

Unzip the LumberJack project and take a look at the LumberJack class folder’s source files.

lumberjack-class-directory

Import LumberJack’s Source files

Start a new xCode project.

Drag the listed files:

  • DDLog.h/.m
  • DDASLLogger.h/.m
  • DDTTYLogger.h/.m
  • DDFileLogger.h/.m
  • DDLegacyMacros.h
  • DDLegacyMacros.h

lumberjack-drag_to_proj

from the LumberJack project’s class folder, and into your project.

Creating the PCH file

Long ago, if there is a utility class that a developer needs for every of his source files, its very tiring for them to import that utility .h file in every of their source file. Hence, Prefix.pch was invented.

It is a precompiled header. It implicitly is included at the start of every source file. In other words, it’s like as if each source file adds:

Hence, you can easily include lumberjack’s functionality in all of your source code by using PCH file.

File >> New >> File
lumberjack-create-pch-file

Other >> PCH file

lumberjack-create-pch-file-2

use “Logging-PrefixHeader.pch”
make sure you check the checkbox for adding it to our target.

lumberjack-pch-file-3

Add

inside the ifndef statements.

Then at the end of the file, add

Your Logging-PrefixHeader.pch file should look like this:

Project Build Settings

Then in your Project, select your Target, Build Settings, and in the search box, type prefix. Scroll down and you’ll see Apple LLVM 7.0 – Language.

In Prefix Header, enter your .pch file name. In our case it would be Logging_PrefixHeader.pch.

Using the code

Add the following imports for DD in your AppDelegate.m file:

Then also in AppDelegate.m, insert the code as shown below:

Build and run the project. You should now see the log messages in your console.

Go to your Logging-PrefixHeader.pch file, highlight the macro LOG_LEVEL_VERBOSE, right click, and select “Jump To Definition”. Use all the different MACROS for setting what kind of log messages you want to see.

Installing xCode Colors Plugin

Install xCode color plugin by following the directions provided here.

Make sure you restart xCode.

Open up your project and in AppDelegate.m:

You should now see that your log messages are color-coded.

Adding colors to xCode debug console

download the project from here

1) Open the XcodeColors project with Xcode
2) select the XcodeColors Plugs in your target.

xcode-colors

Then compile and build it.

xcode-build

When you do this, the Xcode plugin is automatically copied to the proper location.
This is done via the build settings.

Validate by opening up Finder. While the window is opened, press command + Shift + g.

Then copy and paste the below into it.

You should see the plugin file there.

Now completely Quit Xcode
Re-Launch Xcode

linker framework issue when Cordova iOS proj adds Watch

First export an iOS project using Cordova like so here

After that, if you decide to add Apple Watch code, you must resolve some framework linker issues.

framework not found AVFoundation….etc

The idea is that when you add target for Apple Watch, it links to a few frameworks that overlaps with the Target’s frameworks. Thus, if you remove the overlapping frameworks in the Apple Watch, the linker issue will disappear.

You need to select your Watch’s extension, and under Build Settings, type in linker, and you’ll see all the frameworks that it links to.
Then remove everything except -ObjC.

linkder-issue-watchext

Do the same for Apple Watch:

linker-issue-watch

Also, make sure your build versions all match in numbers:

plist-files

Creating iOS app with Cordova

ref – https://cordova.apache.org/docs/en/4.0.0/guide/cli/

Install Cordova

Open up terminal:

Install the emulator

Creating the Cordova Project

arg1 (hello) – specifies a directory to be generated for your project. This directory should not already exist, Cordova will create it for you. Its www subdirectory houses your application’s home page, along with various resources under css, js, and img, which follow common web development file-naming conventions. These assets will be stored on the device’s local filesystem, not served remotely. The config.xml file contains important metadata needed to generate and distribute the application.

arg2 (com.example.hello) – provides your project with a reverse domain-style identifier.

arg3 (HelloWorld) – The third argument HelloWorld provides the application’s display title. This argument is optional. You can edit this value later in the config.xml file, but do be aware that there may be code generated outside of config.xml using this value, such as Java class names. The default value is HelloCordova, but it is recommended that you select an appropriate value.

Adding the iOS platform

This will create an ios folder in your Cordova’s platforms folder.

go into the ios folder, open the project in xCode, and run it.