Category Archives: Configurations

Flutter Dev Portfolio – part 1 (setup)

Developer Portfolio Setup

Setup the Project

cmd + shift + p

Create a new folder on your desktop called DevPortfolio

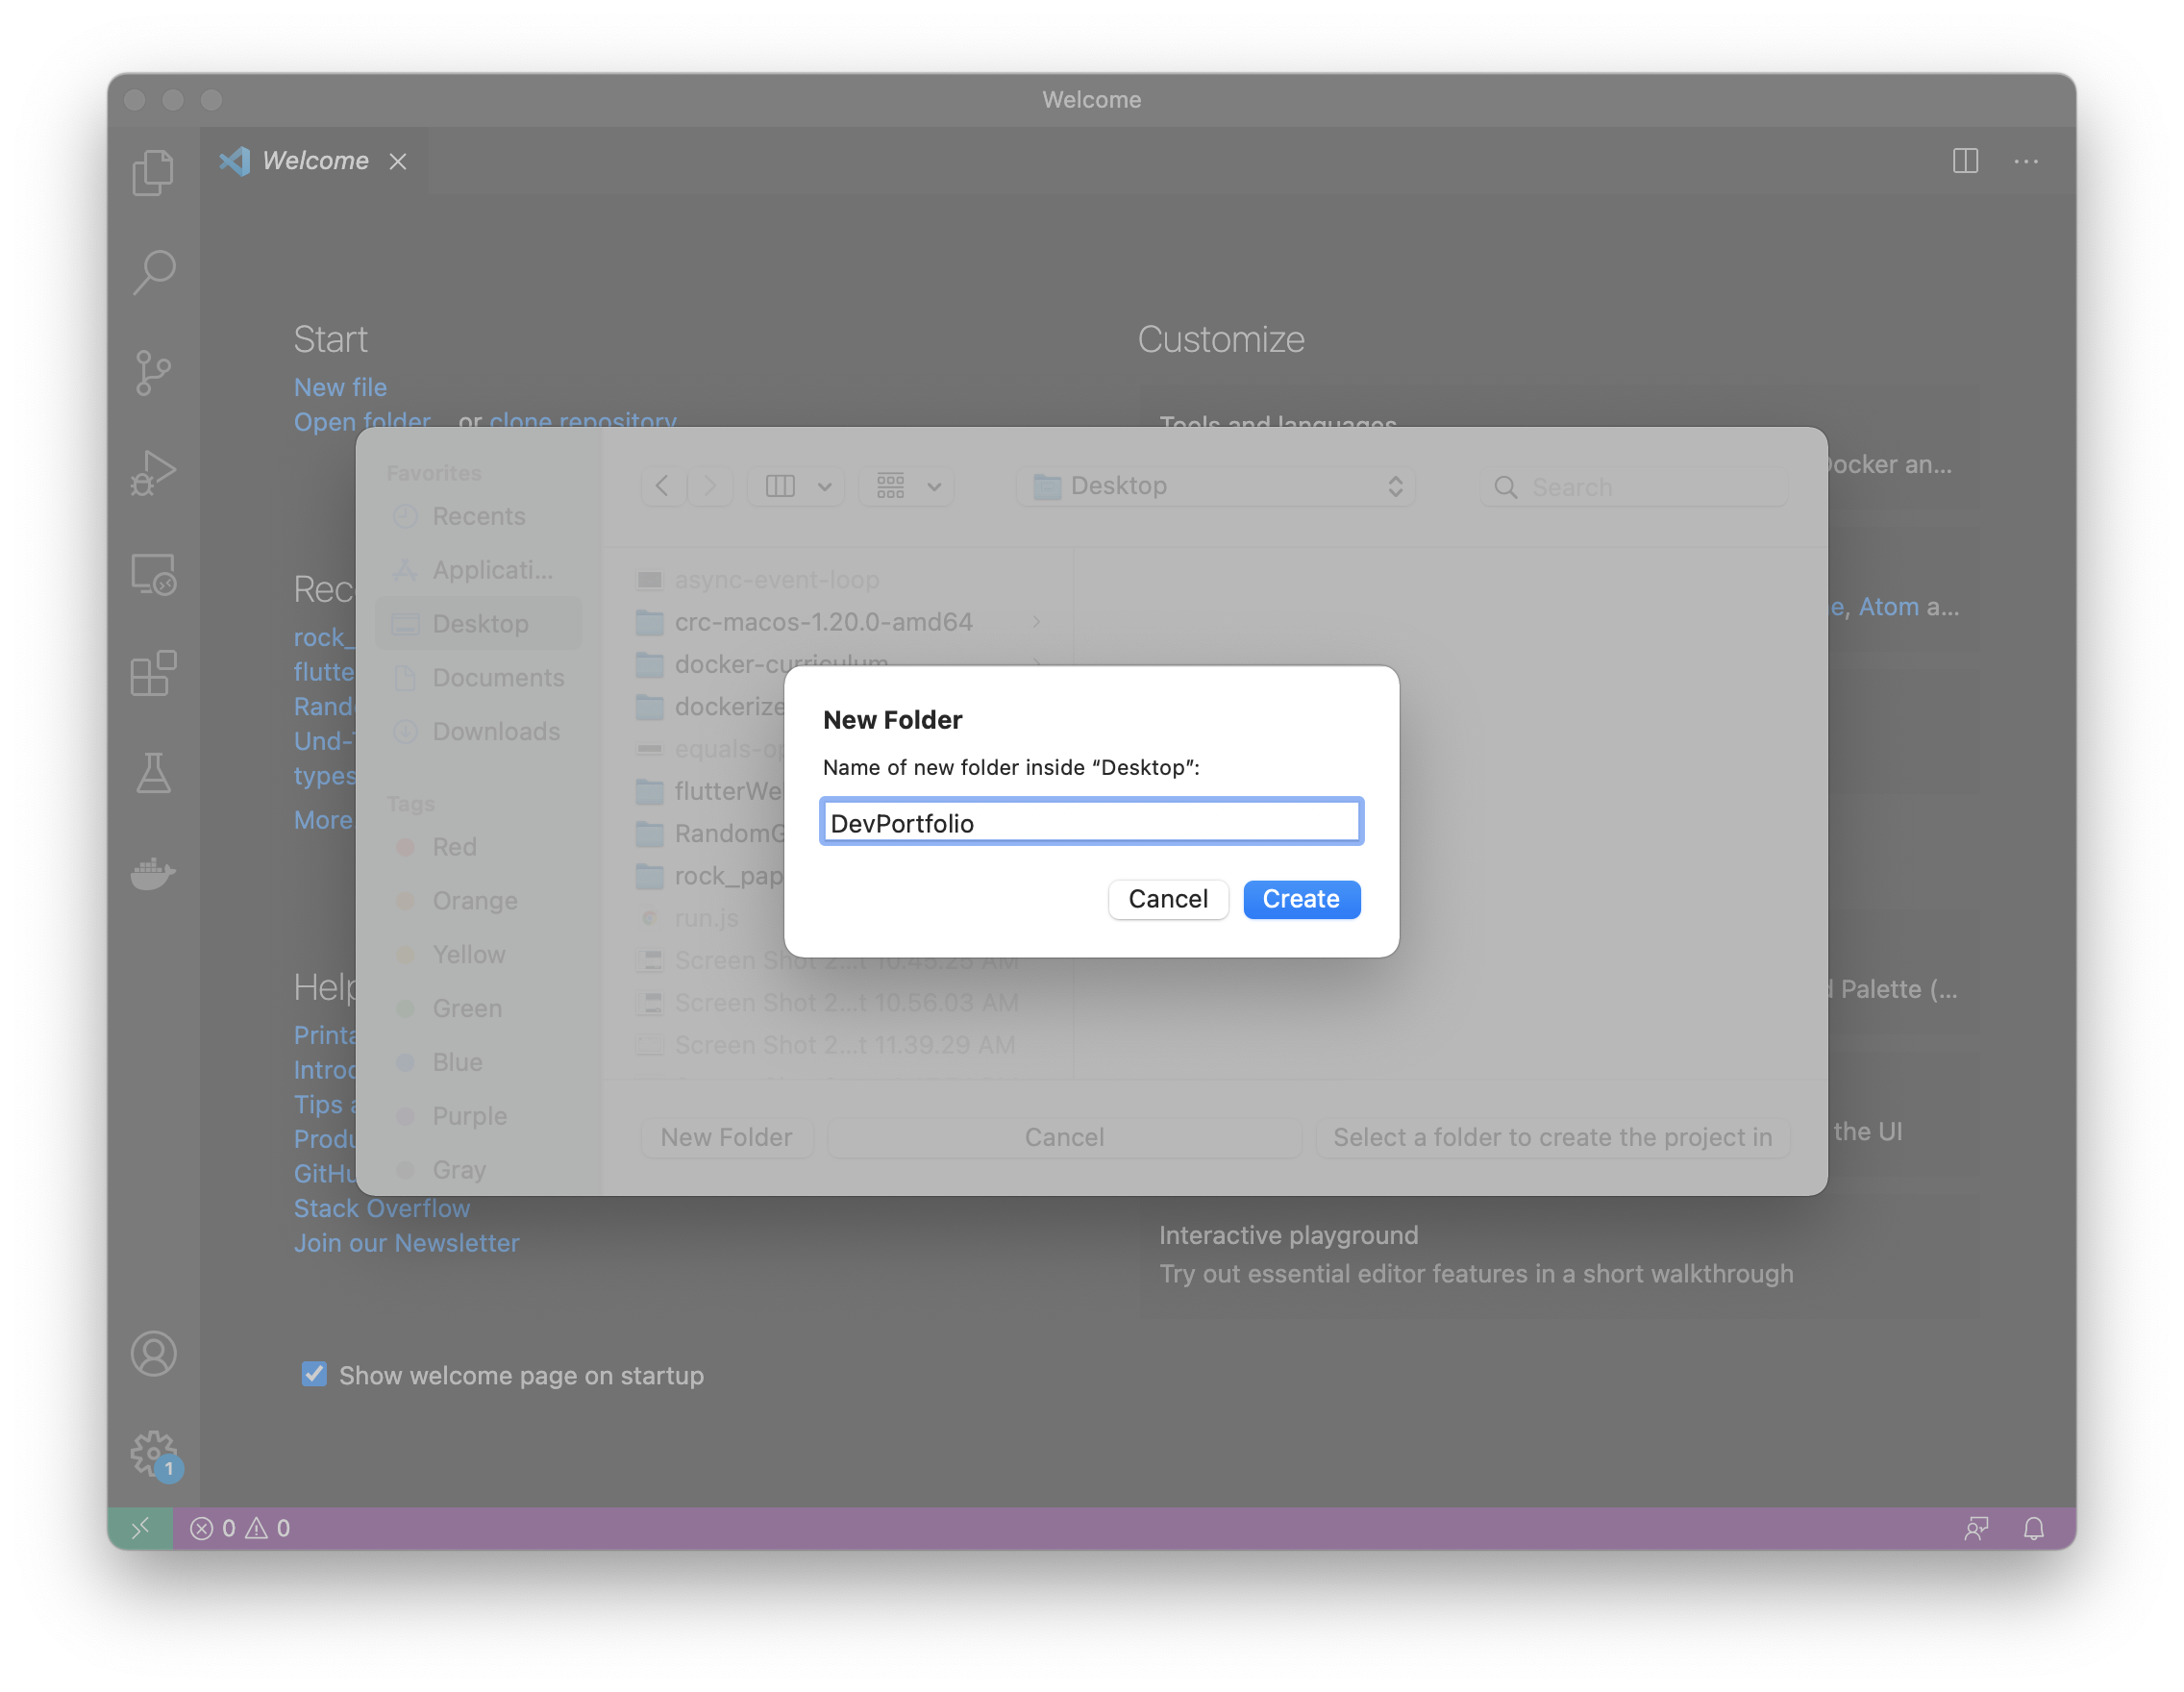
Select the newly created folder to create your project in

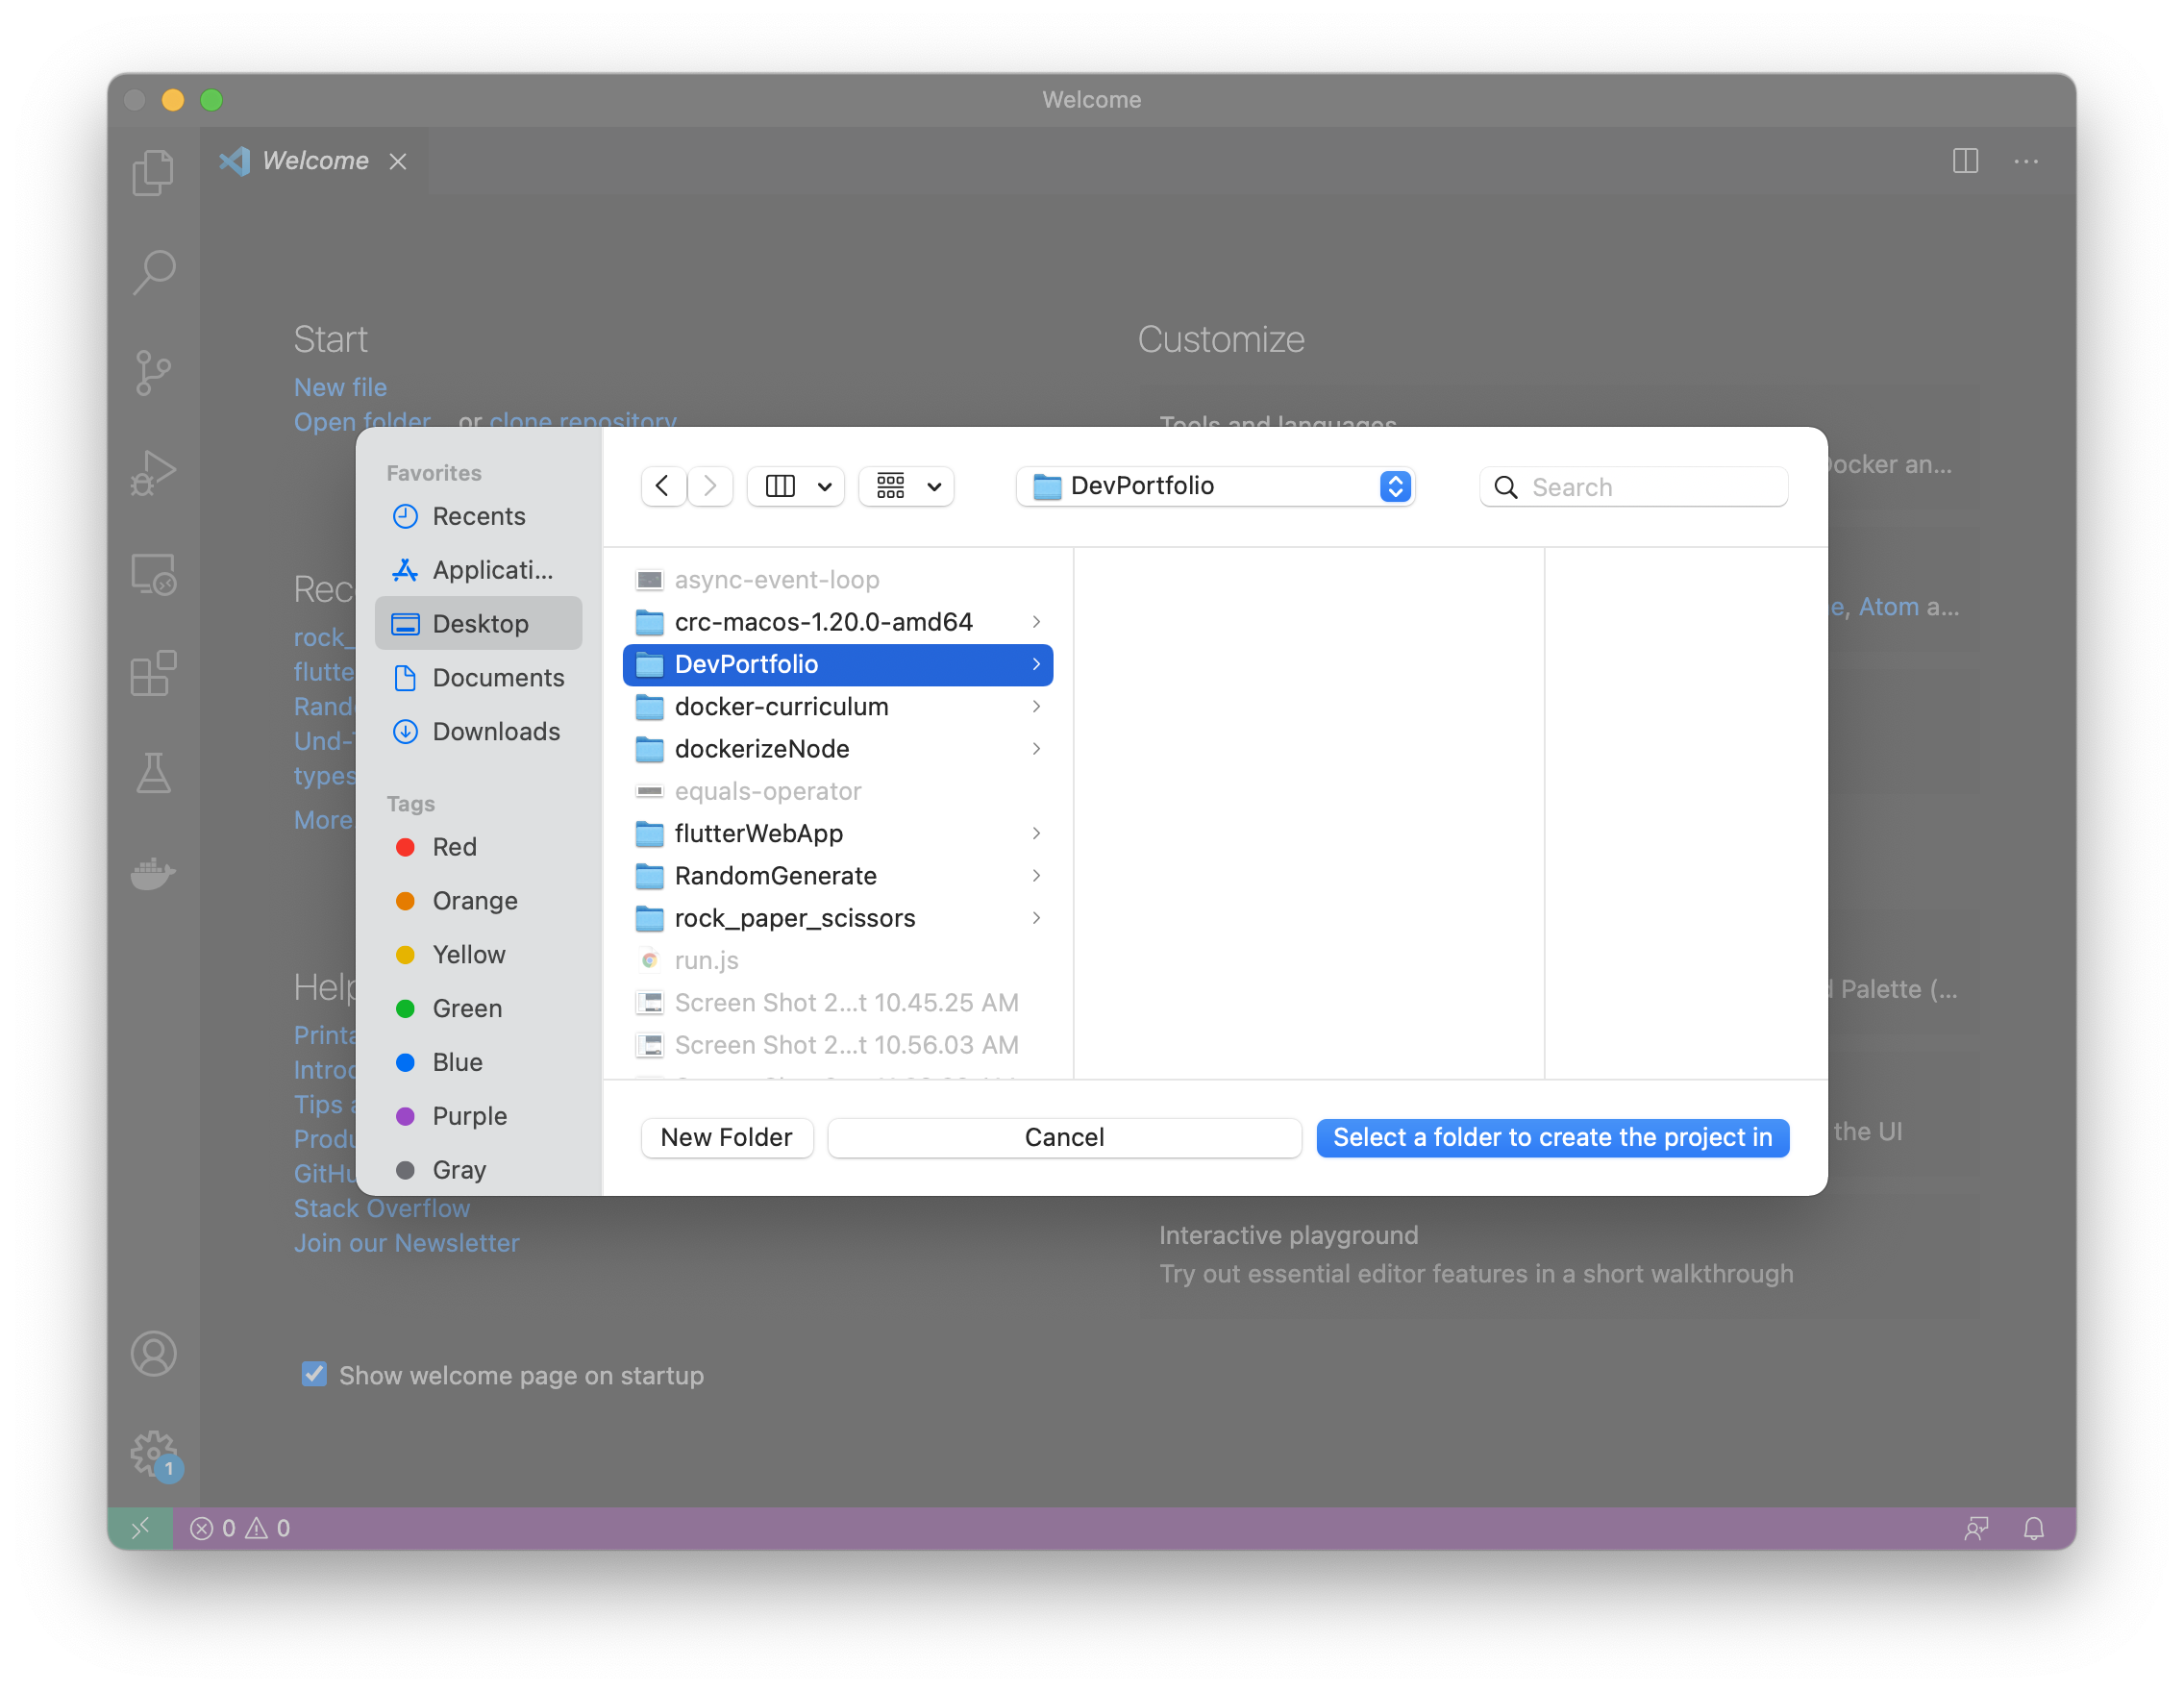
Use lowercase to enter a project name.

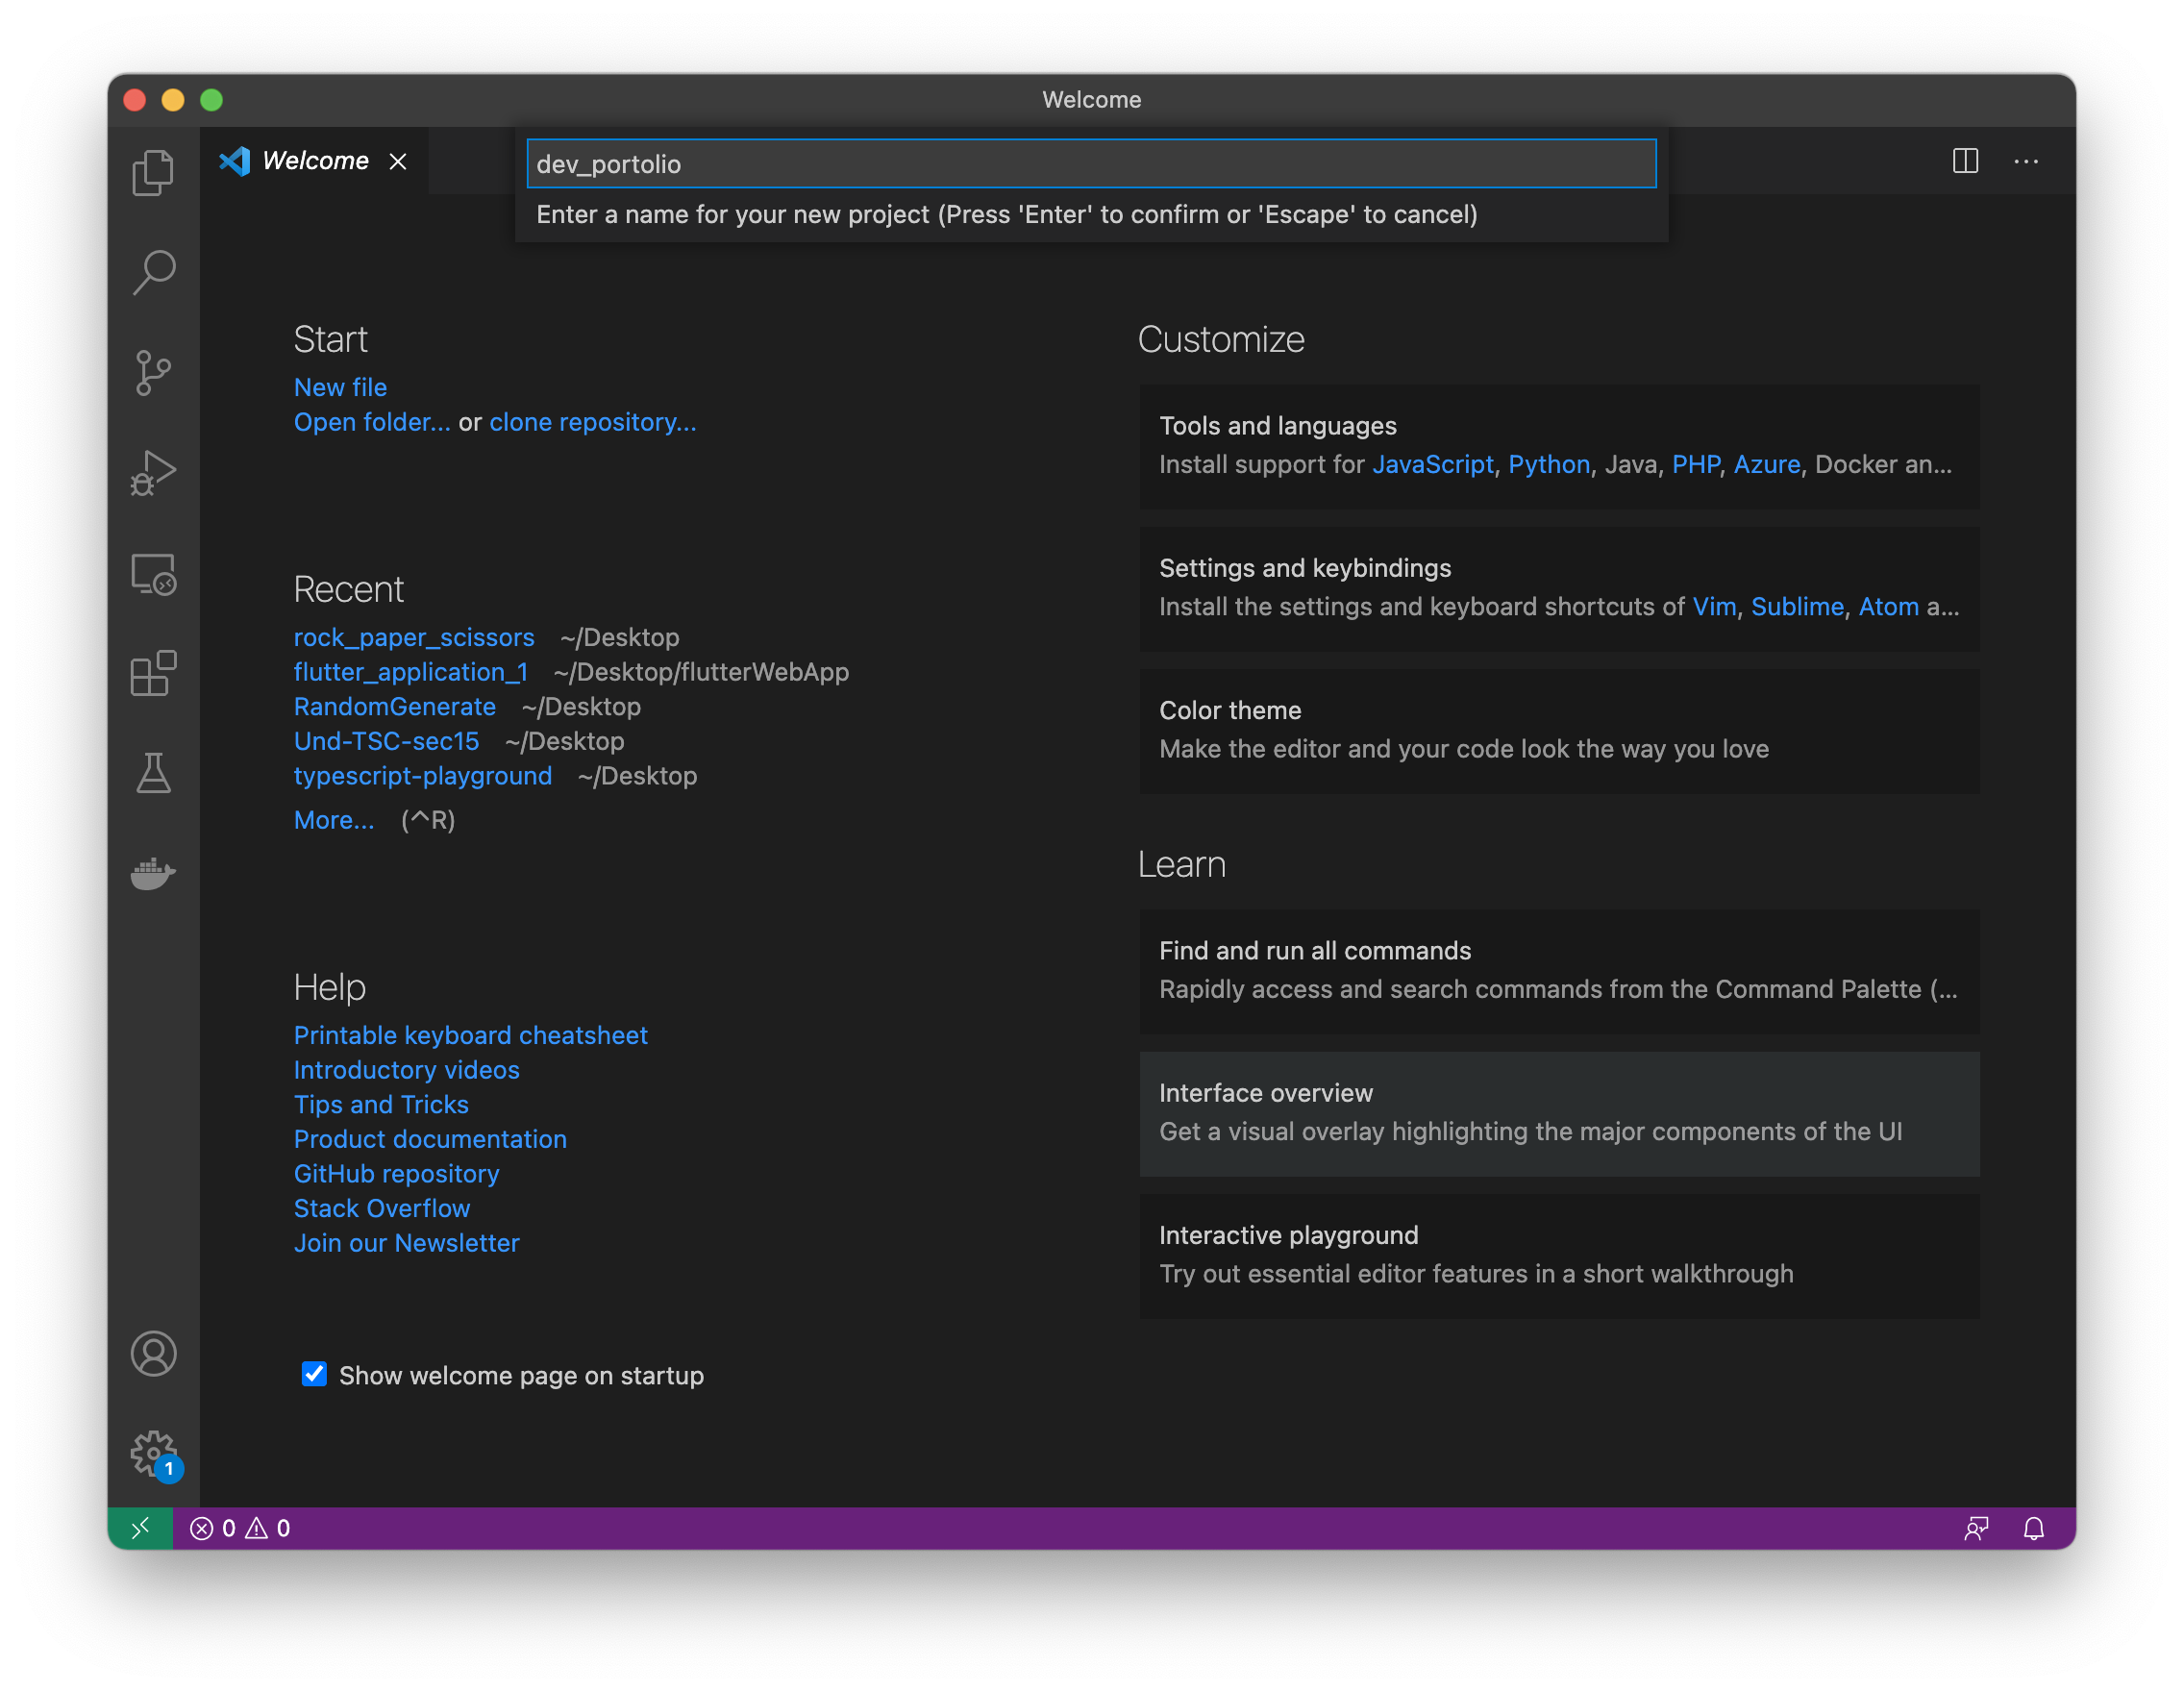
Finally, you should see your project being created.

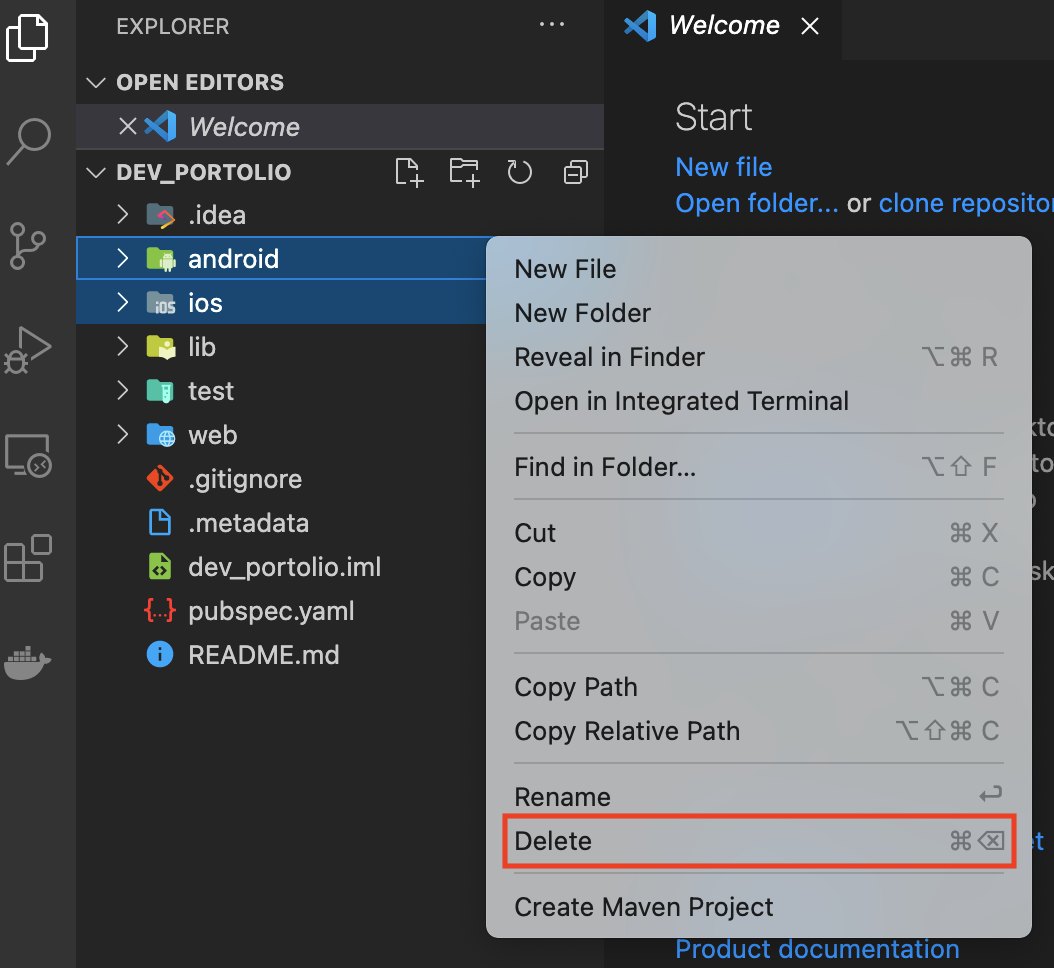
Delete the iOS and Android folders

The project should have been created successfully. If you see that creation process hangs because its still downloading, cancel it. Open the terminal and in the project directory type:
flutter pub get

Open up lib/main.dart.

Delete everything below class MyApp.

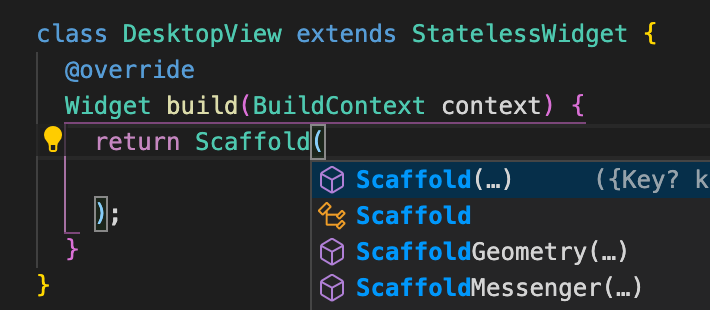
type stl, then tab. Let’s create a Stateless Widget called DesktopView.

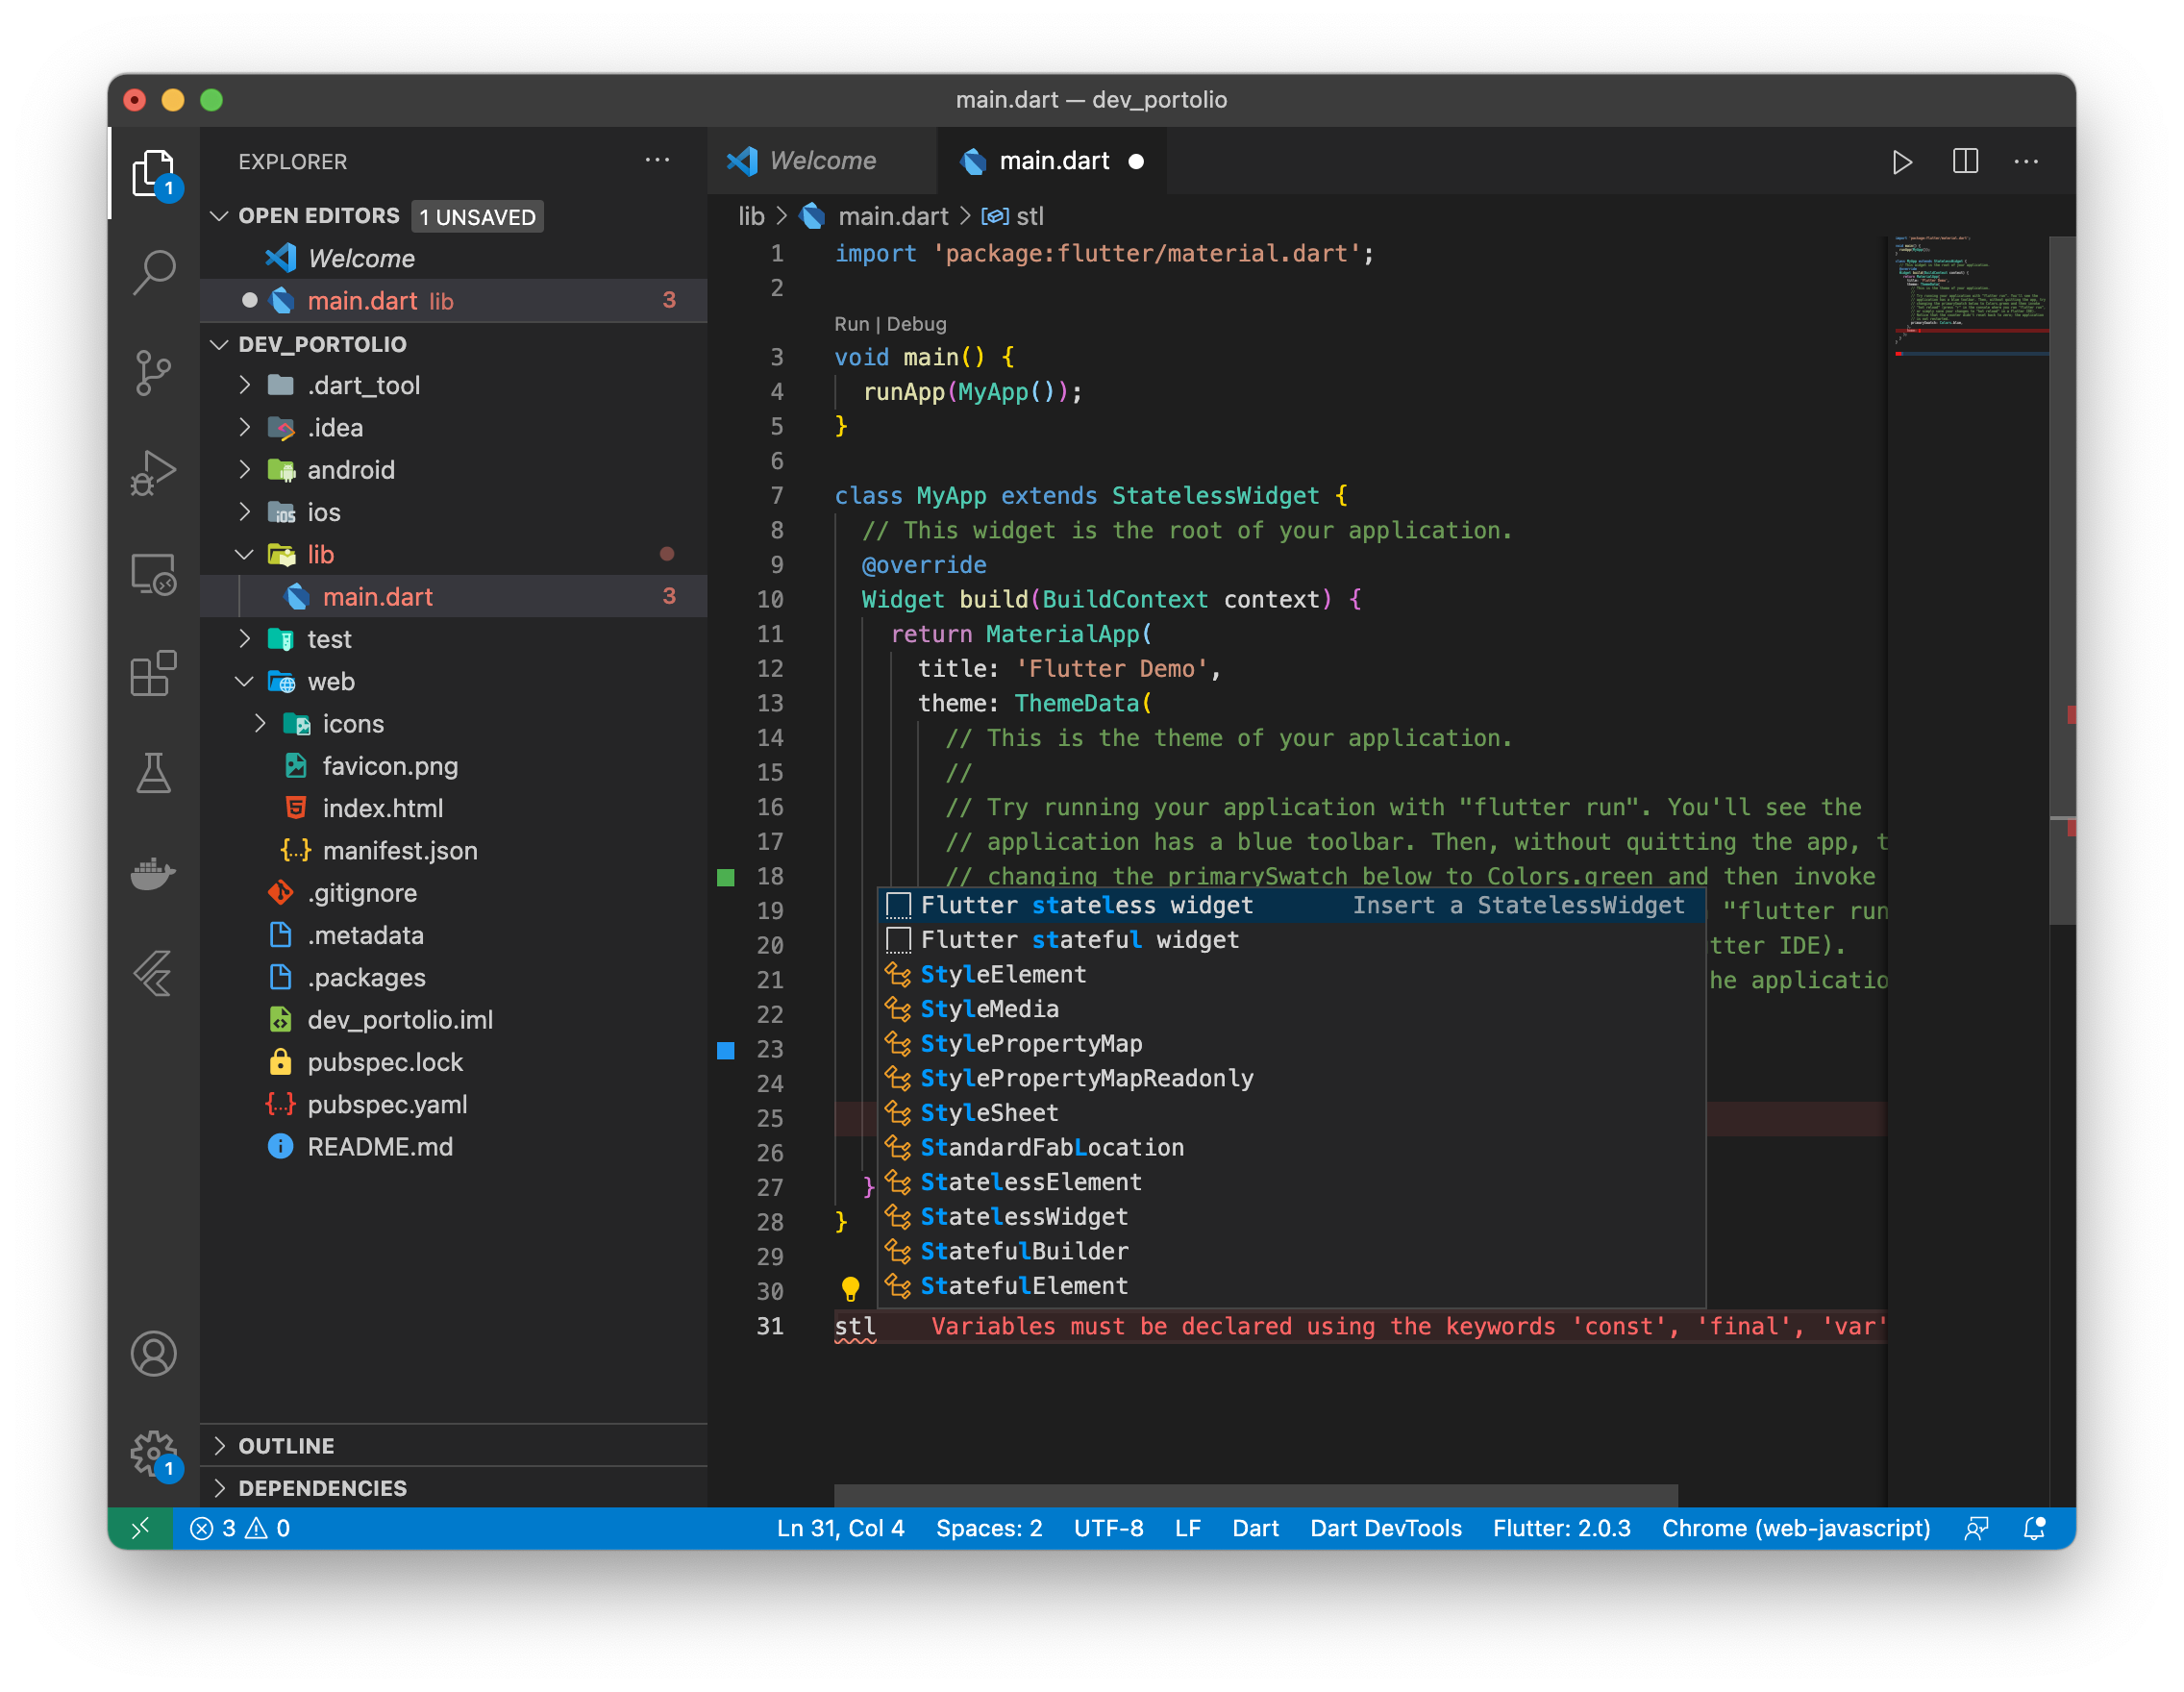
should give you code generation like so:

replace Container with Scaffold, which is a Material Design Layout.

Let’s instantiate our DesktopView class for property home

Media Query returns us the size of the current media. i.e the window containing our app.

Put this at the beginning of the over-ride build function.

Run > Start Debugging

Make sure you use Chrome as your browser. Wait a while. A browser will pop up. Try to resize it. You will see that our output will be updated with the new window size.

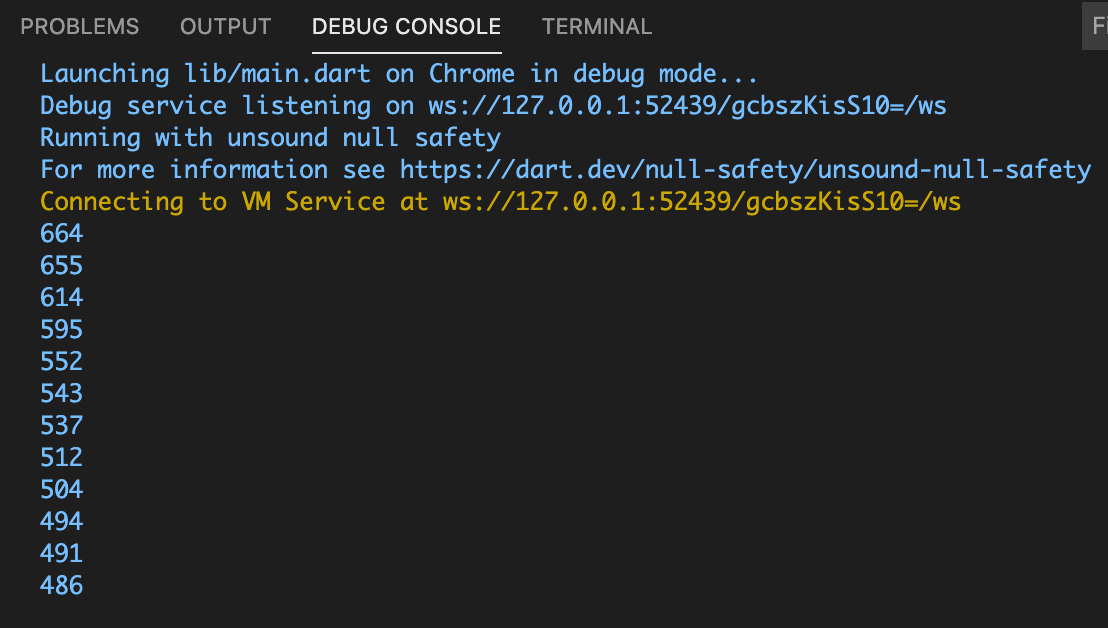
build method will only refresh when size is changed.

Make it Scrollable

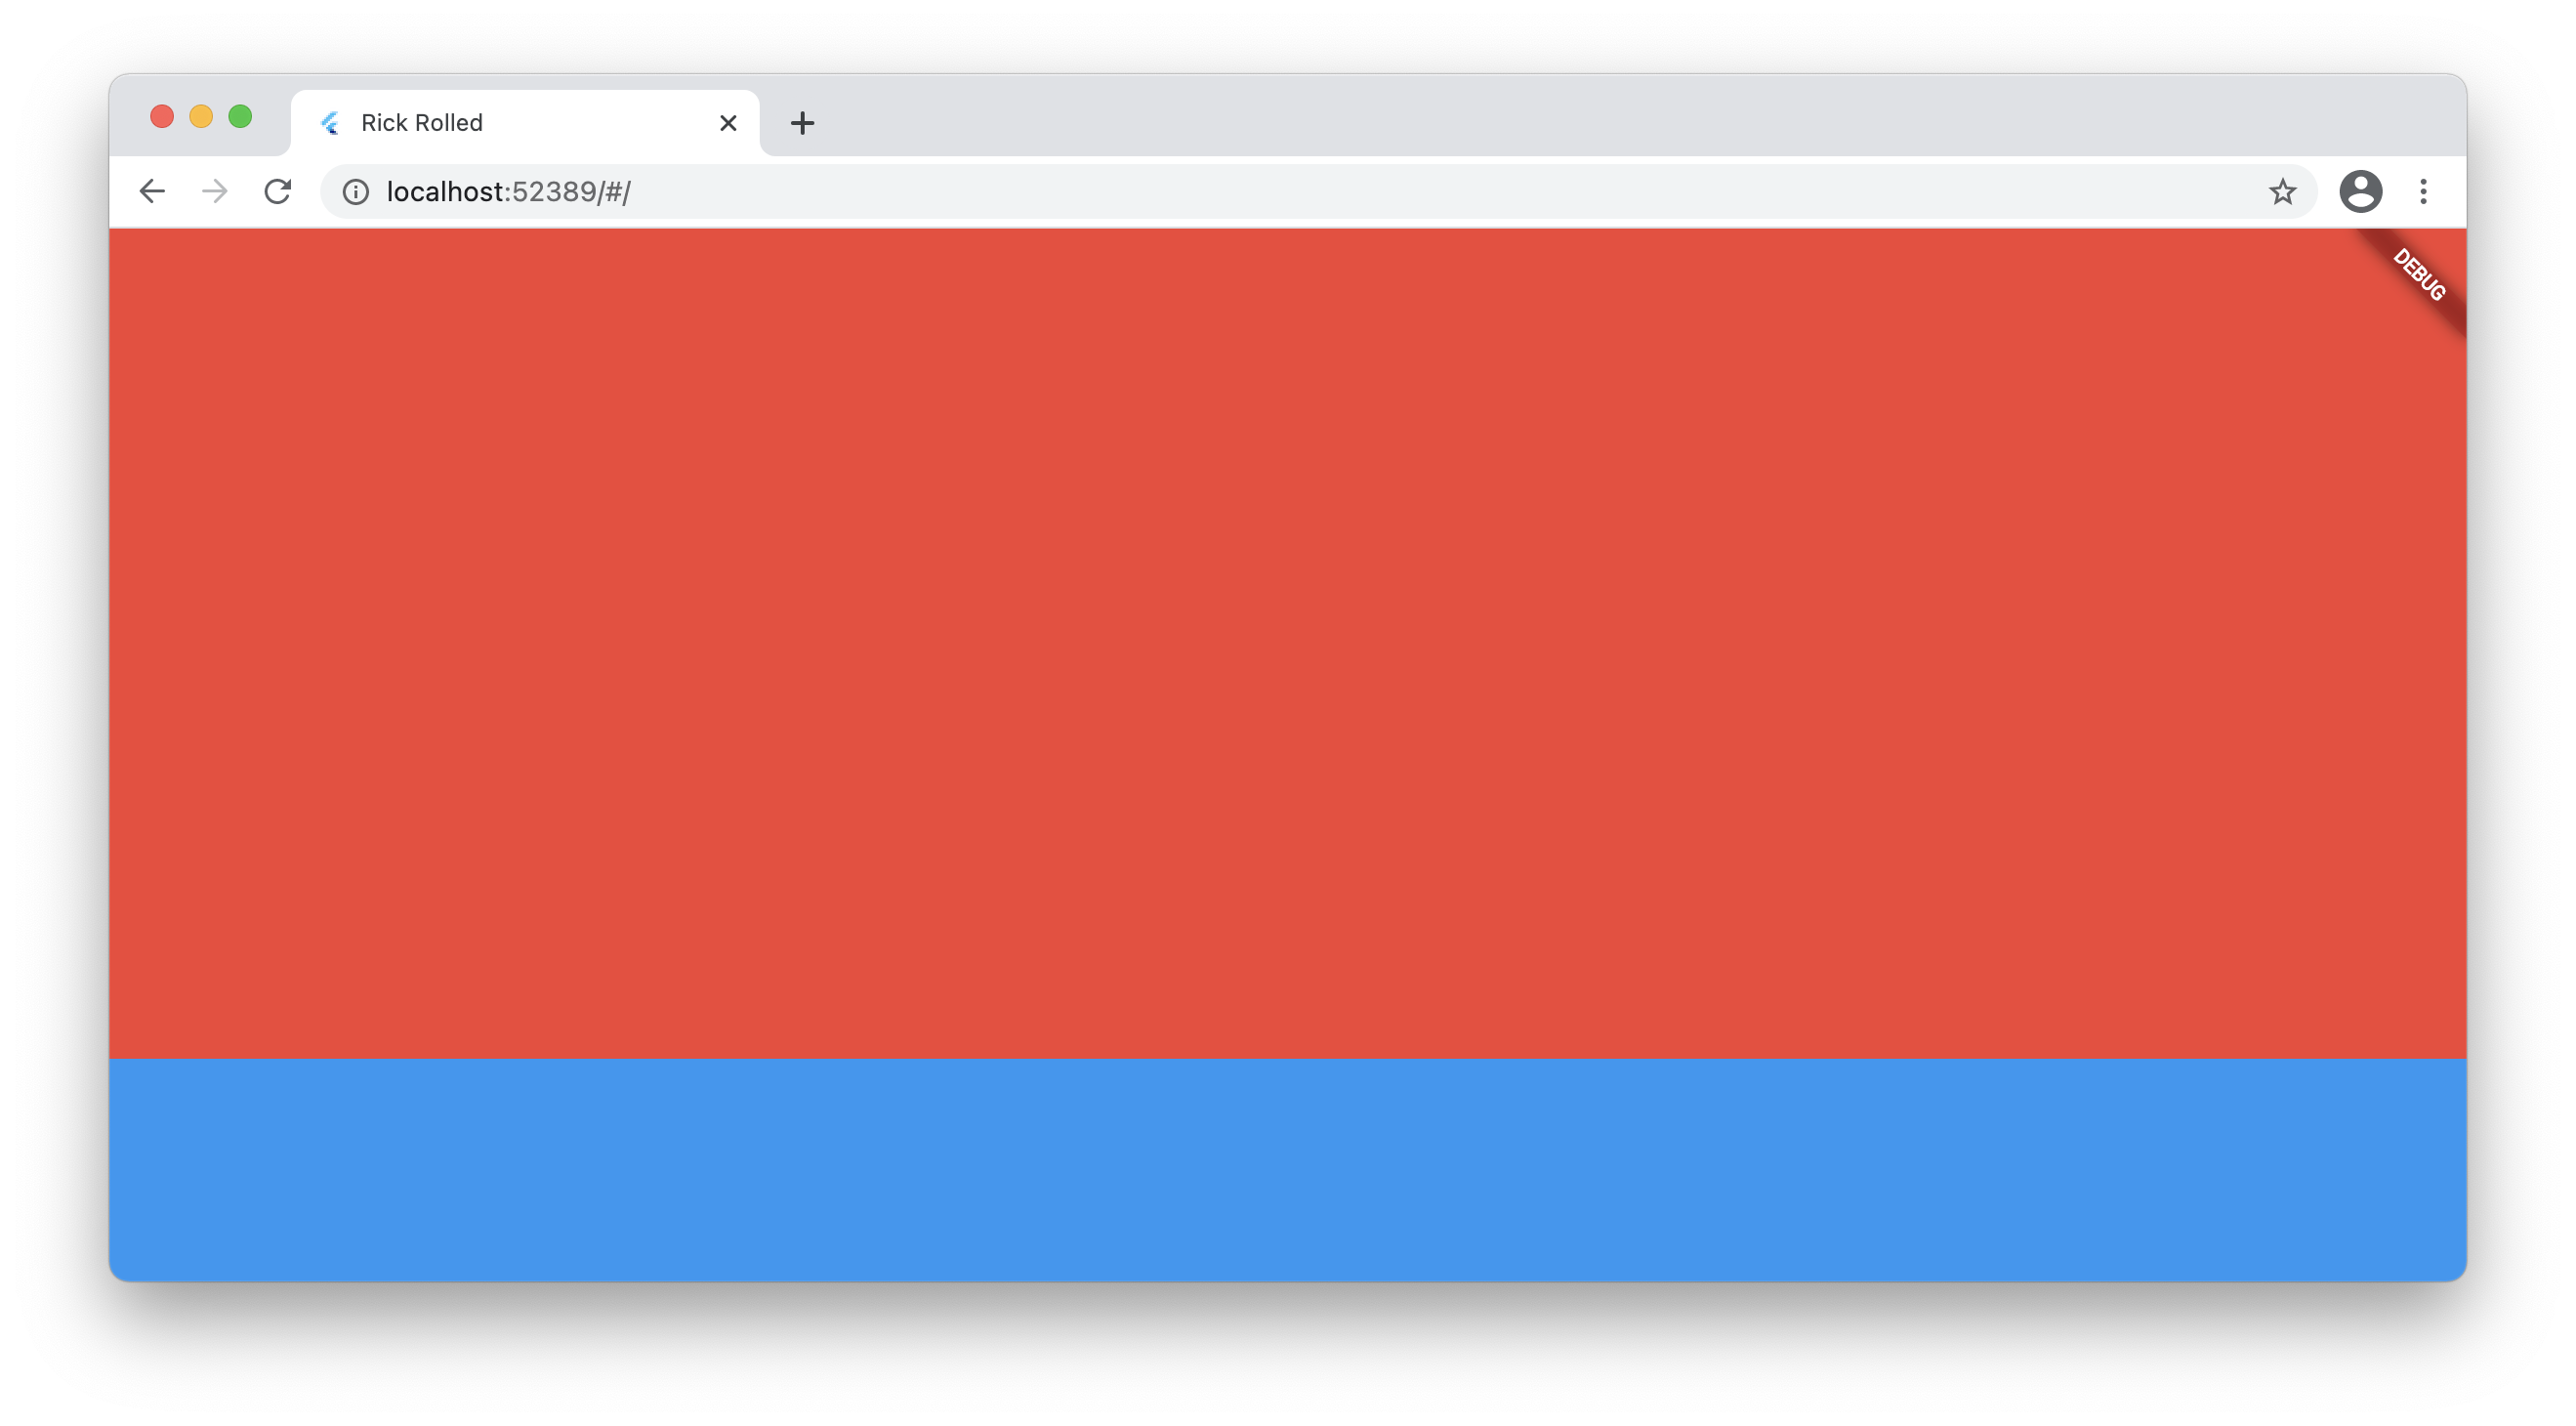
Let’s add two containers with different colors. But since our body Column is not scrollable, our 2nd container will overflow. In order to solve this, we simply our Column in SingleChildScrollView.

So now, our body is the SingleChildScrollView, which has a child of Column. Within the column, we have two containers.

Now, when you save, the project will hot save, and we’re able to see the two containers and scroll up and down.

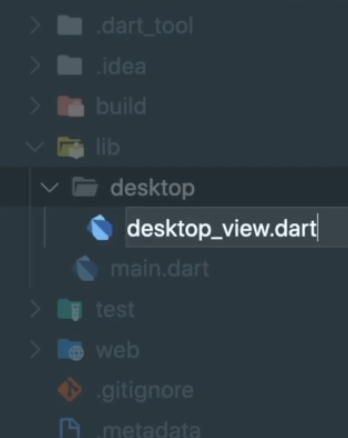
Under lib, create folder called desktop. Then create desktop_view.dart file.

When you copy and pasted the desktop view code into our desktop_view.dart, we’ll see a bunch of errors. This is because we need to import material.dart from the flutter package.

go ahead and do: cmd + .

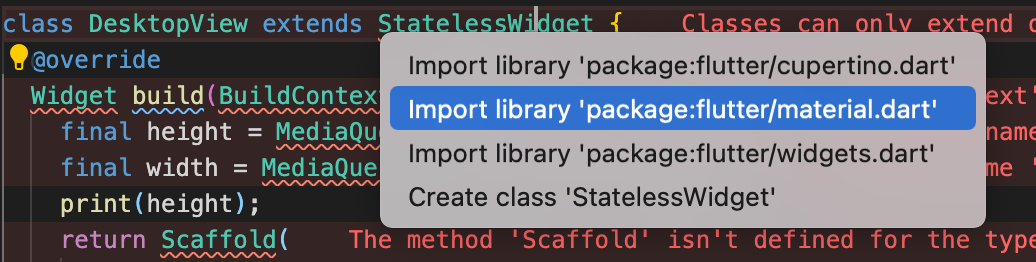
Now the errors will be gone.
Do the same in main.dart and import our desktop_view.dart file. So that DesktopView() can be used.

Layout of the Site

Let’s layout the text and logo for the site.
So for the first Container on top, let’s give it a static height and width. That way we control it to be smaller than the bottom (blue) region.

Then we put a Row, and specify its children to be a Column and a logo.
In the column, we have children of texts. And in order to align them, we use axis alignments.

Google Fonts

Let’s download google_fonts using our pubspec.yaml file.

Open it up and underneath dependencies, let’s download google_fonts 2.0.0

Save and in your project directory: flutter pub get
Your google fonts are now available as dependencies, instead of resources.

In our text, let’s use the following to apply montserrat font style to our text:

then put some spaces between our texts:

Create rounded red button

There is a named property in TextButton called style. We assign a ButtonStyle instance to it. Within the ButtonStyle class, there is a shape property.

We call MaterialSTateProperty.all because its just a convenience method for creating a [MaterialStateProperty] that resolves to a single value for all states. For every state of this button, we use this shape, which is 18.0 border Radius, and side of color Red.

Refactor our code

So we have two Containers. The top Container contains our text and logo that introduces this site. We want to extract this code and create a class out of it. Let’s make it into a header. Highlight the Container keyword, then cmd + period. Select extract widget.

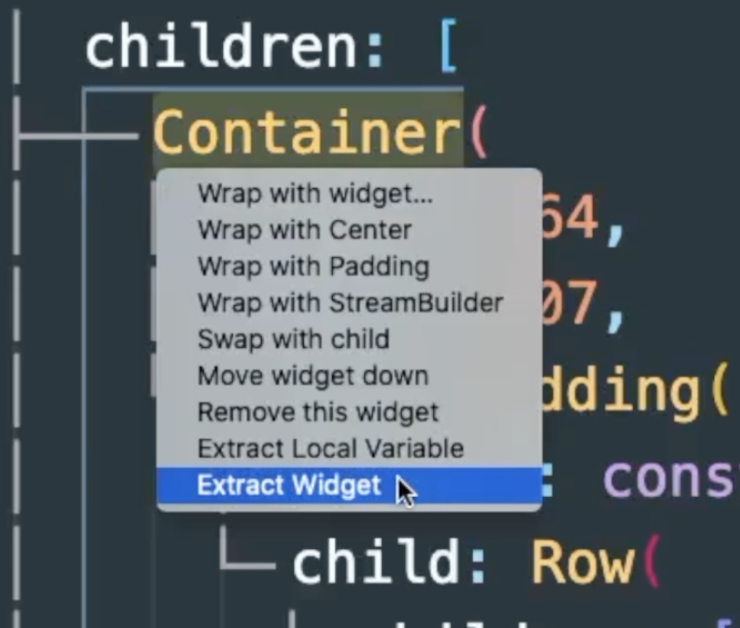
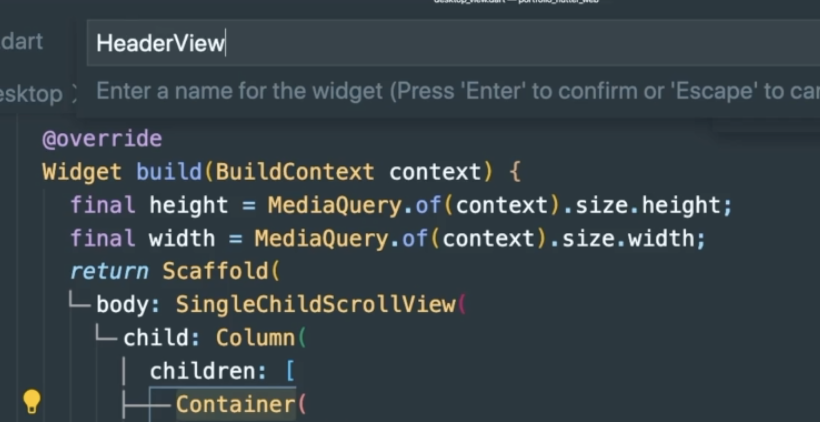
Type in the name of this extraction, say HeaderView.

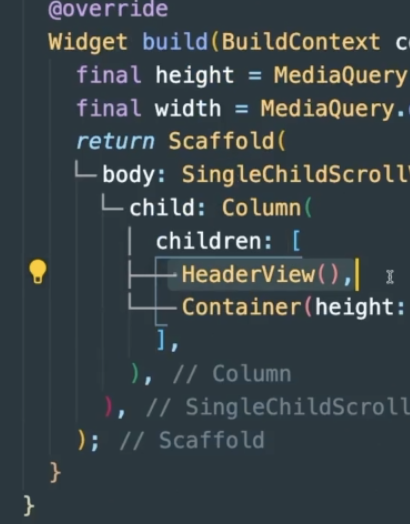
Then we see that class HeaderView is created and that our Container has been replaced by an instantiation of that HeaderView class.

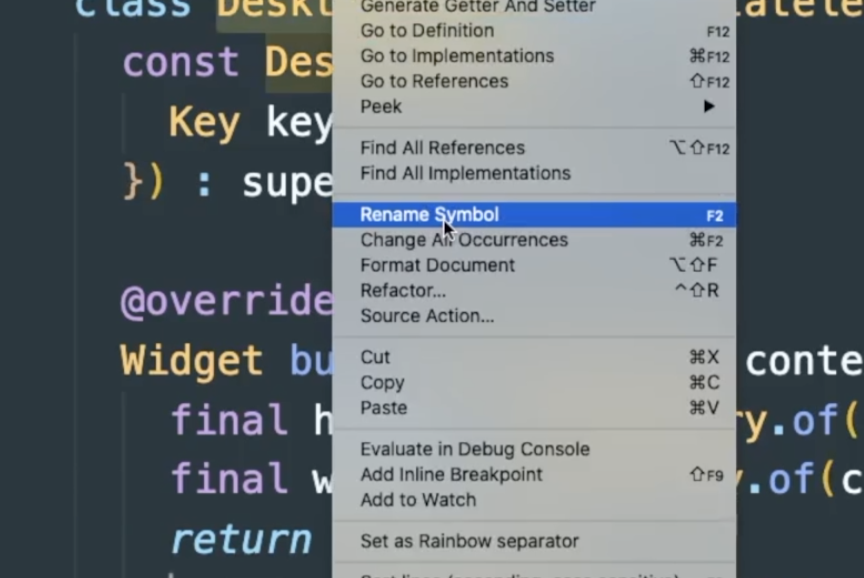
Now let’s replace our DesktopView name with PortfolioView. We use rename symbol. That way, any usage of this symbol will also be changed.

Finally, let’s cut the PortfolioView code and place it into main.dart. We do this because it is the main view that we will see. The SingleChildScrollView will house the HeaderView, BodyView, sidebars and what not. We will continuously create Containers and then refactor them into different sections of the site.

main.dart

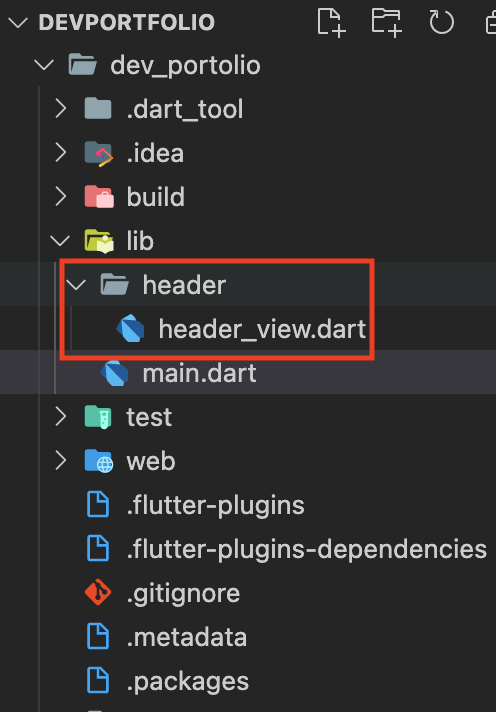
Now let’s rename the folder to header, and the file that holds the header code to header_view.dart

Mac setup for flutter

ref –

  • https://trevorsullivan.net/wp-content/uploads/2015/11/Trevor-Sullivan-VI-Shortcuts.pdf
  • https://stackoverflow.com/questions/58387606/flutter-app-running-error-dart-can-not-be-opened-developer-can-not-be-verified

Download flutter and unzip it into say, your home directory /Users/username.

Still in your home directory, type:

ls -la

You should see a whole list of files.

Look for a .zshenv or a .zshrc file:


-rw-r–r– 1 rtsao staff 91 Mar 23 16:10 .zshenv

If it doesn’t exist, just create one:

touch .zshenv

If you do have it just edit it:

vi .zshenv

Then in that file, put flutter’s bin directory in PATH:

then type:
flutter doctor

and follow the flutter URLs to download the needed packages:

  • Install xCode
  • Install Android

As flutter is downloading and executing, sometimes you’ll need to allow security to let it run:

Go to System Preferences > Security and click ‘Open Anyways’ for some of the packages that is trying to install.

There is a special situation where gen_snapshot will repeatedly get denied because the system can’t verify the developer.

You can allow your mac/apps downloaded from anywhere with this command:

sudo spctl –master-disable

As you download apps and allow access to installations, eventually everything will be a success:


Doctor summary (to see all details, run flutter doctor -v):
[✓] Flutter (Channel stable, 2.0.3, on macOS 11.1 20C69 darwin-x64, locale en-CN)
[✓] Android toolchain – develop for Android devices (Android SDK version 30.0.3)
[✓] Xcode – develop for iOS and macOS
[✓] Chrome – develop for the web
[✓] Android Studio (version 4.1)
[✓] IntelliJ IDEA Community Edition (version 2020.3.2)
[✓] VS Code (version 1.54.2)
[✓] Connected device (1 available)

• No issues found!

Docker Intro

ref – https://docker-curriculum.com/

Requirement: Docker app be installed

What is a container?

A container is simply another process on your machine that has been isolated from all other processes on the host machine. It is created from Docker images and runs the actual application. We create a container using docker run which we did using the busybox image that we will download. A lit of running containers ca be seen using the docker ps command.

What is a container image

When running a container, it uses an isolated filesystem. This custom filesystem is provided by a container image. Since the image contains the container’s filesystem, it must contain everything needed to run an application – all dependencies, configuration, scripts, binaries, etc. The image also contains other configuration for the container, such as environment variables, a default command to run, and other metadata.

In other words, the blueprints of our application which form the basis of a container. In the tutorial below, we use the docker pull command to download the busybox image.

Docker Hub

A registry of Dicker images. Directory of all the images. We can host our own Docker registries and can use them for pulling images.

Docker Client to communicate with Docker Daemon

So the background service running on the host that manages building, running, and distributing Docker containers are called Docker Daemon. We as users interact with this Daemon by using a client, which is GUI based.

Tutorial – BusyBox

docker pull busybox – fetches busybox image from the Docker registry and saves it to our system.

docker images – to see a list of all images on your system

docker run busybox

Wait, nothing happened! Is that a bug? Well, no. Behind the scenes, a lot of stuff happened. When you call run, the Docker client finds the image (busybox in this case), loads up the container and then runs a command in that container. When we run docker run busybox, we didn’t provide a command, so

the container booted up, ran an empty command and then exited.

Well, yeah – kind of a bummer. Let’s try something more exciting.

docker run busybox echo “hello from busybox”

In this case, the Docker client dutifully ran the echo command in our busybox container and then exited it. If you’ve noticed, all of that happened pretty quickly. Imagine booting up a virtual machine, running a command and then killing it. Now you know why they say containers are fast! Ok, now it’s time to see the docker ps command.

docker ps – The docker ps command shows you all containers that are currently running

docker ps -a – list of containers that we ran. Notice under STATUS that these containers exited a few minutes ago.

We can also start an tty interactive and start executing commands for that container.

docker run -it busybox sh

docker ps -a to look at the list of containers that ran
copy and paste the container ID.

Removing stopped Containers

Then run docker rm [CONTAINER ID].

But if you find it tedious, you can go

docker rm $(docker ps -a -q -f status=exited)

The Containers that have been removed will display their IDs.

the -q flag, only returns the numeric IDs and -f filters output based on conditions provided. One last thing that’ll be useful is the –rm flag that can be passed to docker run which automatically deletes the container once it’s exited from. For one off docker runs, –rm flag is very useful.

You can also use docker container prune

Tutorial – Run a static site

docker run –rm prakhar1989/static-site

Since the image doesn’t exist locally, the client will first fetch the image from the registry and then run the image. If all goes well, you should see a Nginx is running… message in your terminal.

kay now that the server is running, how to see the website?
What port is it running on? And more importantly, how do we access the container directly from our host machine?

Hit Ctrl+C to stop the container.

Well, in this case, the client is not exposing any ports so we need to re-run the docker run command to publish ports. While we’re at it, we should also find a way so that our terminal is not attached to the running container. This way, you can happily close your terminal and keep the container running. This is called detached mode.

First, we look at the docker list
docker ps -a
note the CONTAINER ID of our prakhar1989/static-site

say the container id is f57dfdf7e5a3

docker stop f57dfdf7e5a3
docker rm f57dfdf7e5a3

docker run -d -P –name static-site prakhar1989/static-site

In the above command, -d will detach our terminal, -P will publish all exposed ports to random ports and finally –name corresponds to a name we want to give.

then it outputs:
909e91f61b817dfa50df43d3eb5f94c4585331f9328d1348857363306b92f29f

docker port static-site

443/tcp -> 0.0.0.0:55002
80/tcp -> 0.0.0.0:55003

Now if you open a browser and hit http://localhost:55003/ you’ll see a webpage.

to stop the site docker stop static-site

Docker images

Base images are images that have no parent image, usually images with an OS like ubuntu, busybox or debian.

Child images are images that build on base images and add additional functionality.

Official images are images that are officially maintained and supported by the folks at Docker. These are typically one word long. In the list of images above, the python, ubuntu, busybox and hello-world images are official images.

User images are images created and shared by users like you and me. They build on base images and add additional functionality. Typically, these are formatted as user/image-name.

Dockerfile

A Dockerfile is a simple text file that contains a list of commands that the Docker client calls while creating an image.

It’s a simple way to automate the image creation process.

The best part is that the commands you write in a Dockerfile are almost identical to their equivalent Linux commands. This means you don’t really have to learn new syntax to create your own dockerfiles.

Let’s pull from git: git clone https://github.com/prakhar1989/docker-curriculum.git
cd docker-curriculum/flask-app

Now, we have a project that we’ve cloned from github.

Inside this project, let’s create a Dockerfile.

Dockerfile

Now that we have our Dockerfile, we can build our image. The docker build command does the heavy-lifting of creating a Docker image from a Dockerfile.

The section below shows you the output of running the same. Before you run the command yourself (don’t forget the period), make sure to replace my username with yours. This username should be the same one you created when you registered on Docker hub. If you haven’t done that yet, please go ahead and create an account. The docker build command is quite simple – it takes an optional tag name with -t and a location of the directory containing the Dockerfile.

Run docker images and see if your image shows.

Perfect, we see:

rtsao6680/catnip latest f85a28cd3cc9 6 minutes ago 895MB

The last step in this section is to run the image and see if it actually works (replacing my username with yours).

docker run -p 8888:5000 rtsao6680/catnip

Go to http://localhost:8888/ and you’ll see the latest gif of a cat

Congratulations! You have successfully created your first docker image.

Sharing it on AWS

We can deploy our awesome application to the cloud so that we can share it with our friends! We’re going to use AWS Elastic Beanstalk to get our application up and running in a few clicks. We’ll also see how easy it is to make our application scalable and manageable with Beanstalk!

The first thing that we need to do before we deploy our app to AWS is to publish our image on a registry which can be accessed by AWS. There are many different Docker registries you can use (you can even host your own). For now, let’s use Docker Hub to publish the image.

docker login

Then let’s push our catnip project

docker push rtsao6680/catnip

output:

flask-app % docker push rtsao6680/catnip
Using default tag: latest
The push refers to repository [docker.io/rtsao6680/catnip]
d03f56673e4c: Pushed
060c2d81fdfd: Pushed
b86d642a1859: Pushed
394ec6c8d61d: Mounted from library/python
c5e393b8a19a: Mounted from library/python
b3f4557ae183: Mounted from library/python
9f5b4cdea532: Mounted from library/python
cd702377e4e5: Mounted from library/python
aa7af8a465c6: Mounted from library/python
ef9a7b8862f4: Mounted from library/python
a1f2f42922b1: Mounted from library/python
4762552ad7d8: Mounted from library/python
latest: digest: sha256:d2ba2613cdc9d0fb211c230d0e336e498cc16a1e319866e6fce61bdd2083e014 size: 2843

Now go on Docker Hub and check for your image.

Now that your image is online, anyone who has docker installed can play with your app by typing just a single command.

docker run -p 8888:5000 rtsao6680/catnip

Making it public on AWS

Login to your AWS console.
Click on Elastic Beanstalk.
It will be in the compute section on the top left.
Alternatively, you can access the Elastic Beanstalk console.

In https://hub.docker.com/repositories, our app name is rtsao6680/catnip.
Hence, make sure we reflect that in our Dockerrun.aws.json:

Under Platform, choose Docker. The other settings will auto-select. It should look something like this:

The Name rtsao6680/catnip should tell AWS EBS to seek out that image from Docker. Then upload it and make it public. However, if it doesn’t work, make sure you try to upload and deploy again.

When it succeeds, you should be able to click the link and see the site publicly.

Cleanup

Once you done basking in the glory of your app, remember to terminate the environment so that you don’t end up getting charged for extra resources.

Distribute IPA file to the Apple app store

ref – https://appmanager.io/blog/tips-and-tricks/uploading-an-ios-app-to-the-app-store-updated/
https://help.swiftic.com/hc/en-us/articles/201697821-Install-the-Application-Loader-on-Your-Computer

Client Side upload app to the Store

…after receiving the IPA file from your developer, go to your Apple account.

Log in, and choose the Agreements, Tax, and Banking section. Before publishing an app you’ll have to accept some of those agreements and set up your banking info so you can get paid. You’ll also need to set up tax info, depending on your country.

If you already have an App Store Connect account, make sure that your role is Admin, Technical, App Manager, or Developer. Only those roles can upload a build.

When your app is ready to upload, you can add the app to App Store Connect. (You should probably tag it in your version control first.)

In App Store Connect go to the My Apps section and hit the plus sign on the left side to create a new app. You’ll get a little form to fill out with your app’s info:

Hit Create andApp Store Connect will create a record for your app. Look on the left hand side and select the 1.0 release under iOS App. Scroll down to the build section. This is where you’ll be able to see your uploaded app.

You can use Application Loader to submit your app for review if you’re getting a build from a developer (in ipa format) and don’t have Xcode installed. You’ll still need a Mac since that’s the only operating system Application Loader runs on.

If you want to try out Application Loader and don’t have Xcode installed, get it from Resources and Help section of App Store Connect.

When you have found the Application Loader from the Resources > Help Section, simply install it and upload your ipa file. Then, you are done.

However, if you do have Xcode installed, you can access Application Loader under the Xcode -> Open Developer Tool menu.

Uploading the Build – Since we already set up the app in App Store Connect and Xcode knows about our dev account, it’ll know where to put it when we upload it.

Open your project in Xcode. Select Archive in the Product menu. Choose Save for iOS App Store Distribution. That’ll create the build to be submitted.

To upload your app, click on the big blue Upload to App Store button on the right side. You’ll have to confirm for Xcode that it’s going to upload the app to the right place. If you’re on multiple iOS dev teams, you’ll have to pick the one it should use. When Xcode has it all figured out, it’ll show you a summary screen. Click the Upload button.

Developer upload app

Another way to upload the app is through a developer.

First make sure to create an archive. After that you should see the archive on your list. Select the archive from the list and click the Upload to App Store… button on the right. The application binary is then uploaded to Apple’s servers.

During this process, your application is also validated. If an error occurs during the validation, the submission process will fail. The validation process is very useful as it will tell you if there is something wrong with your application binary that would otherwise result in a rejection by the App Store review team.

Just go with the default values…

Certificate

If the certificate associated with the app does not align with your computer, there will be an error. You can request from that user to get a public certificate for you to use.

If you want to create your own certificate from your computer and generate your own provisioning profile, then on:

In your Apple account, when you get provisioning profiles, you need to register a certificate first. Certificates are files generated by your computer’s Key chain.

You will need to create this Certificate (CSR file) to give to Apple.

To manually generate a Certificate, you need a Certificate Signing Request (CSR) file from your Mac. To create a CSR file, follow the instructions below to create one using Keychain Access.

Create a CSR file, copy and pasted from wizard page
In the Applications folder on your Mac, open the Utilities folder and launch Keychain Access.

Within the Keychain Access drop down menu, select Keychain Access > Certificate Assistant > Request a Certificate from a Certificate Authority.

In the Certificate Information window, enter the following information:
In the User Email Address field, enter your email address.
In the Common Name field, create a name for your private key (e.g., John Doe Dev Key).
The CA Email Address field should be left empty.
In the “Request is” group, select the “Saved to disk” option.
Click Continue within Keychain Access to complete the CSR generating process.

Once, you’ve successfully created it, save the .certSigningRequest file on your computer.

On the next screen, then you will see Generate your Certificate page. Upload the .certSigningRequest file, and click Generate.

You will then see that your Certificate is ready.

Name: Apple Development iOS Push Services: com.rtsao.deleteTestPush
Type: APNs Development iOS
Identifier ID: deleteTestPush
Expires: Dec 01, 2016

Click download and you should see a .cer file

That’s about it. When you’ve reached to the end of the wizard, you’ll have a chance to turn the app in and then wait about 2 weeks for the approval.

Freeze Screen in Chrome Debugger for popover Inspection

https://stackoverflow.com/questions/17931571/freeze-screen-in-chrome-debugger-devtools-panel-for-popover-inspection

  • Browse to the desired page
  • Open the dev console – F12 on Windows/Linux or option + ⌘ + J on OSX
  • Select the Sources tab in chrome inspector
  • In the web browser window, hover over the desired element to initiate the popover
  • Hit F8 on Windows/Linux (or fn + F8 on OSX) while the popover is showing. If you have clicked anywhere on the actual page F8 will do nothing. Your last click needs to be somewhere in the inspector, like the sources tab
  • Go to the Elements tab in inspector
  • Find your popover (it will be nested in the trigger element’s HTML)

Should IBOutlet be weak or strong?

https://stackoverflow.com/questions/7678469/should-iboutlets-be-strong-or-weak-under-arc/7729141#7729141

…the outlets to subviews of the view controller’s view can be weak, because these subviews are already strongly owned by the top-level object of the nib file.

However, when an Outlet is defined as a weak pointer and the pointer is set, ARC calls the runtime function:

This adds the pointer (object) to a table using the object value as a key. This table is referred to as the weak table. ARC uses this table to store all the weak pointers of your application. Now, when the object value is deallocated, ARC will iterate over the weak table and set the weak reference to nil.

Alternatively, ARC can call:

Then, the object is unregistered and objc_destroyWeak calls again:

This book-keeping associated with a weak reference can take 2–3 times longer over the release of a strong reference. So, a weak reference introduces an overhead for the runtime that you can avoid by simply defining outlets as strong.

git commands

https://tortoisegit.org/docs/tortoisegit/tgit-dug-conflicts.html

Switch Branch

> git checkout -b

Show origin of current git directory

> git remote show origin

* remote origin
Fetch URL: https://ricky_tsao@gitcn.epam.com:4443/ricky_tsao/joiner-app-backend.git
Push URL: https://ricky_tsao@gitcn.epam.com:4443/ricky_tsao/joiner-app-backend.git
HEAD branch: master
Remote branch:
master tracked
Local branch configured for ‘git pull’:
master merges with remote master
Local ref configured for ‘git push’:
master pushes to master (up to date)

Resolving Conflicts

During a merge, the working tree files are updated to reflect the result of the merge. Once in a while, you will get a conflict when you merge another branch, cherry-pick commits, rebase or apply a stash: Among the changes made to the common ancestor’s version, non-overlapping ones (that is, you changed an area of the file while the other side left that area intact, or vice versa) are incorporated in the final result verbatim. When both sides made changes to the same area, however, Git cannot randomly pick one side over the other, and asks you to resolve it by leaving what both sides did to that area. Whenever a conflict is reported you need to resolve it!

The conflicting area is marked in the file like this (also cf. the section called “HOW CONFLICTS ARE PRESENTED”):

The code from your current branch is on top, the code from the branch you are merging in is on the bottom

The contents after the first marker originate from your current working branch. After the angle brackets, Git tells us where (from which branch) the changes came from. A line with “=======” separates the two conflicting changes.