ref – http://code.tutsplus.com/tutorials/cocoalumberjack-logging-on-steroids–mobile-15287
Go to CocoaLumberJack’s site and download their source code here
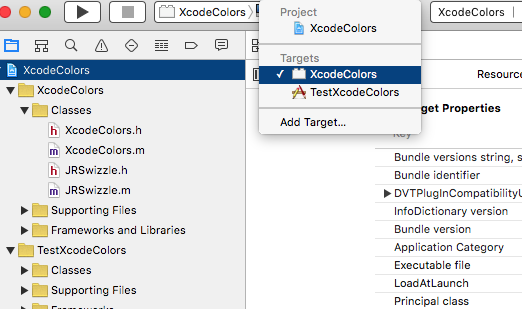
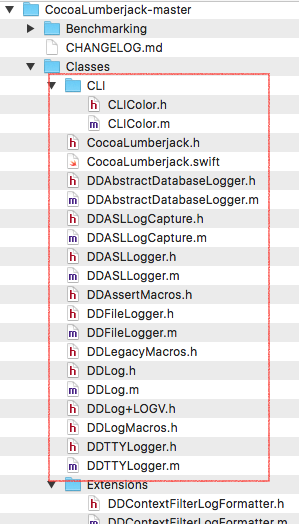
Unzip the LumberJack project and take a look at the LumberJack class folder’s source files.
Import LumberJack’s Source files
Start a new xCode project.
Drag the listed files:
- DDLog.h/.m
- DDASLLogger.h/.m
- DDTTYLogger.h/.m
- DDFileLogger.h/.m
- DDLegacyMacros.h
- DDLegacyMacros.h
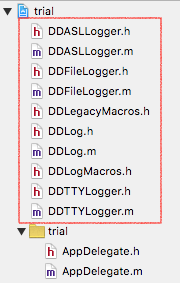
from the LumberJack project’s class folder, and into your project.
Creating the PCH file
Long ago, if there is a utility class that a developer needs for every of his source files, its very tiring for them to import that utility .h file in every of their source file. Hence, Prefix.pch was invented.
It is a precompiled header. It implicitly is included at the start of every source file. In other words, it’s like as if each source file adds:
|
1 |
#import "Prefix.pch" |
Hence, you can easily include lumberjack’s functionality in all of your source code by using PCH file.
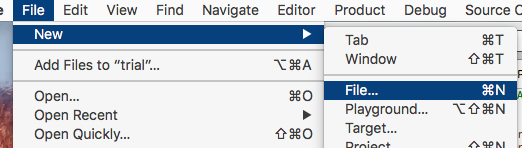
File >> New >> File
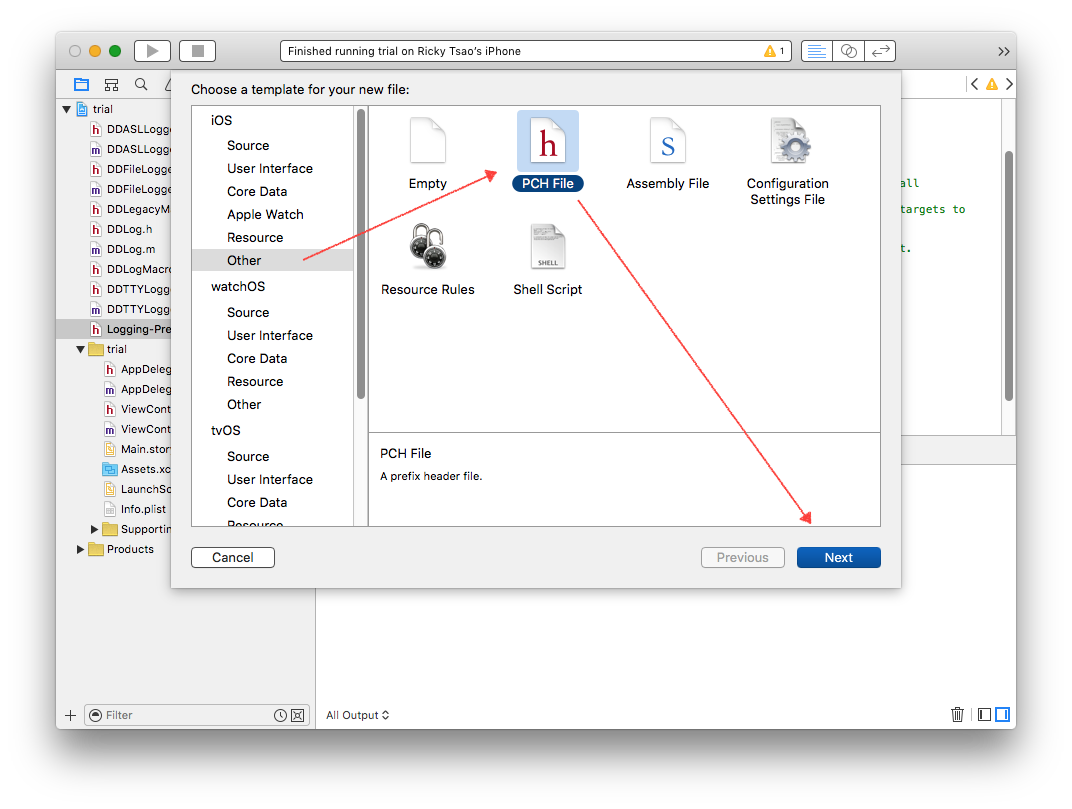
Other >> PCH file
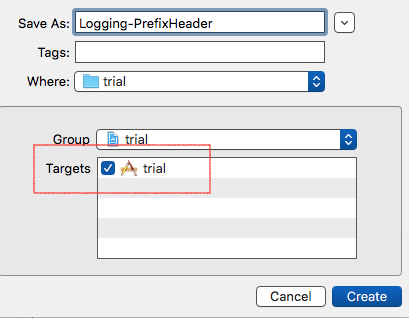
use “Logging-PrefixHeader.pch”
make sure you check the checkbox for adding it to our target.
Add
|
1 |
#import "DDLog.h" |
inside the ifndef statements.
Then at the end of the file, add
|
1 |
static const int ddLogLevel = LOG_LEVEL_VERBOSE; |
Your Logging-PrefixHeader.pch file should look like this:
|
1 2 3 4 5 6 7 8 9 10 11 12 13 |
#ifndef Logging_PrefixHeader_pch #define Logging_PrefixHeader_pch // Include any system framework and library headers here that should be included in all compilation units. // You will also need to set the Prefix Header build setting of one or more of your targets to reference this file. //This ensure that the macros defined in DDLog.h are available throughout the project. #import "DDLog.h" #endif /* Logging_PrefixHeader_pch */ static const int ddLogLevel = LOG_LEVEL_VERBOSE; |
Project Build Settings
Then in your Project, select your Target, Build Settings, and in the search box, type prefix. Scroll down and you’ll see Apple LLVM 7.0 – Language.
In Prefix Header, enter your .pch file name. In our case it would be Logging_PrefixHeader.pch.
Using the code
Add the following imports for DD in your AppDelegate.m file:
|
1 2 3 |
#import "DDASLLogger.h" #import "DDTTYLogger.h" #import "DDFileLogger.h" |
Then also in AppDelegate.m, insert the code as shown below:
|
1 2 3 4 5 6 7 8 9 10 11 12 13 14 |
- (BOOL)application:(UIApplication *)application didFinishLaunchingWithOptions:(NSDictionary *)launchOptions { // Override point for customization after application launch. // Configure CocoaLumberjack [DDLog addLogger:[DDASLLogger sharedInstance]]; [DDLog addLogger:[DDTTYLogger sharedInstance]]; DDLogError(@"This is an error."); DDLogWarn(@"This is a warning."); DDLogInfo(@"This is just a message."); DDLogVerbose(@"This is a verbose message."); return YES; } |
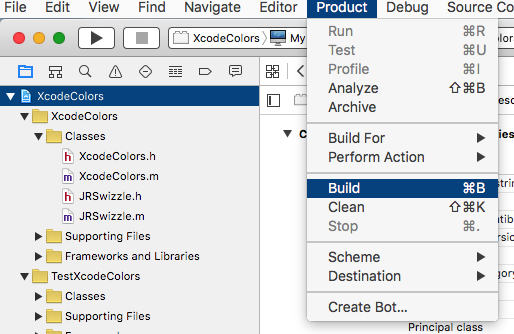
Build and run the project. You should now see the log messages in your console.
Go to your Logging-PrefixHeader.pch file, highlight the macro LOG_LEVEL_VERBOSE, right click, and select “Jump To Definition”. Use all the different MACROS for setting what kind of log messages you want to see.
Installing xCode Colors Plugin
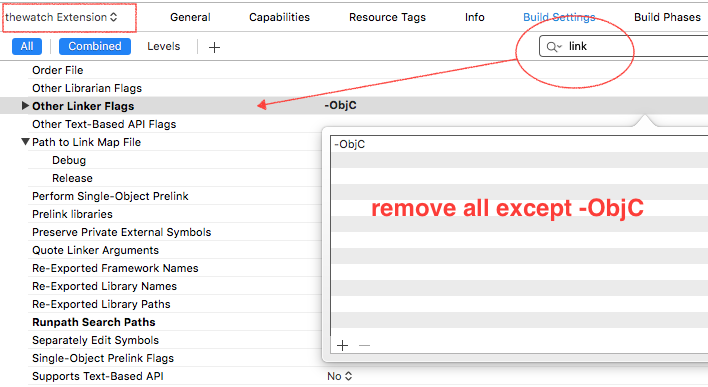
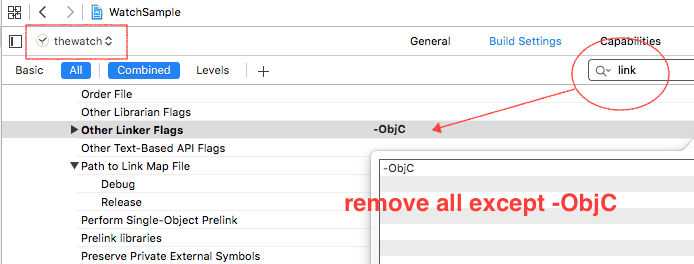
Install xCode color plugin by following the directions provided here.
Make sure you restart xCode.
Open up your project and in AppDelegate.m:
|
1 2 3 4 5 6 7 8 9 10 11 12 13 14 15 16 17 18 |
- (BOOL)application:(UIApplication *)application didFinishLaunchingWithOptions:(NSDictionary *)launchOptions { setenv("XcodeColors", "YES", 0); // Configure CocoaLumberjack [DDLog addLogger:[DDASLLogger sharedInstance]]; [DDLog addLogger:[DDTTYLogger sharedInstance]]; // And then enable colors [[DDTTYLogger sharedInstance] setColorsEnabled:YES]; DDLogError(@"This is an error."); DDLogWarn(@"This is a warning."); DDLogInfo(@"This is just a message."); DDLogVerbose(@"This is a verbose message."); return YES; } |
You should now see that your log messages are color-coded.