ref – https://pub.dev/packages/flutter_staggered_animations/
In your pubspec.yaml file, include
|
1 2 3 4 |
dependencies: .... flutter_staggered_animations: "^1.0.0" ... |
We use AnimationConfiguration.toStaggeredList with a duration of Duration(milliseconds: 1375).
We then fill in the childAnimationBuilder, which is the specified way on how to animate each widget in the List. The idea here is that we wrap this widget with FadeInAnimation and SlideAnimation. It’s a combination effect.
|
1 2 3 4 5 6 |
childAnimationBuilder: (widget) => SlideAnimation( horizontalOffset: 100.0, child: FadeInAnimation( child: widget, ), ), |
Hence, what we’ve stated in childAnimationBuilder is that for each child widget, we want to apply the slide and fade in animation to each widget.
|
1 2 3 4 5 6 7 8 9 10 11 12 13 14 15 16 17 18 19 20 21 22 23 24 25 26 27 28 29 30 31 32 33 34 35 36 37 38 39 40 41 42 43 |
import 'package:flutter/material.dart'; import 'package:flutter_staggered_animations/flutter_staggered_animations.dart'; class Exercise1 extends StatelessWidget { static final title = 'Exercise 1'; static final routeName = '/exercise1'; const Exercise1({Key key}) : super(key: key); _buildBlock(height, color) { return Container( height: height, decoration: BoxDecoration( color: color, ), ); } @override Widget build(BuildContext context) { return Scaffold( body: SingleChildScrollView( child: AnimationLimiter( child: Column( children: AnimationConfiguration.toStaggeredList( duration: const Duration(milliseconds: 1375), childAnimationBuilder: (widget) => SlideAnimation( horizontalOffset: 100.0, child: FadeInAnimation( child: widget, ), ), children: <Widget>[ Container(child: _buildBlock(320.0, Colors.red)), Container(child: _buildBlock(320.0, Colors.blue)), Container(child: _buildBlock(320.0, Colors.orange)) ]), ), ), ), ); } } |
This is for fade in on lists.
|
1 2 3 4 5 6 7 8 9 10 |
AnimationConfiguration.staggeredList( position: index, duration: const Duration(milliseconds: 375), child: SlideAnimation( verticalOffset: 50.0, child: FadeInAnimation( child: _buildItem(context, index), ), ), ); |
Full Code
|
1 2 3 4 5 6 7 8 9 10 11 12 13 14 15 16 17 18 19 20 21 22 23 24 25 26 27 28 29 30 31 32 33 34 35 36 37 38 39 40 41 42 43 44 45 46 47 48 49 50 51 52 53 54 55 56 57 58 59 60 61 62 63 64 65 66 67 68 69 70 71 72 73 74 75 76 77 78 79 80 81 82 83 84 85 86 87 88 89 90 91 92 93 94 95 96 97 98 99 100 101 102 103 104 105 106 107 108 109 110 111 112 113 114 115 116 117 118 119 120 121 122 123 124 125 126 127 128 129 130 131 132 133 134 135 136 137 138 139 140 141 142 143 144 145 146 147 |
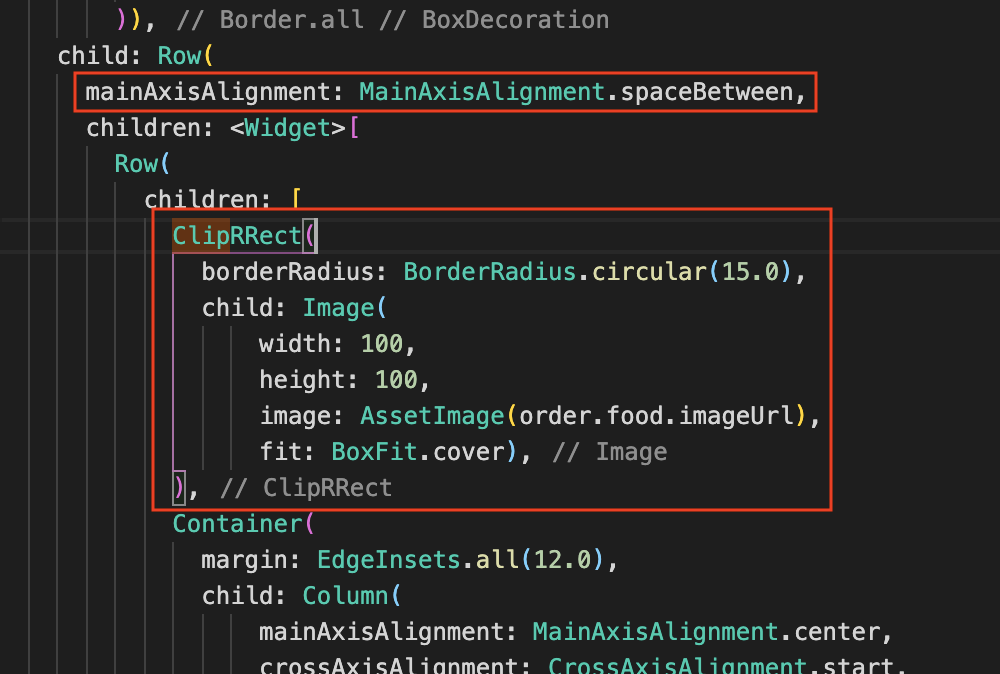
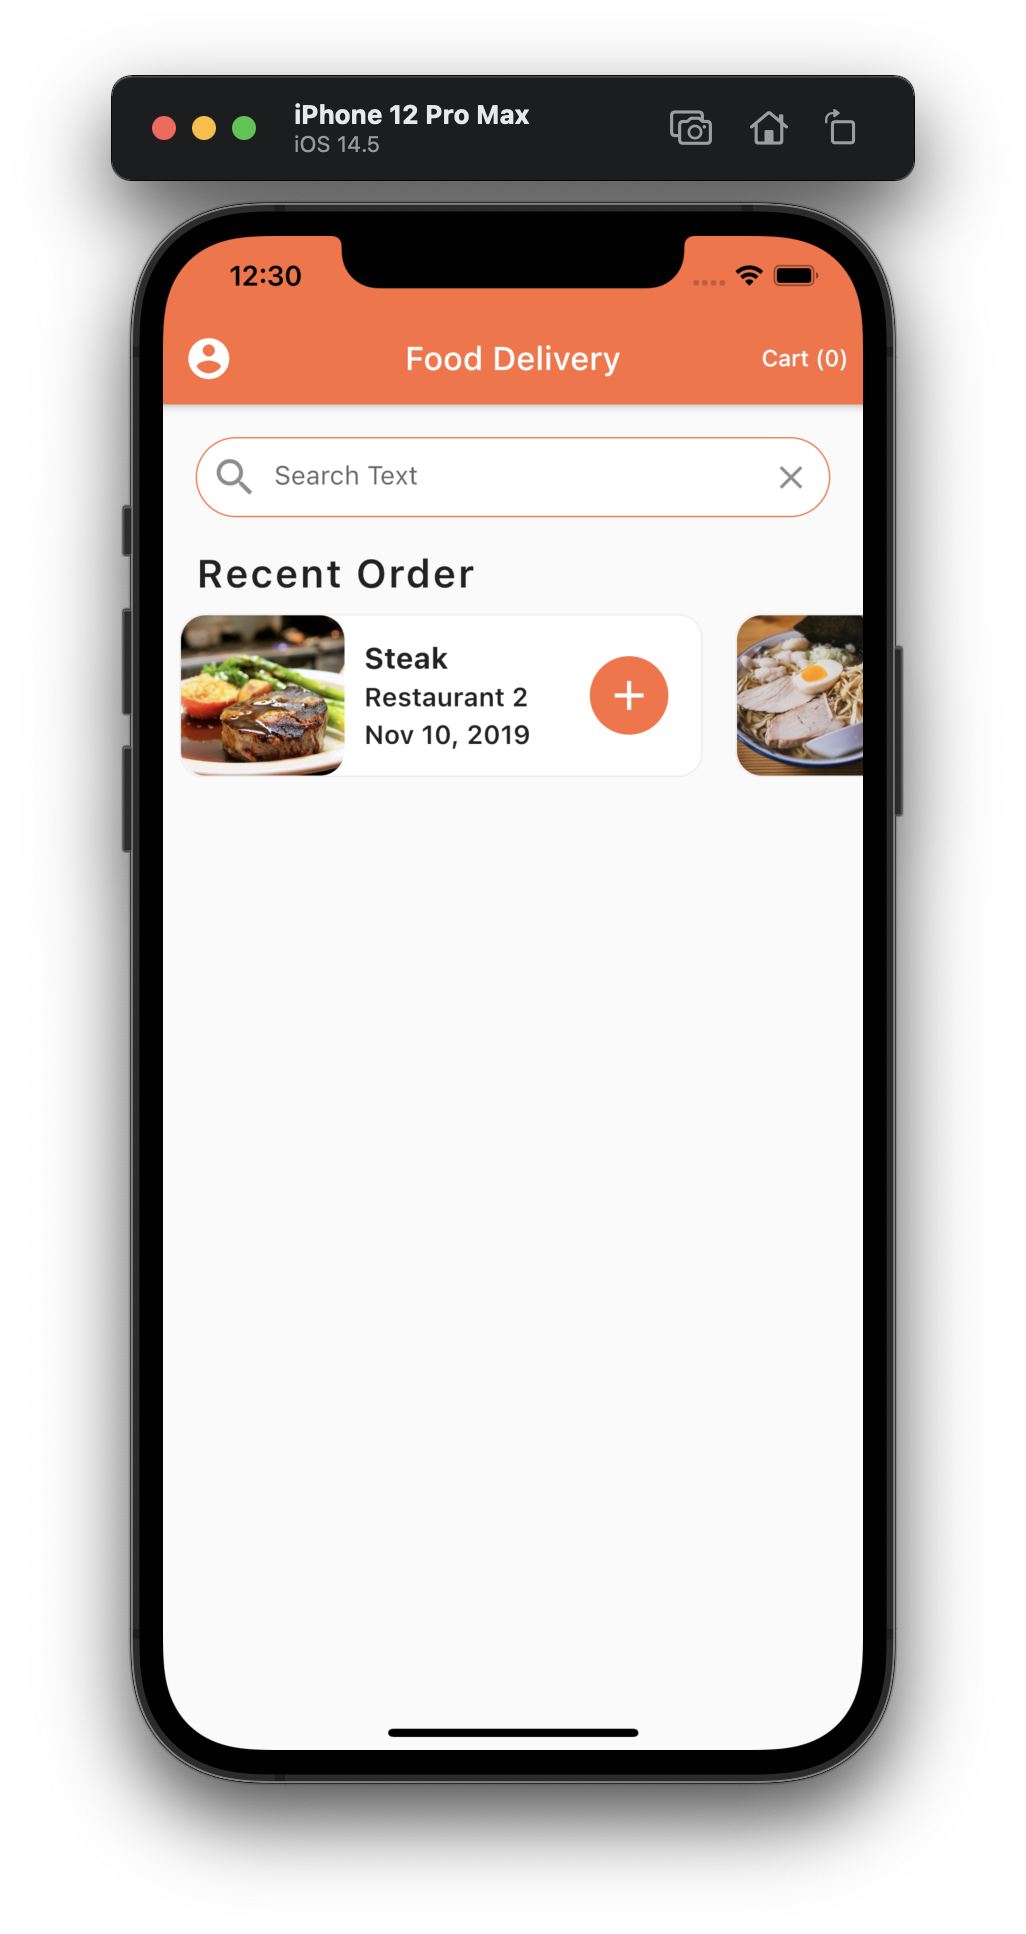
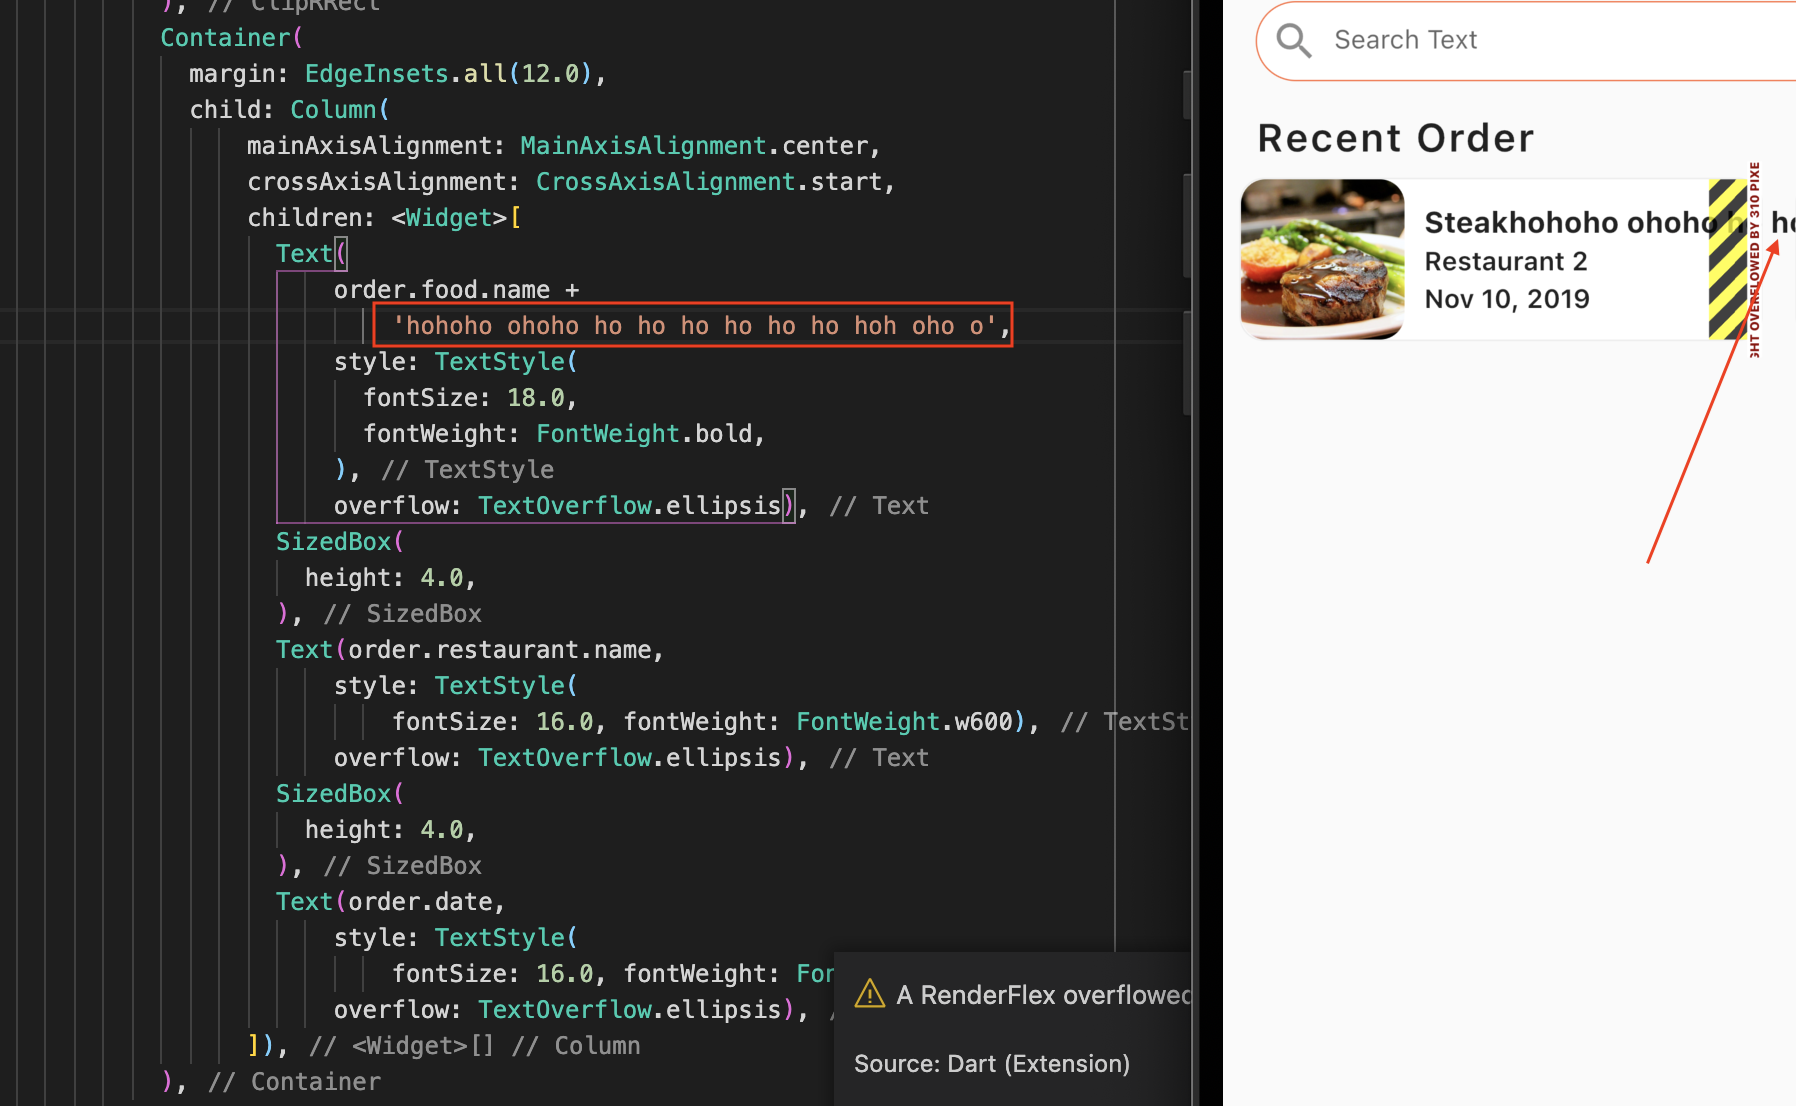
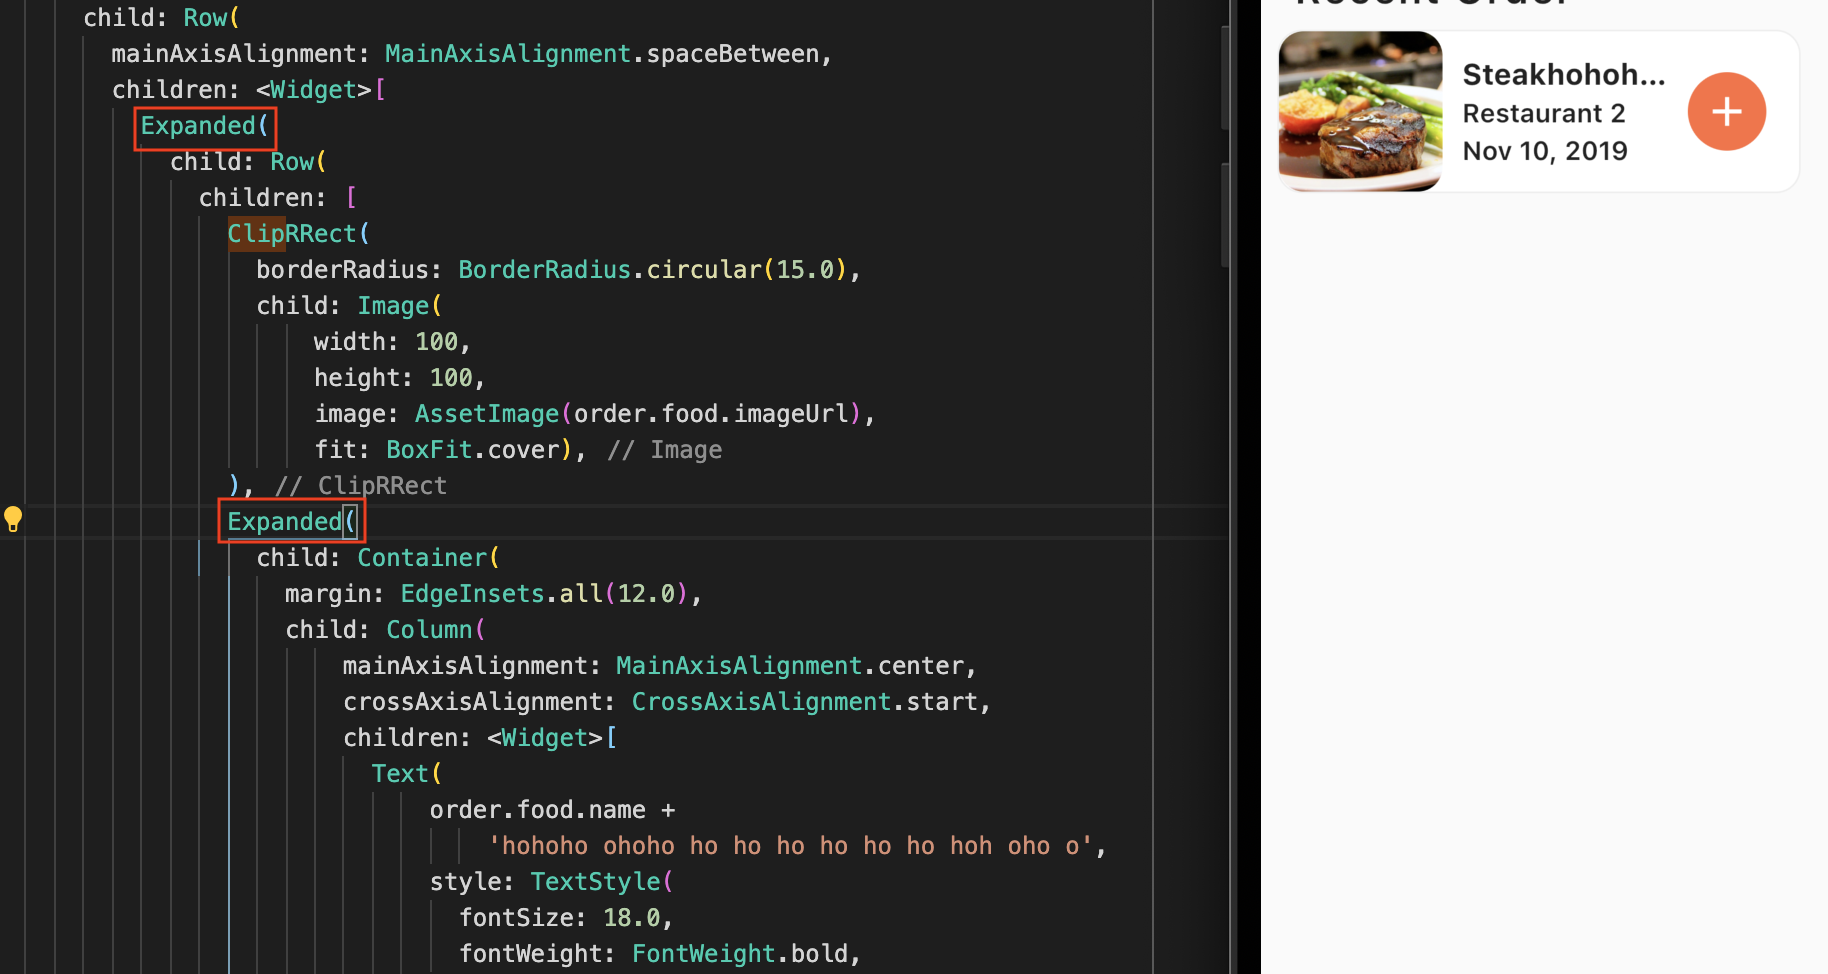
import 'package:flutter/material.dart'; import 'package:flutter_staggered_animations/flutter_staggered_animations.dart'; class Exercise1 extends StatelessWidget { static final title = 'Exercise 1'; static final routeName = '/exercise1'; const Exercise1({Key key}) : super(key: key); _buildBlock(height, color) { return Container( height: height, decoration: BoxDecoration( color: color, ), ); } _buildItem(BuildContext context, int index) { return Container( margin: EdgeInsets.all(10.0), width: 320.0, decoration: BoxDecoration( color: Colors.white, borderRadius: BorderRadius.circular(15.0), border: Border.all( width: 1.0, color: Colors.grey[200], )), child: Row( mainAxisAlignment: MainAxisAlignment.spaceBetween, children: <Widget>[ Expanded( child: Row( children: [ Expanded( child: Container( margin: EdgeInsets.all(12.0), child: Column( mainAxisAlignment: MainAxisAlignment.center, crossAxisAlignment: CrossAxisAlignment.start, children: <Widget>[ Text('index $index', style: TextStyle( fontSize: 18.0, fontWeight: FontWeight.bold, ), overflow: TextOverflow.ellipsis), SizedBox( height: 4.0, ), Text('Item # $index', style: TextStyle( fontSize: 16.0, fontWeight: FontWeight.w600), overflow: TextOverflow.ellipsis), SizedBox( height: 4.0, ), Text(DateTime.now().toString(), style: TextStyle( fontSize: 16.0, fontWeight: FontWeight.w600), overflow: TextOverflow.ellipsis), ]), ), ), ], ), ), Container( margin: EdgeInsets.only(right: 20.0), width: 48.0, decoration: BoxDecoration( color: Theme.of(context).primaryColor, borderRadius: BorderRadius.circular( 30.0) // makes the Container circular ), child: IconButton( icon: Icon(Icons.add), // the + sign iconSize: 30.0, color: Colors.white, onPressed: () {})), ], ), ); } @override Widget build(BuildContext context) { return Scaffold( body: SingleChildScrollView( child: AnimationLimiter( child: Column( children: AnimationConfiguration.toStaggeredList( duration: const Duration(milliseconds: 1375), childAnimationBuilder: (widget) => SlideAnimation( horizontalOffset: 100.0, child: FadeInAnimation( child: widget, ), ), children: <Widget>[ Container(child: _buildBlock(320.0, Colors.red)), Container(child: _buildBlock(320.0, Colors.blue)), Container(child: _buildBlock(320.0, Colors.orange)) ]), ), ), ), ); } } /* // original answer ListView.builder( physics: BouncingScrollPhysics(), scrollDirection: Axis.vertical, itemCount: 3, itemBuilder: (BuildContext context, int index) { print(index); if (index == 0) { return _buildBlock(heightOfBlock, Colors.green); } if (index == 1) { return _buildBlock(heightOfBlock, Colors.yellow); } if (index == 2) { return _buildBlock(heightOfBlock, Colors.red); } return _buildBlock(heightOfBlock, Colors.red); }) */ /* // staggered animation on ListView items AnimationConfiguration.staggeredList( position: index, duration: const Duration(milliseconds: 375), child: SlideAnimation( verticalOffset: 50.0, child: FadeInAnimation( child: _buildItem(context, index), ), ), ); */ |