All posts by admin

Generator 2

ref – https://towardsdatascience.com/how-to-use-generator-and-yield-in-javascript-d1771bf698cd

A generator is a function that allows for the function to be exited and re-entered with its context (variable bindings) preserved.

Normal functions


—————–
Output
—————–
I’m a regular function
Surprise surprice
This is the end

What is function*?

That’s the syntax we use to declare a function as a generator.

What is yield?

The yield, will pause the function by saving all its states and will later continue from that point on successive calls.

Let’s call our generatorFunction and see what happens


—————–
Output
—————–
generatorFunction {} {
__proto__: Generator
[[GeneratorLocation]]: VM272:1
[[GeneratorStatus]]: “suspended”
[[GeneratorFunction]]: ƒ* generatorFunction()
[[GeneratorReceiver]]: Window
[[Scopes]]: Scopes[3]
}

When we call a generator function, the function is not automatically triggered and instead,
it returns an iterator object.

What’s particular about this object is that when the method next() is called, the generator function’s body is executed until the first yield or return expression.


—————–
Output
—————–
{value: “This is the first return”, done: false}

generator run until the first yield statement and yielded an object containing a value property, and a done property.

The value property is equal to the value that we yielded
The done property is a boolean value, which is only set to true once the generator function returned a value. (not yielded)

Let’s invoke next() one more time and see what we get


—————–
Output
—————–
First log!
{value: “This is the second return”, done: false}

This time we first see the console.log in our generator body being executed and printing First log!, and the second yielded object. And we could continue doing this like:


—————–
Output
—————–
Second log!
{value: “Done!”, done: true}

Now the second console.log statement is executed and we now hit

but this time the property done is set to true.
The value of the done property is not just a flag, it is a very important flag as we can only iterate a generator object once!.

try calling next() one more time:


—————–
Output
—————–
{value: undefined, done: true}

yield #

Yield over iterators


—————–
Output
—————–
{value: Array(3), done: false}

But that’s not quite what we wanted, we wanted to yield each element in the array, so we could try doing something like:


—————–
Output
—————–
{value: 1, done: false}
{value: 2, done: false}
{value: 3, done: false}

We can also use yield* to produce the same results.


—————–
Output
—————–
{value: 1, done: false}
{value: 2, done: false}
{value: 3, done: false}

by using yield* expression we can iterate over the operand and yield each value returned by it.

Yield * can be applied to other generators, arrays, strings, any iterable object.

Uses of Generators

The great thing about generators is the fact that they are lazy evaluated (meaning that the value that we get from invoking the next() method) is only computed after we specifically asked for it. This makes generators a good choice for solving multiple scenarios like the ones presented below:

Generating an infinite sequence

First we have a generator infiniteSequence, which is an iterator.
We calculate an infinite sequence in there and yield the number.
But because generators are lazy loaded, it won’t calculate the value until we ask for it by using .next(). Hence, our infinite sequence won’t run until stackoverflow. It will patiently wait for us to next().

We then loop over the iterator’s yield value and log it. We break if i is more than 10.

If we didn’t use generators, this program would crash because infiniteSequence would get stackoverflow or out of memory crash. But because its an iterator, we can lazy load and display its value like so:


—————–
Output
—————–
0
1
2
3
4
5
6
7
8
9

Implementing iterables

ref – http://chineseruleof8.com/code/index.php/2021/12/10/creating-an-iterator/

When you need to implement an iterator, you have to manually create an object with a next() method. Also, you have to manually save the state.
Imagine we want to make an iterable that simply returns I, am, iterable. Without using generators we would have to do something like:


—————–
Output
—————–
I
am
iterable.

With generators this is much simpler:


—————–
Output
—————–
I
am
iterable.

notes

Generator objects are one-time access only. Once exhausted, you can’t iterate over it again. To do so, you will have to create a new generator object.

Generator objects do not allow random access as possible with for instance, arrays.

Since the values are generated one by one, you can’t get the value for a specific index, you will have to manually call all the next() functions until you get to the desire position, but then, you cannot access the previously generated elements.

yield function vs yield result that reference function

Note we yield the result reference to JCcall()

Note that we now move yield to JCcall instead.

Another example is that we return another generator (* function) inside of our original generator function.
The yield* expression ( as opposed to the yield of a normal function above ) is used to delegate to another generator or iterable object.

The key point here is that we must put yield* in front like this:

Now, let’s run our generator.

Generics

ref – https://www.typescriptlang.org/docs/handbook/2/generics.html
https://medium.com/ovrsea/checking-the-type-of-an-object-in-typescript-the-type-guards-24d98d9119b0
https://stackoverflow.com/questions/59183989/why-do-we-need-the-any-type-in-typescript

Concept

While using any is certainly generic in that it will cause the function to accept any and all types for the type of arg, we actually are losing the information about what that type was when the function returns.

If we passed in a number, the only information we have is that any type could be returned.

Instead, we need a way of capturing the type of the argument in such a way that we can also use it to denote what is being returned. Here, let’s assume we have declared an interface called MyType:

In other words, it is to denote the type or interface we decide to use so that the compiler has the type information. That way, it does checking for us, and intellisense will bring up the attributes and methods of that type.

From the compiler’s view, it allows us to capture the type the user provides (e.g. number), so that we can use that information later. Here, we use the same MyType again as the return type. The compiler can now see the same type is used for the argument and the return type. This allows us to traffic that type information in one side of the function and out the other.

We say that this version of the identity function is generic, as it works over a range of types. Unlike using any, it’s also just as precise (ie, it doesn’t lose any information) as the first identity function that used numbers for the argument and return type.

Once we’ve written the generic identity function, we can call it in one of two ways. The first way is to pass all of the arguments, including the type argument, to the function:

Here we explicitly set Type to be string as one of the arguments to the function call, denoted using the <> around the arguments rather than ().

Notice that we didn’t have to explicitly pass the type in the angle brackets (<>); the compiler just looked at the value “myString”, and set Type to its type. While type argument inference can be a helpful tool to keep code shorter and more readable, you may need to explicitly pass in the type arguments as we did in the previous example when the compiler fails to infer the type, as may happen in more complex examples.

When using any you’ll lose all type checking and safety checking that Typescript is offering, whereas, T behaves like a variable that will hold the Type that you don’t know what it is going to be

Explanation

The any type is an escape hatch—it allows you to effectively turn off Typescript’s type checking. Sometimes, there just isn’t a good way to tell Typescript what you are doing, so you use any to work around that.

And types are not necessarily any when you leave off a type annotation—in many cases, Typescript will infer a type, and then enforce that. let x = 2; will infer x as having type number. In intellisense, you’ll see type ‘any’, and when working with different types down the line, you won’t be able to see or access the object’s attributes and methods because we’re missing type information.

And you get type-safety and intellisense (depending on your editor) when you retrieve a value:

usages

say we use generics in class Test:

interface as generic

declare an object that conforms to our interface Person

output:

{
“name”: “ricky”,
“dob”: “June 6, 11980”
}

Class as generic

Create a class, then pass it into an instance of Test.

output:

MyData: {
“name”: “ricky”,
“dob”: “6680”
}

Generic Class extends Interface

Finally, let’s try extending generic classes. We make it so that our generic class can take any object type only if it conforms to interface Person.

This means that object must have properties name of type string, and dob of type string.

If we were to use MyData class, it would work because we do, after all, have name: string and dob: string.

Say we remove dob: string from MyData

We will get an error because our generic type T extends from Person. This means whatever class we choose to use, must conform to Person, which means we must implement name and dob of type string.

When we implemented class MyData to be passed in as the generic class, we have name of type string, but we are missing dob of type string.

Generic extend from Abstract

Say we declare a Base class

Then we use generic class and extend from abstract class.
This means any class we pass in to be used must satisfy abstract Base, which means to implement greetings().

Thus, let’s satisfy it by
1) extend from Base and use super

2) or simply implementing greetings() will work also.

Now, we can instantiate MyData and pass it into Test with no problem.

Generic class extends a concrete class

of course you don’t have to use ‘extend Base’. As you long as you implement it, its fine:

Web framework with typescript – refactor using Inheritance

source code

What we accomplished here uses composition.

Problems:

  • properties are public
  • Sync, Eventing and Attributes are hard types. We should use interfaces to components can be swapped in and out.
  • Make general functionalities reusable

Composition worse problem is nested properties.

Thus, let’s create a class Model that solves some of these problems. In order to do so, this class Model will have private properties that:

1) can hide the objects that deal with inner workings of our class.

2) use interfaces that will allow us to switch out components. Thus, it’s not hard coded. As long as our components adhere to those interfaces, we’re good to go.

3) We will also use generic type T so that the compiler will recognize the attributes and methods of any objects that we will pass in. That way, there will be type data available and intellisense can show us what we need.

Interfaces for the components

First we create interfaces for the components that will be used in Models.
This is so that as long as other components conform to these interfaces, we can interchange them.

For example, we need a component that represents Syncing. So we create interface Sync where you must implement:

1) fetch that takes in an id of type number and returns AxiosPromise.
2) save that takes in data of generic type T and returns AxiosPromise

We need a component that takes care of settings and getting local attributes, so we create interface ModelAttributes where:

1) get a certain type, where the type exists in keys of generic type T
2) getAll attributes where we return the whole object

Finally, we create an interface Events, where we force the component to implement:

1) on, with string param eventName, and a Callback so that the system can update you.
2) trigger, with string param eventName

But first, let’s look at what T means and how it is used.

Model class

We create Model class with generic type T.

We create private properties that has interface types T, which forces our data to have certain properties and to be constructed in a certain way. Notice that T acts as the generic type for some interfaces (ModelAttributes, Sync) in our properties.

Now, we create our Class that extends Model so all models can share general functionalities.

Let’s first declare a type that we can use for generic type T.

Declaring an interface for generic type T

ref – http://chineseruleof8.com/code/index.php/2021/12/06/generics/

We create an interface that act as a generic type.

Then we create a class User where it extends form Model.

This means User automatically takes on all attributes and methods of Model.
This is because those attributes and methods of Model are very general which we would to exist for any future classes that deals with Models. i.e User, Buildings, Animals….etc.

Now let’s look at the private attributes.

ModelAttributes is an interface that says you must implement these functions, for whatever generic type T these objects are.

We instantiate class Attributes, which conforms to ModelAttributes by having methods set, getAll, and get

Events is an interface that says you must implement these functions.

We instantiate class Eventing, which conforms to by having methods on, trigger

Sync is an interface that says you must implement these functions, for whatever generic type T these objects are.

We instantiate class ApiSync, which conforms to by having methods fetch, save, and get

Functions with generic type T

Look at the functions in our classes Attribute and ApiSync:

or:

Notice T. T simply means generic interface. In our case of User extends Model, we have declared T to be UserProps like so:

Look at

Attributes’ constructor, we pass in an object that conforms to UserProps (has optional properties id, name, and age):

gets passed into Attributes’ constructor:

where

Attributes’ getAll() returns UserProps, which we can then pass into
Sync’s save():


Just remember to declare a generic type T (i.e UserProps) when we extend User from Model

Constraints on Generic Type

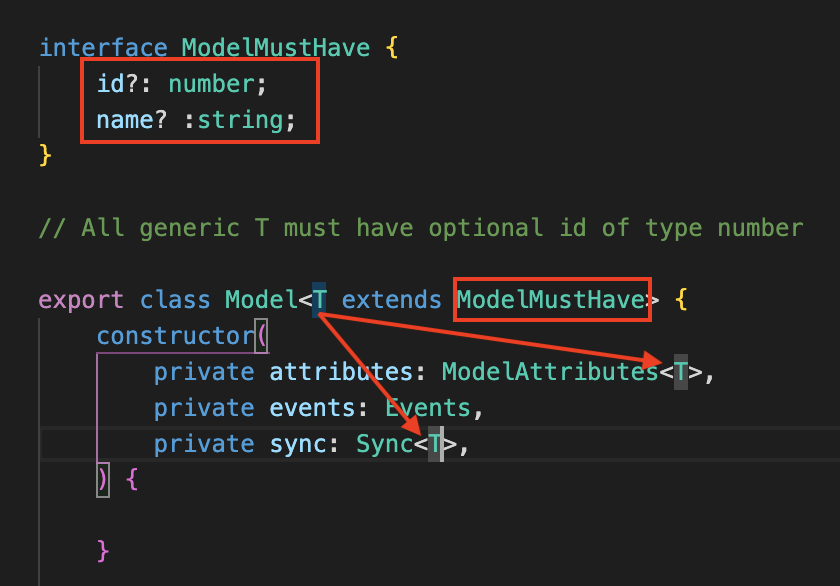
Now, take a look at ModelMustHave:

The generic type T extends from interface ModelMustHave.
This means that the allowed optional attributes presented in UserProps are limited to ModelMustHave, which is:

-id
-name

This limit comes in handy when we’re trying to implement get, where we want to limit the kind of property strings to allow in the key parameter.

Let’s take a detailed look:

keyof T – http://chineseruleof8.com/code/index.php/2021/12/01/in-typescript/

If it was just T, our union would be “id” | “name” | “age”

In our case, T extends ModelMustHave for User

So hence, only “name” and “id” will work because ModelMustHave have constrained it to “name” | “id” only.

In other words, if the T are used in parameters, then we can only pass in “id” or “name”, as T extends ModelMustHave means we are constrained to “name” and “id”.

Notice the components that conform to interface with generic T must work together like this. It returns T and takes in parameter T.

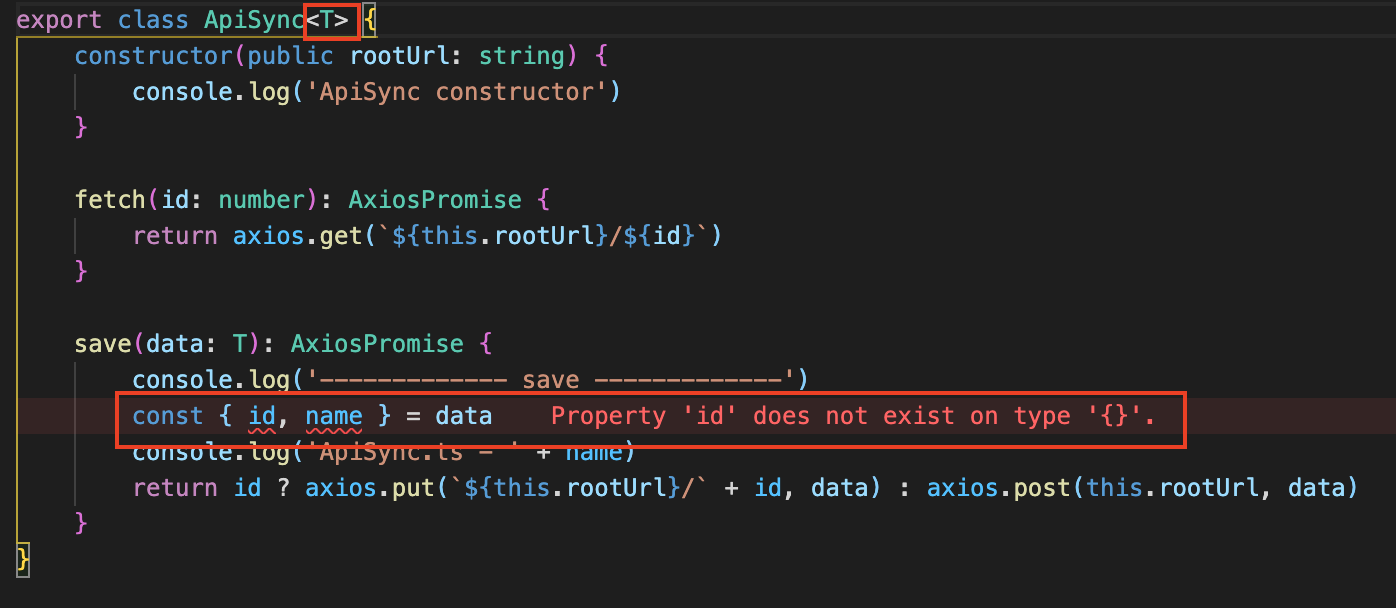
then in class ApiSync, we must clarify what T extends to again in order to extract the constrained properties as shown in function save.

We import ModelMustHave for T, so that in save, we can extract those properties from T.

If we do not declare and extend ModelMustHave, the compiler will complain because our generic type T guarantees this type checking:

Creating a wrapper around the composition

Then by using these properties, we create a wrapper around their functionalities in order to do what we want to do.

For example, if we want to register and trigger events, we just use events.
But we if want to set data, we must use attributes to update locally, then use events to trigger

As you can see, we have created an interface layer for it.

In addition, we know that this.events.on means we want to register events, but we don’t want to always type out this.event.on, so we rather just say this.on

Then, we can return references like so:

this is so that in our code, we can do this:

Web framework with typescript – Update from and Save to Server

The techniques we use here is called Composition. We compose different objects and have them work together.

To start off, we have a json server with its initial content like so:

db.json

Updating a User from the server

So we have a user. In order to update it from the latest data from the server, we’ll register an event ‘change’ and to pass a callback to let us know when it is done.

1) REGISTER event on

Once our event has been saved, we call fetch which does two things:

  1. It fetches the data from server
  2. Once data arrives, we update it locally using Attributes (Object.assign)
  3. Then our Eventing will trigger ‘change’ to execute the callback

2) FETCH data from server

where fetch is:

3) Set local properties

and set function is:

4) Trigger event Change for completion

Saving user Data

First, we have the sync class

The save function says, we are passed in data that must have an optional id property.
If this id exists then we do a PUT request, which updates the user on the server.
If this id doesn’t exist, then we simply make a POST request, which creates the user on the server.

In our attributes class, implement a getAll function that returns all attributes as an object. This is naturally our dictionary this.data:

Now we are ready to implement save() for User.
Use use User’s sync property and call save.
That function looks to see if id exists in the Attributes object.

If id does exist, we update the user on the server by making a PUT request.

If id doesn’t exist, it creates a user on the server by making a GET request.

The save function return a Promise. We call then on it so when the async function completes, it will come to our callback. In the callback, we simply trigger the ‘save’ event to let it know that our operation has completed

In index.tsx

To update User

To create New User

get keyword in typescript

The get keyword will bind an object property to a function. When this property is looked up now the getter function is called. The return value of the getter function then determines which property is returned.

Example:

When the fullname property gets looked up
the getter function gets executed and its
returned value will be the value of fullname

K extends keyof T in typescript

ref – https://stackoverflow.com/questions/57337598/in-typescript-what-do-extends-keyof-and-in-keyof-mean

Initially methods that return unions such as “string | number” is very limited.
Thus, let’s get away from union types.

Let’ take a look at this example. We create a class Attributes, which will will be initialized with interface type T.

We initialize a sample interface called UserProps.

Thus, we’ll be passing UserProps into Attributes like so:

This means Attributes will be type checking to make sure what we pass into constructor will conform to UserProps.

Now let’s implement get.

keyof T

keyof T is the union of public property names of T.

In our example, we will be using UserProps as type T.
So “keyof T” will produce “name” | “age” | “id”.

K extends keyof T

K extends keyof T is used to constrain our function get function’s param key.
What we’re saying here is that since we’ll be passing in UserProps, “keyof T” will translated to “keyof UserProps”, which then return to us a union of “name” | “age” | “id”.

Then type K of param key must be one of these three. In other words, K can only be “name”, “age”, or “id”.
Note that the “extends” used here has nothing to do inheritance!

T[K]

T[K] is the return type.

Say if we were to pass in “name” into function get,
K will be “name”
T is UserProps,
Then T[K], UserProps[“name] will give the type string.

Now that the code is clear, let’s look at the full source and see how it is used:

We first instantiate an Attributes where it accepts interface UserProps as T. The object we pass in must conform to UserProps with properties name, age, and id.

We then use the instance and call function get with parameter name.

name conforms to keyof UserProps, so K is now name.

Since K is name then T[K] will be string.
We see this by hovering over name and intellisense will show the type string.

For age and id, its returned instances will have type number.

This is a much better way than to return limited unions.

Polling with Node JS and Vue

ref – https://www.technouz.com/4879/long-polling-explained-with-an-example/
https://github.com/zaarheed/long-polling-example

Short Polling

Polling at intervals

  1. The client sends a request
  2. Server returns a response of either data or no data
  3. Client receives the response. If there is data, does something with it
  4. Client sleeps for an interval and repeats

The connection here is not continuous. It is at an interval. i.e 5 seconds.
This means we get a result every 5 seconds. However, our result can be ~5 seconds old.

For example,

seconds:
0, client makes a request,
0.1, server responds with empty response
0.2, client receives empty response, data is updated on the server side

1,
2,
3,
4,

5, client makes a request
5.1, server responds with updated data
5.2, client receives the updated data.

Thus, this data is ~5 seconds old.

Making repeated requests like this wastes resources, as each:

– new incoming connection must be established
– the HTTP headers must be parsed
– a query for new data must be performed
– and a response (usually with no new data to offer) must be generated and delivered.

The connection must then be closed, and any resources cleaned up.
This process gets repeated and it very inefficient.

Long Polling

Long polling is a technique where the server elects to hold a client’s connection open for as long as possible, delivering a response only after data becomes available for a timeout threshold has been reached.

With long polling it is almost immediately.
During long polling, we send a request. The request will take say..100 milliseconds. The server gets the data and sends it back, which say takes 200 milliseconds. So it is 300 milliseconds.

This is almost ‘real time’-ish.

On the client side, only a single request to the server needs to be managed. When the response is received, the client can initiate a new request, repeating this process as many times as necessary.

The only difference to basic polling is that a client performing basic polling may deliberately leave small time window between each request so as to reduce its load on the server. And it may responds to timeouts.

With long polling, the client may be configured to allow for a longer timeout period (via Keep-Alive header) while listening for a response.

Note the timeout seconds is ten seconds. This means, ten seconds is the maximum time the server has to return something.

The server

Client

Using TypeScript with React JS

ref – https://blog.logrocket.com/using-typescript-with-react-tutorial-examples/

download demo

The key to TypeScript is that it’s a statically typed script. Programming languages can either be statically or dynamically typed; the difference is when type checking occurs. Static languages variables are type-checked.

TypeScript allows you to define complex type definitions in the form of interfaces. This is helpful when you have a complex type that you want to use in your application, such as an object which contains other properties. This results in strict checks, which reduces the number of possible bugs you might have produced without it.

JSX stands for JavaScript XM. It allows us to write HTML code directly in our React project. Using TypeScript with React provides better IntelliSense, code completion for JSX.

Basic Setup


mkdir typescript-react-project
cd typescript-react-project
npm init

How does TypeScript compile React code?

TypeScript always checks for a file called tsconfig.json in the project root folder for instructions. When it finds the tsconfig.json file, it loads the settings defined in the file and uses them to build the project.

A TypeScript project is compiled in one of the following ways:

By invoking tsc with no input files, in which case the compiler searches for the tsconfig.json file starting in the current directory and continuing up the parent directory chain.

By invoking tsc with no input files and a –project (or just -p) command line option that specifies the path of a directory containing a tsconfig.json file, or a path to a valid .json file containing the configurations

touch tsconfig.json

The JSON configuration above defines two major sections: the compilerOptions and exclude parameters.

In the compilerOptions, a target of es6 has been set. This means the JavaScript engine target will be set to es6 but will compile down to es5 as the target.

Notice that there is also a key called jsx, which is set to react. This tells TypeScript to compile JSX files as React files. This is similar to running tsc  –jsx react.

The outDir is the output folder after compilation.

In the exclude block, node_modules is being defined for it. TypeScript will not scan the node_modules folder for any TypeScript file while compiling.

If you’re familiar with TypeScript and its configuration, you might wonder why the include section is missing. This is because we’re going to configure webpack to handle taking in the entry files, passing them to TypeScript for compilation, and returning a bundled JavaScript script for browsers.

Configuring Webpack

npm install webpack webpack-cli ts-loader

What is ts-loader?

As its name implies, ts-loader is the TypeScript loader for webpack. Put simply, it’s a plugin that helps webpack work well with TypeScript.

Just like TypeScript, webpack also checks for a file called webpack.config.js for configuration.

If it doesn’t already exist, create a new file called webpack.config.js and add the following code:

Adding npm scripts

In your package.json, edit your scripts attribute like so:

After all the configurations were done above, it’s time to create the main entry point file of our project, but before we do that, we need to install types definition for libraries installed.


npm install react react-dom @types/react @types/react-dom

Next, create a new folder src and then a file in the src folder called index.tsx in the root and add the following code:

Above is a simple React setup, except that it is using TypeScript. To compile the file, run the command below in your terminal:

npm run magic

A build folder with a file named bundle.js has been created.

Does this newly created bundle work as expected? Create a new index.html file that references the new build to find out:

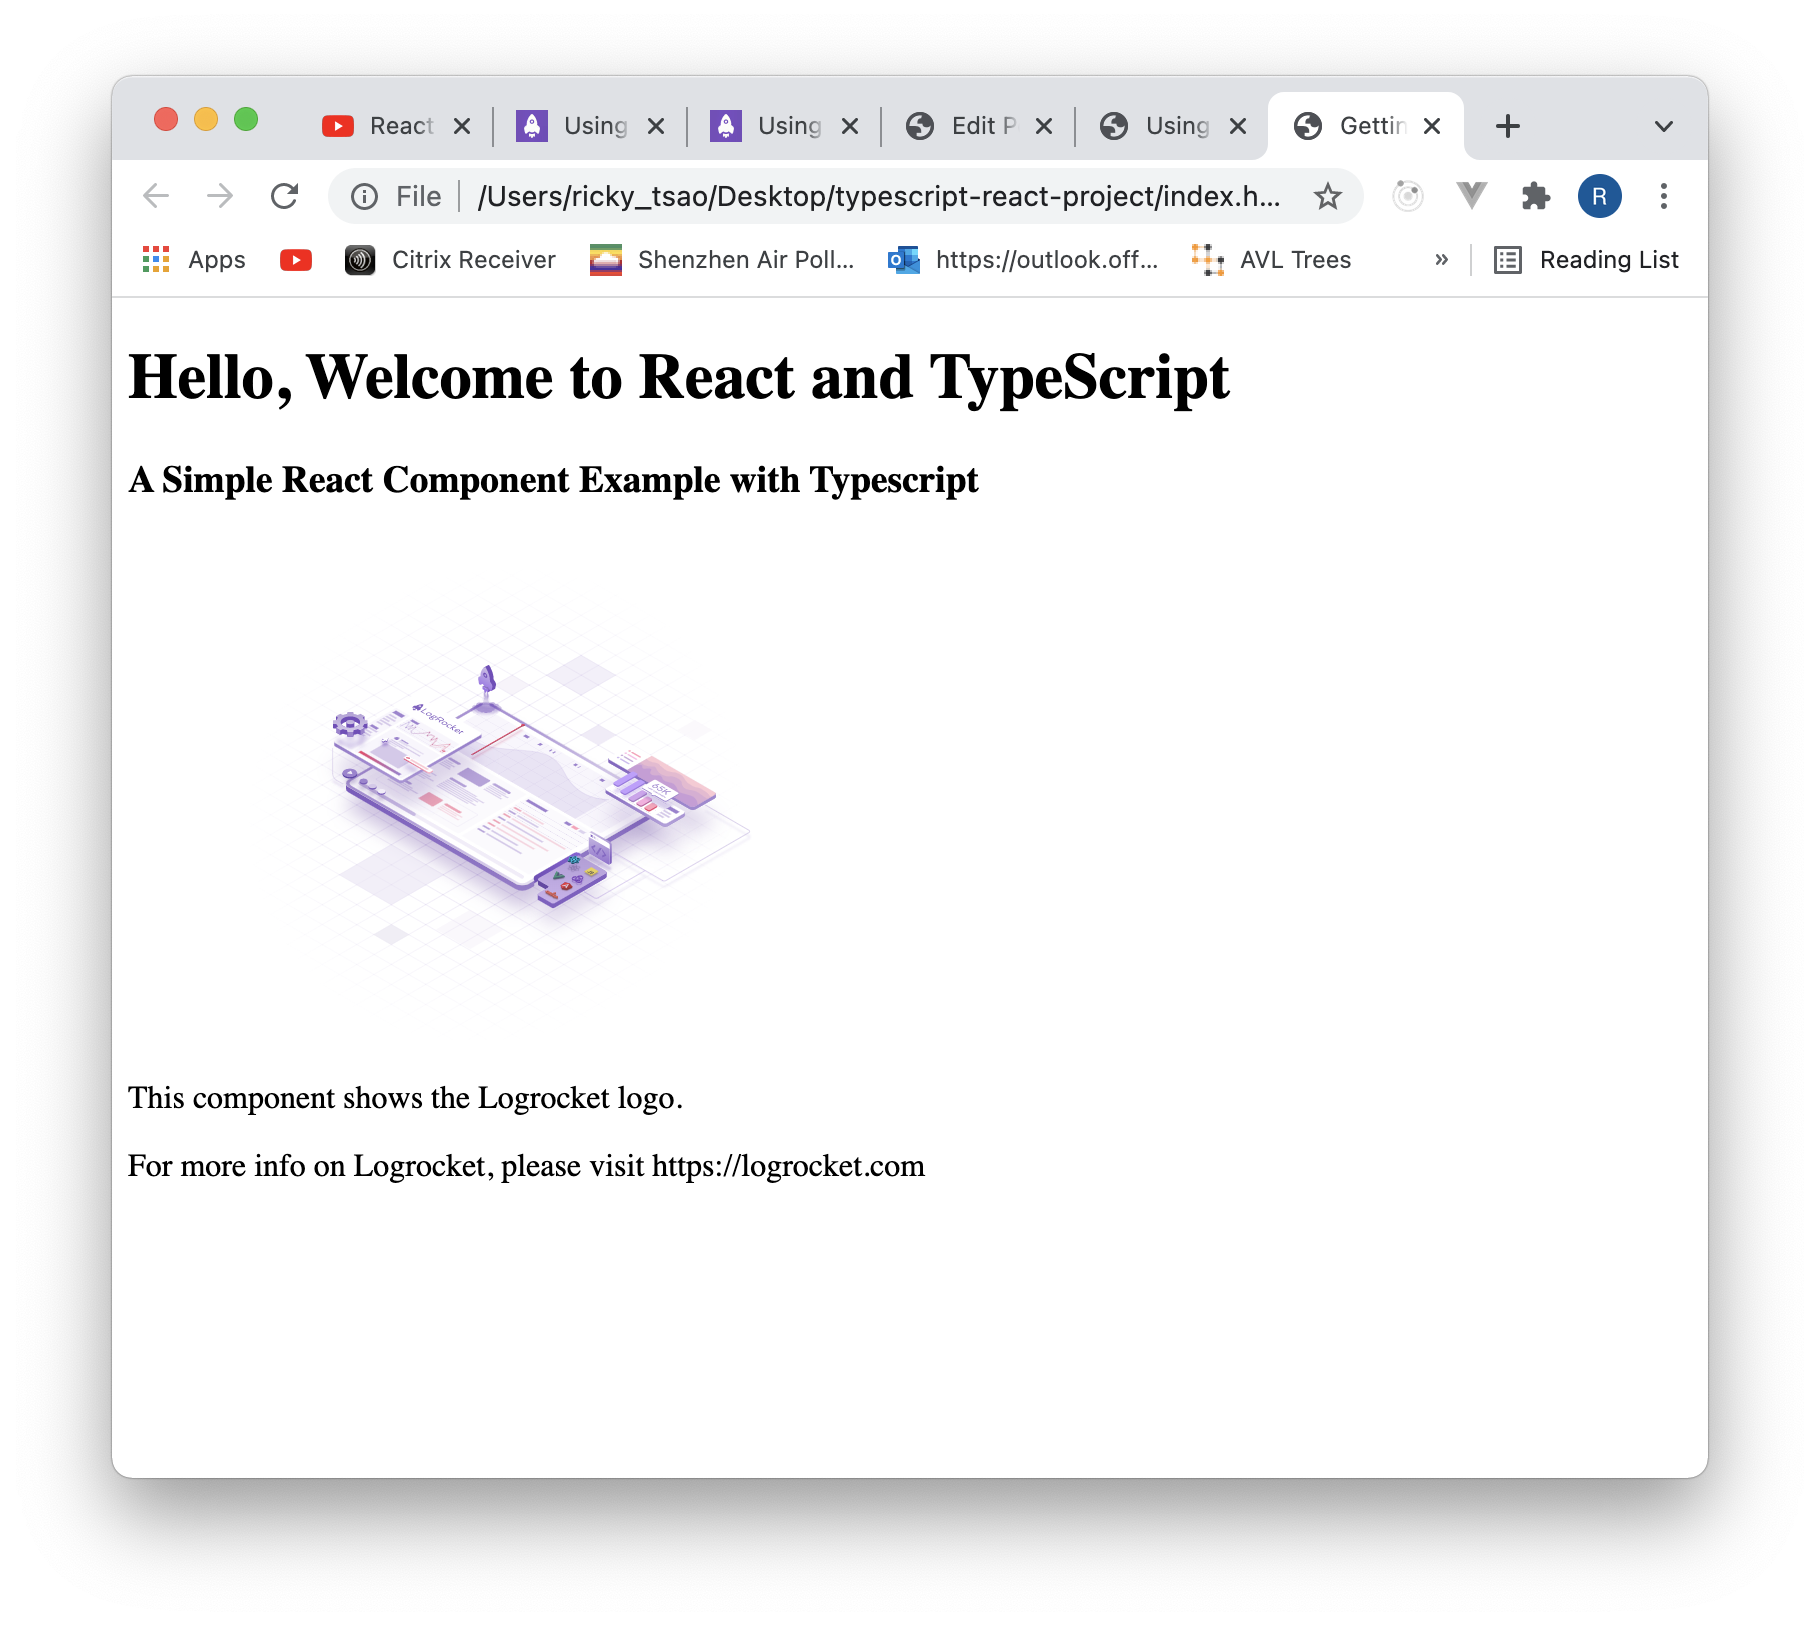
double click on index.html and you should see a simple page appear.

Creating React components in TypeScript

src/component/FirstComponent.tsx

To make this new component accessible to React, we need to import and use the component in the base index.tsx file. Update the index.tsx file to:

npm run magic

output:

Using TypeScript interfaces with React components

One of TypeScript’s core principles is that type checking focuses on the shape that values have. This is sometimes called “duck typing” or “structural subtyping.”

In TypeScript, interfaces fill the role of naming these types and are a powerful way of defining contracts within your code and contracts with code outside of your project.

To see how you can use interfaces with your react components, create a file src/UserInterface.ts in the src folder and add the following code:

The code block above defines a simple User interface, which will be passed in as props into a new component. Because this interface is strongly typed, notice you cannot pass an integer for the name key, as the value is a string.

Create a new component in our components folder called UserComponent.tsx and add the following code:

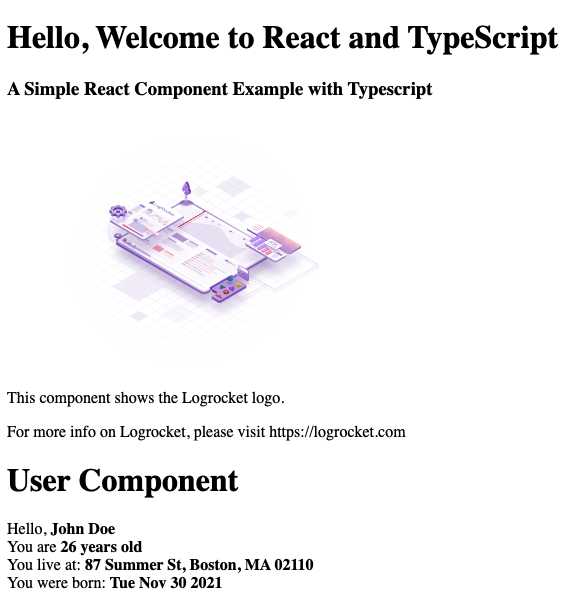
The UserInterface created earlier on has been imported and passed down as the props of the UserComponent. In the constructor, we checked that the props passed are of the UserInterface type and in the render function, the data will be displayed on our page.

After creating our UserComponent, update the index.tsx file:

npm run magic