ref – https://docker-curriculum.com/
Requirement: Docker app be installed
What is a container?
A container is simply another process on your machine that has been isolated from all other processes on the host machine. It is created from Docker images and runs the actual application. We create a container using docker run which we did using the busybox image that we will download. A lit of running containers ca be seen using the docker ps command.
What is a container image
When running a container, it uses an isolated filesystem. This custom filesystem is provided by a container image. Since the image contains the container’s filesystem, it must contain everything needed to run an application – all dependencies, configuration, scripts, binaries, etc. The image also contains other configuration for the container, such as environment variables, a default command to run, and other metadata.
In other words, the blueprints of our application which form the basis of a container. In the tutorial below, we use the docker pull command to download the busybox image.
Docker Hub
A registry of Dicker images. Directory of all the images. We can host our own Docker registries and can use them for pulling images.
Docker Client to communicate with Docker Daemon
So the background service running on the host that manages building, running, and distributing Docker containers are called Docker Daemon. We as users interact with this Daemon by using a client, which is GUI based.
Tutorial – BusyBox
docker pull busybox – fetches busybox image from the Docker registry and saves it to our system.
docker images – to see a list of all images on your system
docker run busybox
Wait, nothing happened! Is that a bug? Well, no. Behind the scenes, a lot of stuff happened. When you call run, the Docker client finds the image (busybox in this case), loads up the container and then runs a command in that container. When we run docker run busybox, we didn’t provide a command, so
the container booted up, ran an empty command and then exited.
Well, yeah – kind of a bummer. Let’s try something more exciting.
docker run busybox echo “hello from busybox”
In this case, the Docker client dutifully ran the echo command in our busybox container and then exited it. If you’ve noticed, all of that happened pretty quickly. Imagine booting up a virtual machine, running a command and then killing it. Now you know why they say containers are fast! Ok, now it’s time to see the docker ps command.
docker ps – The docker ps command shows you all containers that are currently running
docker ps -a – list of containers that we ran. Notice under STATUS that these containers exited a few minutes ago.
We can also start an tty interactive and start executing commands for that container.
docker run -it busybox sh
docker ps -a to look at the list of containers that ran
copy and paste the container ID.
Removing stopped Containers
Then run docker rm [CONTAINER ID].
But if you find it tedious, you can go
docker rm $(docker ps -a -q -f status=exited)
The Containers that have been removed will display their IDs.
the -q flag, only returns the numeric IDs and -f filters output based on conditions provided. One last thing that’ll be useful is the –rm flag that can be passed to docker run which automatically deletes the container once it’s exited from. For one off docker runs, –rm flag is very useful.
You can also use docker container prune
Tutorial – Run a static site
docker run –rm prakhar1989/static-site
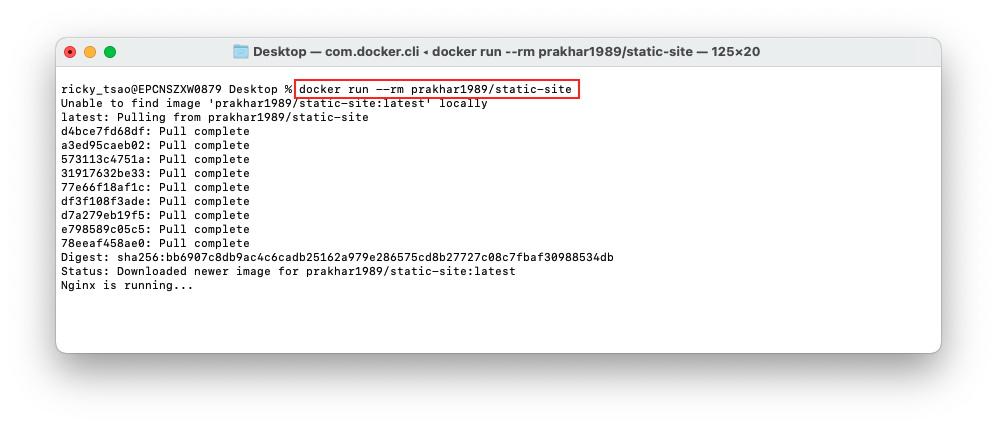
Since the image doesn’t exist locally, the client will first fetch the image from the registry and then run the image. If all goes well, you should see a Nginx is running… message in your terminal.
kay now that the server is running, how to see the website?
What port is it running on? And more importantly, how do we access the container directly from our host machine?
Hit Ctrl+C to stop the container.
Well, in this case, the client is not exposing any ports so we need to re-run the docker run command to publish ports. While we’re at it, we should also find a way so that our terminal is not attached to the running container. This way, you can happily close your terminal and keep the container running. This is called detached mode.
First, we look at the docker list
docker ps -a
note the CONTAINER ID of our prakhar1989/static-site
say the container id is f57dfdf7e5a3
docker stop f57dfdf7e5a3
docker rm f57dfdf7e5a3
docker run -d -P –name static-site prakhar1989/static-site
In the above command, -d will detach our terminal, -P will publish all exposed ports to random ports and finally –name corresponds to a name we want to give.
then it outputs:
909e91f61b817dfa50df43d3eb5f94c4585331f9328d1348857363306b92f29f
docker port static-site
443/tcp -> 0.0.0.0:55002
80/tcp -> 0.0.0.0:55003
Now if you open a browser and hit http://localhost:55003/ you’ll see a webpage.
to stop the site docker stop static-site
Docker images
Base images are images that have no parent image, usually images with an OS like ubuntu, busybox or debian.
Child images are images that build on base images and add additional functionality.
Official images are images that are officially maintained and supported by the folks at Docker. These are typically one word long. In the list of images above, the python, ubuntu, busybox and hello-world images are official images.
User images are images created and shared by users like you and me. They build on base images and add additional functionality. Typically, these are formatted as user/image-name.
Dockerfile
A Dockerfile is a simple text file that contains a list of commands that the Docker client calls while creating an image.
It’s a simple way to automate the image creation process.
The best part is that the commands you write in a Dockerfile are almost identical to their equivalent Linux commands. This means you don’t really have to learn new syntax to create your own dockerfiles.
Let’s pull from git: git clone https://github.com/prakhar1989/docker-curriculum.git
cd docker-curriculum/flask-app
Now, we have a project that we’ve cloned from github.
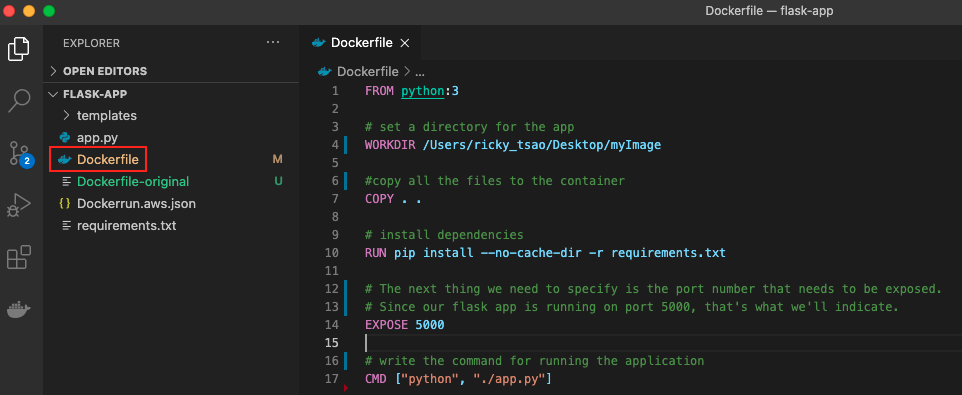
Inside this project, let’s create a Dockerfile.
Dockerfile
|
1 2 3 4 5 6 7 8 9 10 11 12 13 14 15 16 17 |
FROM python:3 # set a directory for the app WORKDIR /Users/ricky_tsao/Desktop/myImage #copy all the files to the container COPY . . # install dependencies RUN pip install --no-cache-dir -r requirements.txt # The next thing we need to specify is the port number that needs to be exposed. # Since our flask app is running on port 5000, that's what we'll indicate. EXPOSE 5000 # write the command for running the application CMD ["python", "./app.py"] |
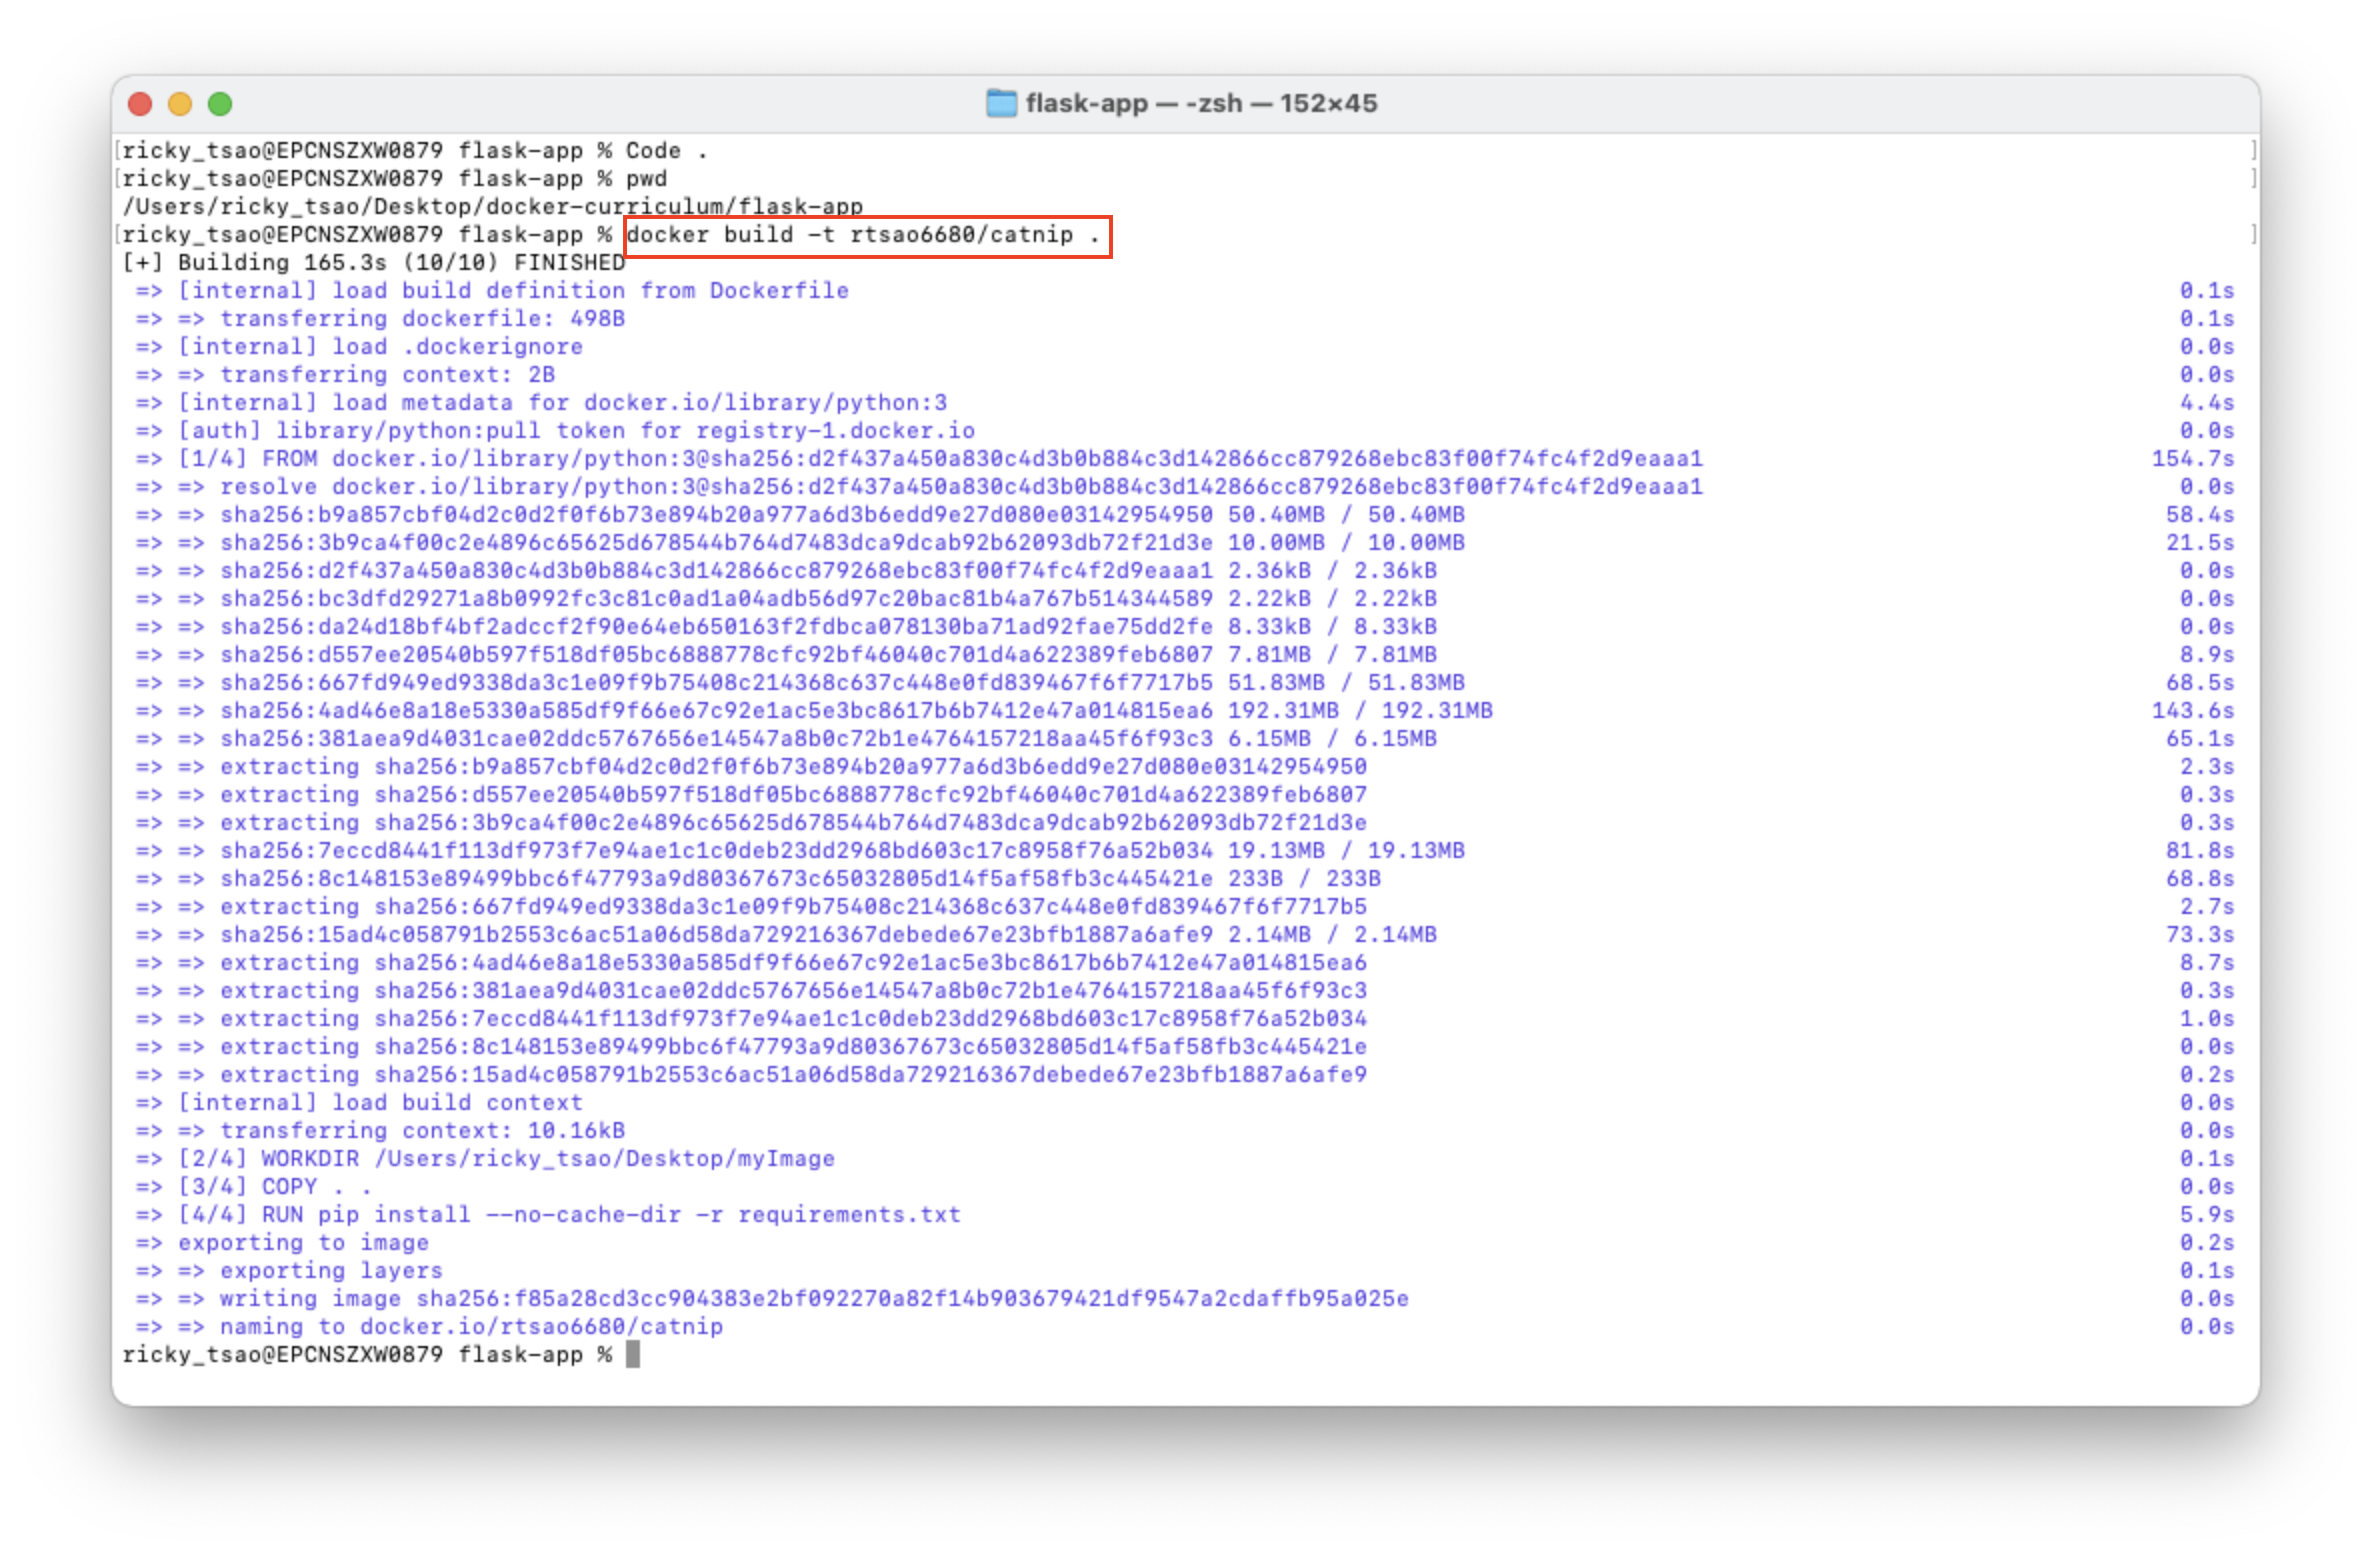
Now that we have our Dockerfile, we can build our image. The docker build command does the heavy-lifting of creating a Docker image from a Dockerfile.
The section below shows you the output of running the same. Before you run the command yourself (don’t forget the period), make sure to replace my username with yours. This username should be the same one you created when you registered on Docker hub. If you haven’t done that yet, please go ahead and create an account. The docker build command is quite simple – it takes an optional tag name with -t and a location of the directory containing the Dockerfile.
Run docker images and see if your image shows.
Perfect, we see:
rtsao6680/catnip latest f85a28cd3cc9 6 minutes ago 895MB
The last step in this section is to run the image and see if it actually works (replacing my username with yours).
docker run -p 8888:5000 rtsao6680/catnip
Go to http://localhost:8888/ and you’ll see the latest gif of a cat
Congratulations! You have successfully created your first docker image.
Sharing it on AWS
We can deploy our awesome application to the cloud so that we can share it with our friends! We’re going to use AWS Elastic Beanstalk to get our application up and running in a few clicks. We’ll also see how easy it is to make our application scalable and manageable with Beanstalk!
The first thing that we need to do before we deploy our app to AWS is to publish our image on a registry which can be accessed by AWS. There are many different Docker registries you can use (you can even host your own). For now, let’s use Docker Hub to publish the image.
docker login
Then let’s push our catnip project
docker push rtsao6680/catnip
output:
flask-app % docker push rtsao6680/catnip
Using default tag: latest
The push refers to repository [docker.io/rtsao6680/catnip]
d03f56673e4c: Pushed
060c2d81fdfd: Pushed
b86d642a1859: Pushed
394ec6c8d61d: Mounted from library/python
c5e393b8a19a: Mounted from library/python
b3f4557ae183: Mounted from library/python
9f5b4cdea532: Mounted from library/python
cd702377e4e5: Mounted from library/python
aa7af8a465c6: Mounted from library/python
ef9a7b8862f4: Mounted from library/python
a1f2f42922b1: Mounted from library/python
4762552ad7d8: Mounted from library/python
latest: digest: sha256:d2ba2613cdc9d0fb211c230d0e336e498cc16a1e319866e6fce61bdd2083e014 size: 2843
Now go on Docker Hub and check for your image.
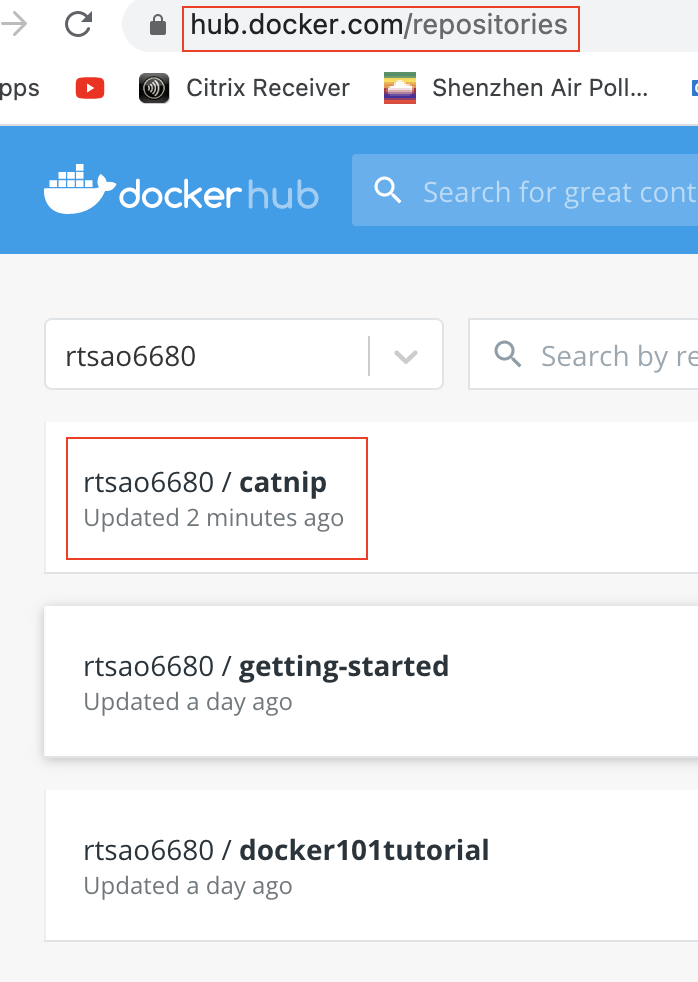
Now that your image is online, anyone who has docker installed can play with your app by typing just a single command.
docker run -p 8888:5000 rtsao6680/catnip
Making it public on AWS
Login to your AWS console.
Click on Elastic Beanstalk.
It will be in the compute section on the top left.
Alternatively, you can access the Elastic Beanstalk console.
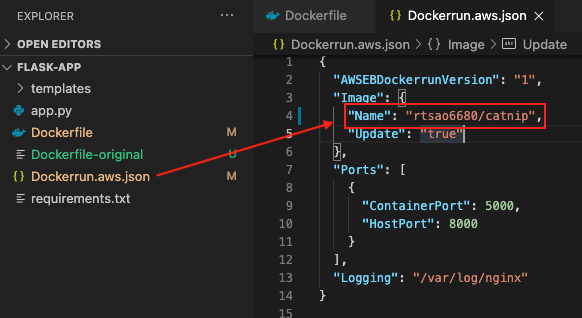
In https://hub.docker.com/repositories, our app name is rtsao6680/catnip.
Hence, make sure we reflect that in our Dockerrun.aws.json:
Under Platform, choose Docker. The other settings will auto-select. It should look something like this:

The Name rtsao6680/catnip should tell AWS EBS to seek out that image from Docker. Then upload it and make it public. However, if it doesn’t work, make sure you try to upload and deploy again.
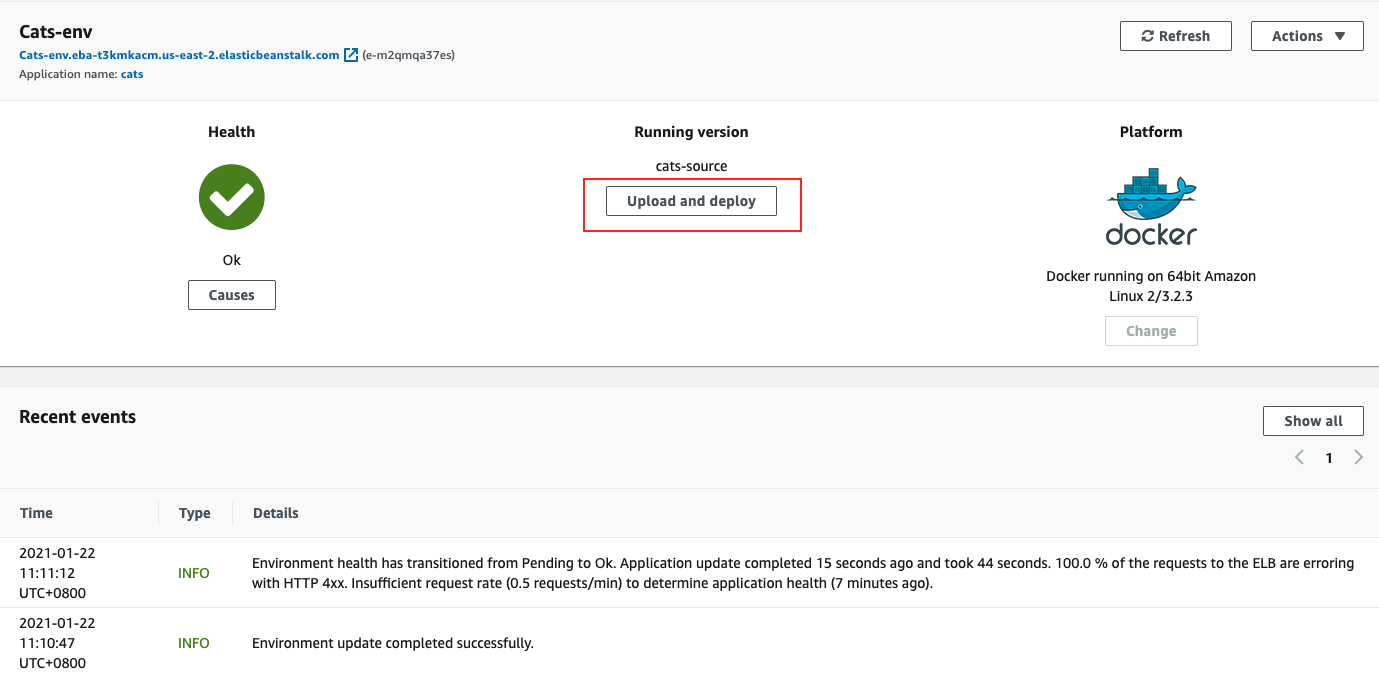
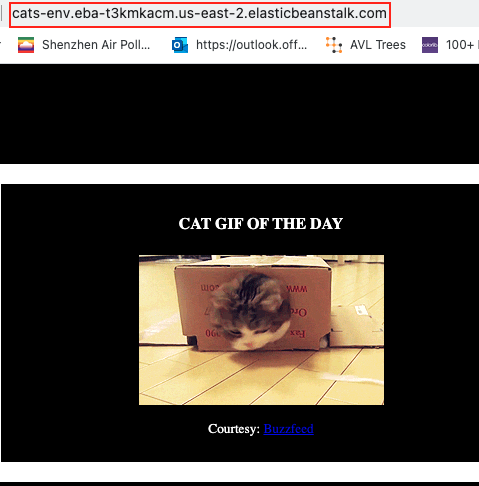
When it succeeds, you should be able to click the link and see the site publicly.
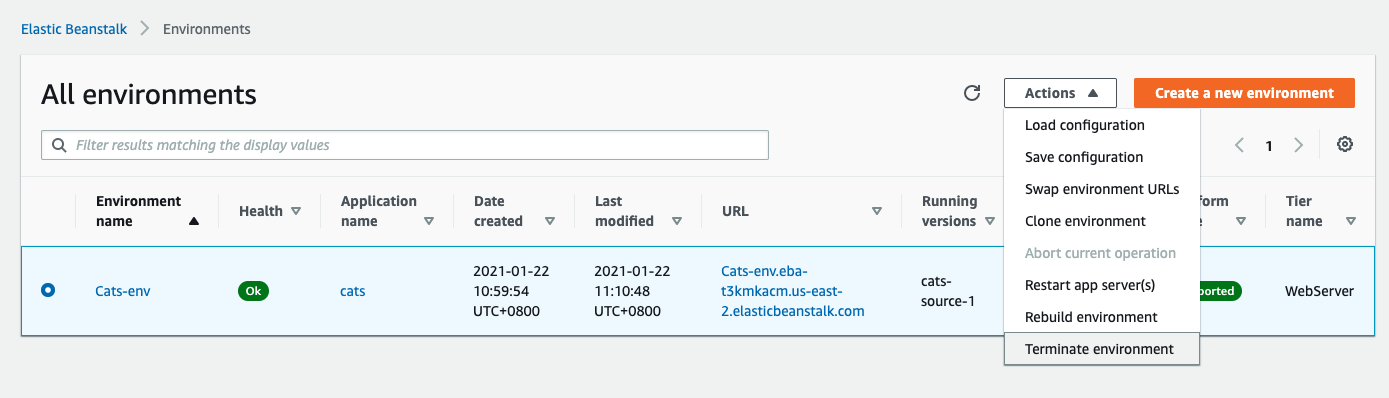
Cleanup
Once you done basking in the glory of your app, remember to terminate the environment so that you don’t end up getting charged for extra resources.