ref –
- Install KeyCloak Server – https://huongdanjava.com/install-keycloak-standalone-server.html
- Install and run Node JS with KeyCloak Server -https://medium.com/devops-dudes/securing-node-js-express-rest-apis-with-keycloak-a4946083be51
- demo
Install Keycloak
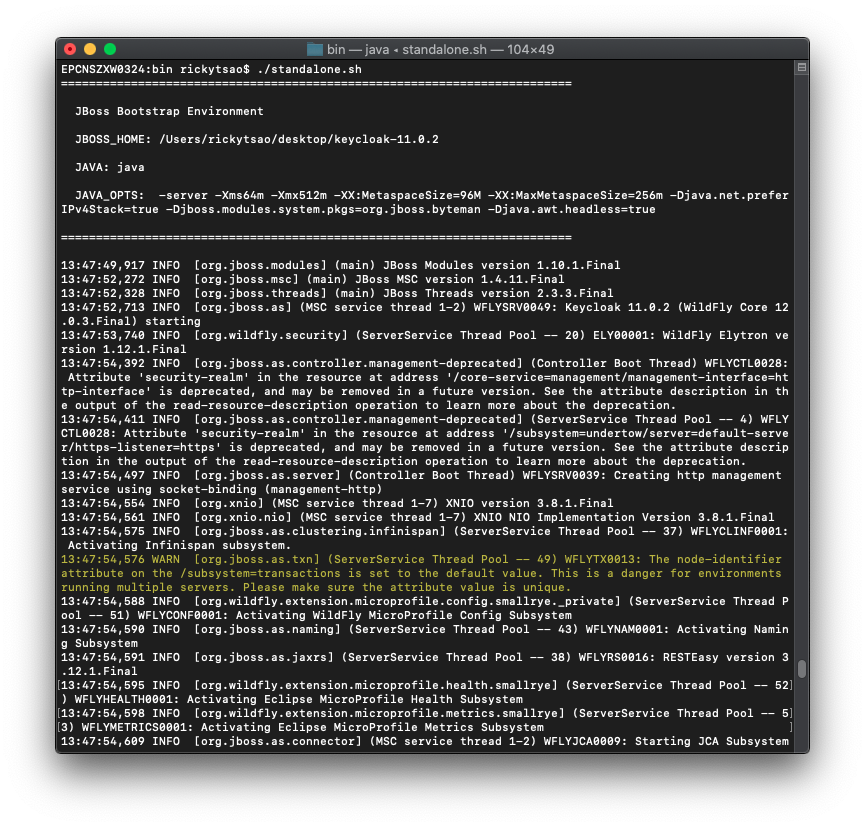
Download Keycloak zip and unzip it onto a directory.
Go into the directory and cd into the bin folder. Then: ./standalone.sh
Open up a browser and go to http://localhost:8080/auth/
We then need to create a new user admin by filling in the Administration Console and then clicking Create button.
I will create a new user using admin/admin.
Go to the admin console http://localhost:8080/auth/admin/ and log in.
Create Realm
A Realm manages a set of users, clients, credentials, roles, and groups. A user belongs to and logs into a realm. Realms are isolated from one another and can only manage and authenticate the users that they control.
Clients are browser apps and web services that are either allowed to initiate the login process or have been provided with tokens resulting from earlier logins.
First, make sure you are logged into the Admin Console.
From the Master drop-down menu, click Add Realm. When you are logged in to the master realm this drop-down menu lists all existing realms.
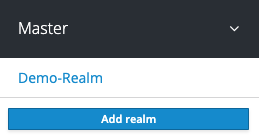
Type Demo-Realm in the Name field and click Create.
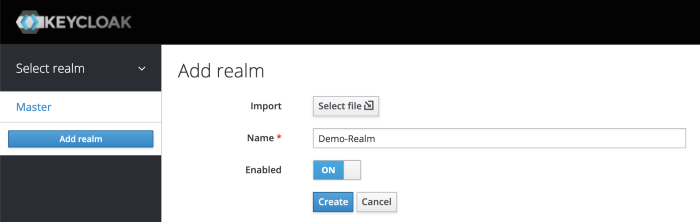
Make sure Demo-Realm is selected for the below configurations. Avoid using the master realm.
Create Client for your Realm
Click on the Clients menu from the left pane. All the available clients for the selected Realm will get listed here.
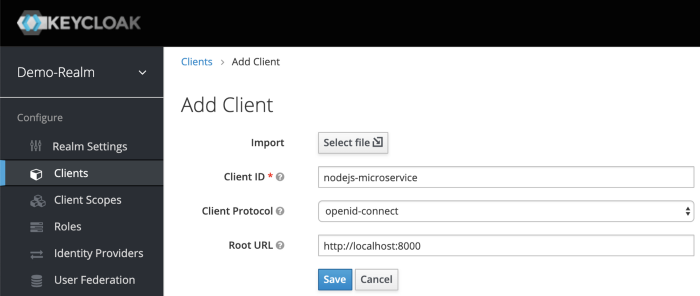
To create a new client, click Create. You will be prompted for a Client ID, a Client Protocol and a Root URL. A good choice for the client ID is the name of your application nodejs-microservice, the client protocol should be set to openid-connect and the root URL should be set to the application URL of http://localhost:8000
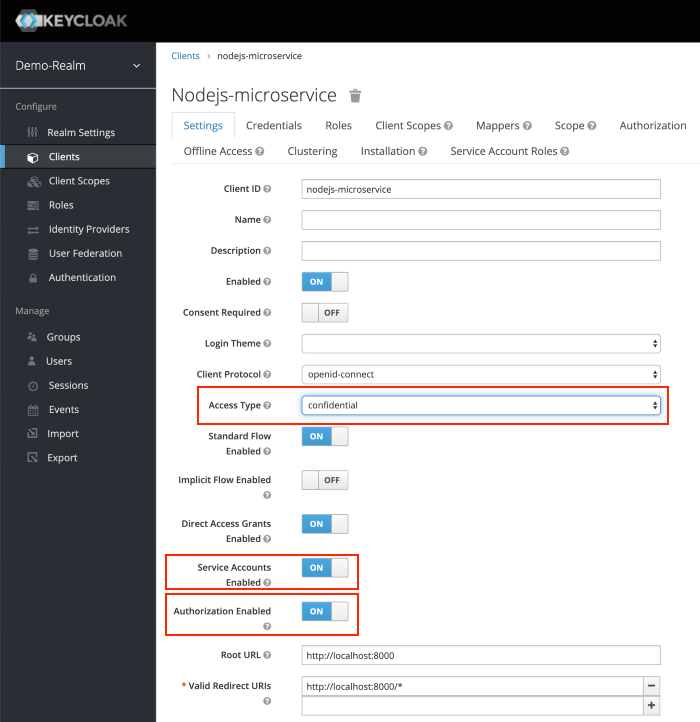
After saving you will be presented with the client configuration page where you can assign a name and description to the client if desired.
Set the Access Type to confidential, Authorization Enabled to ON , Service Account Enabled to ON and click Save.
Credentials tab will show the Client Secret which is required for the Node.js Application Keycloak configurations later on.
Creating Client Roles
First, click on Clients > nodejs-microservice > Roles tab.
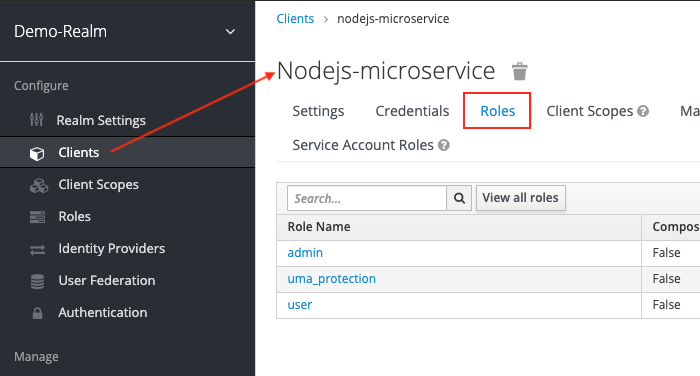
We need to create roles for this.
Do this for user and admin.
After creating those roles, you should be able to see them appear under the Roles tab of Client nodejs-microservice.
Creating Realm Roles
We have applications assign access and permissions to specific roles. Let’s create realm roles to give application access to our user and admin roles.
For example, for user boss, we want it with admin roles to be able to access, so we will create an app-admin realm role to give to this user.
for user rtsao, we want it with user roles to be able to access, so we will create an app-user realm role for this.
On the left sidebar menu, click on the roles. Click Add Role.
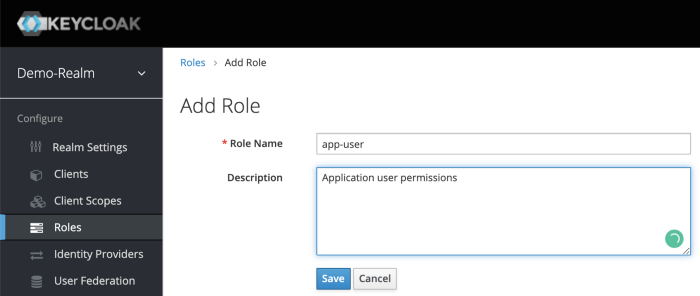
After Save, enabled Composite Roles and Search for nodejs-microservice under Client Roles field. Select user role of the nodejs-microservice and Click Add Selected >.
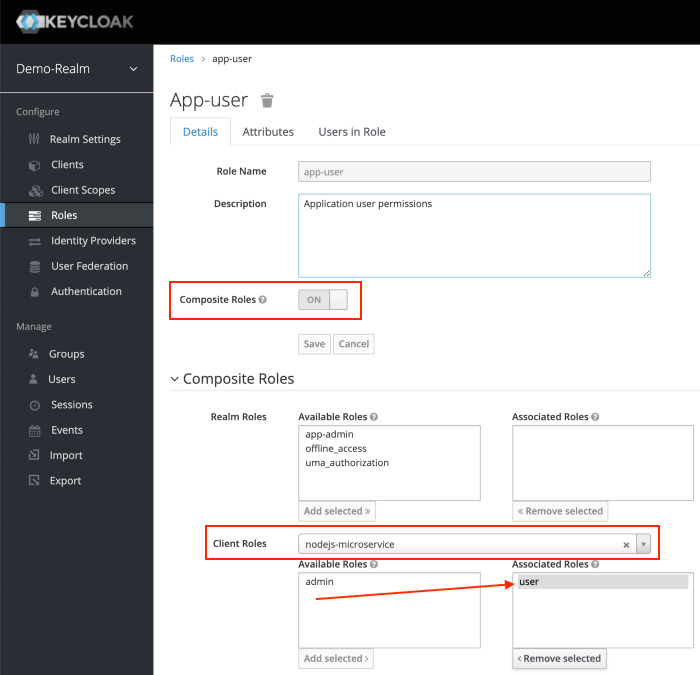
This configuration will assign nodejs-microservice user client role to the app-user realm role. We can also mix and match for more complicated permissions.
Let’s do the same for realm role app-admin.
Creating Users with realm roles
Users are entities that are able to log into your system. We can grant them our realm roles for testing purposes.
Let’s create users:
rtsao – user role only
boss – admin role only
ver – both user and admin role
On the left hand sidebar, click on Users.
On the right side of the empty user list, click Add User to open the add user page.
Enter a name in the Username field; this is the only required field. Flip the Email Verified switch from Off to On and click Save to save the data and open the management page for the new user.
Click the Credentials tab to set a temporary password for the new user.
– Flip the Temporary switch from On to Off
– Type a new password and confirm it, click Reset Password to set the user password to the new one you specified.
For simplicity let’s set the password to mypassword for all the users.
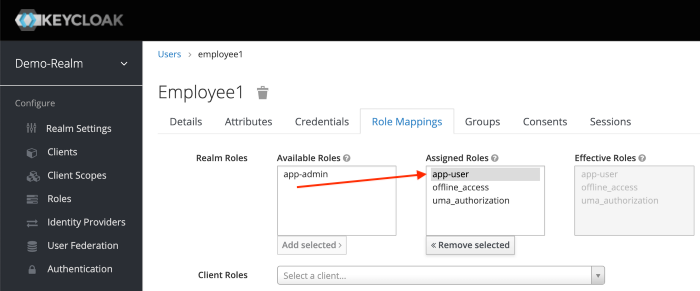
Click the Role Mappings tab to assign realm roles to the user.
Realm roles list will be available in Available Roles list. Select one required role and click on the Add Selected > to assign it to the user.
After role assignment, assigned roles will be available under Assigned Roles list. Role assignments for rtsao should be app-user.
for boss, give it app-admin.
For ver, give it both app-admin and app-user.
Generating Tokens for users to access resource
Go to Realm Settings of the Demo-Realm from the left menu and click on OpenID Endpoint Configuration to view OpenID Endpoint details.
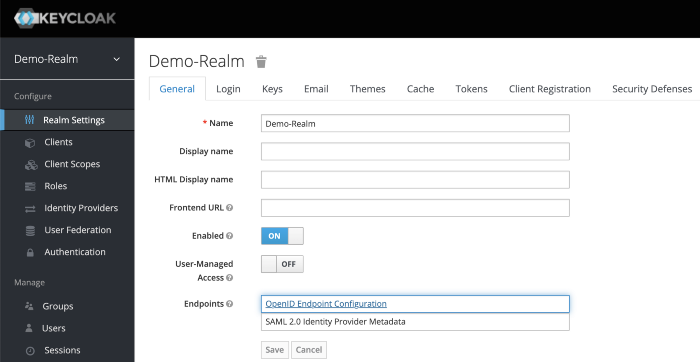
copy the token endpoint.
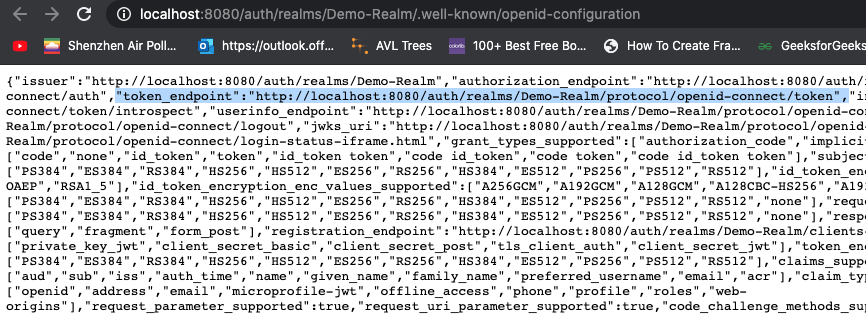
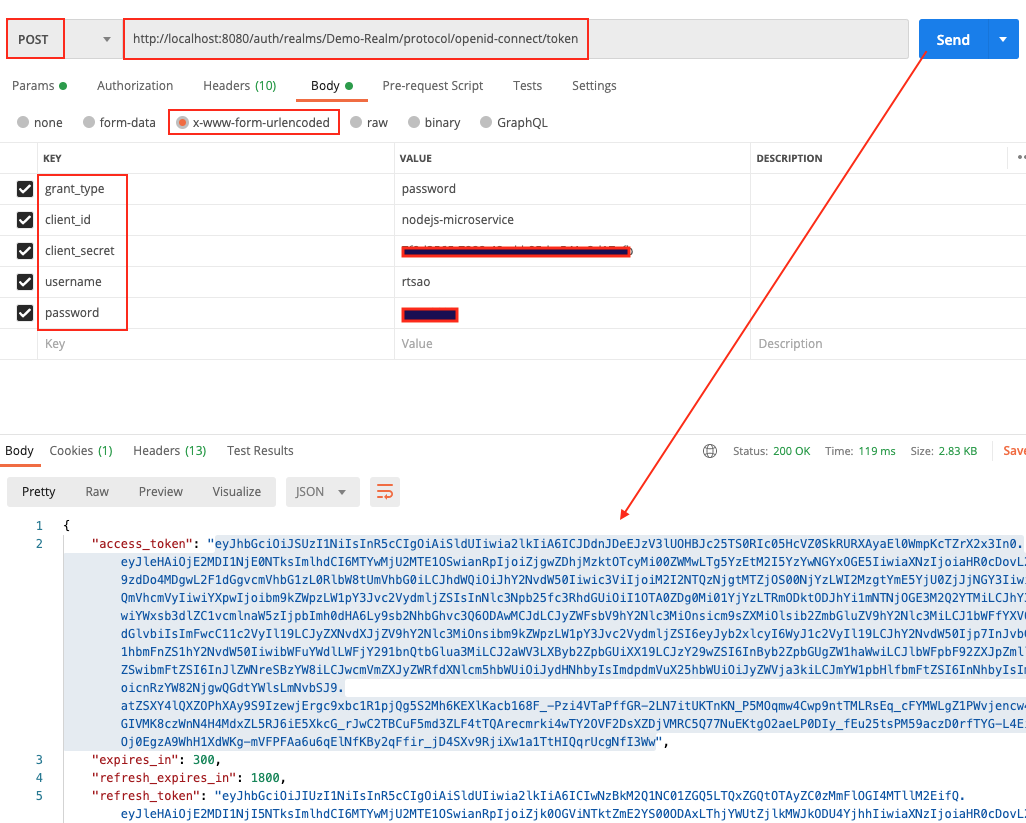
Open up Postman, and put it into the url.
Make sure you put http verb as POST.
Click on Body tab. Click on x-www-form-urlencoded radio button.
They put these key/values
grant_type, password
client_id, nodejs-microservice
client_secret,
username, rtsao
password, *************
This is the basics of getting an access token. With this token, you give it to keycloak’s API later in the tutorial, and it will grant you access to the URL resource.
When you hit send, you should get a status 200 and the token itself.
Copy the token and give it to https://jwt.io/ to verify.
On the right hand side, look at the payload. You should see various information. At the very bottom, you should see ‘signature verified’.
access_token includes the permission details.
realm_access.roles includes app_user realm role.
resource_access.nodejs-microservice.roles include the user client role.
preferred_username includes the username of the user (rtsao)
iat, exp includes the token issued time as well as the token expiry time. Access Token expiry times can be customizable under Realm Settings, Tokens tab. By default, Access Token Lifespan would be set to 5 minutes which can be customized based on your security requirements.
Node JS App
Make sure you have the latest node and npm.
mkdir keycloak-nodejs-microservice
cd keycloak-nodejs-microservice
npm init
It will ask you for the following information. Just keep pressing enter, and enter your name at the “author name” field.
npm install –save express
npm install -g nodemon
Open the project with VS Code.
Create a new file called index.js and with the below content.
|
1 2 3 4 5 6 7 8 |
var express = require('express'); var app = express(); app.get('/', function(req, res){ res.send("Server is up!"); }); app.listen(3000); |
Save the file, go to your terminal and type the following.
nodemon index.js
This will start the server. To test this app, open your browser and go to http://localhost:3000 and Server is up! message will appear in the browser.
Create sub directory Test
We want all of our resource strings to have a sub route of ‘test’. test/route1, test/route2…etc.
Create a new folder controller and create a new file test-controller.js in the created folder with the below content.
|
1 2 3 4 5 6 7 8 9 10 11 12 13 14 15 16 17 18 19 |
var express = require('express'); var router = express.Router(); router.get('/anonymous', function(req, res){ res.send("Hello Anonymous"); }); router.get('/user', function(req, res){ res.send("Hello User"); }); router.get('/admin', function(req, res){ res.send("Hello Admin"); }); router.get('/all-user', function(req, res){ res.send("Hello All User"); }); module.exports = router; |
Import test-controller.js and add the testController router to express in index.js before the app.listen function call.
|
1 2 |
var testController = require('./controller/test-controller.js'); app.use('/test', testController); |
invoke by opening Postman and do a GET on http://localhost:3000/test/{anonymous} (user, admin, all-user)
You should get the response text accordingly because so far, no authorization is applied.
Integrating Keycloak with our Node app
Install keycloak-connect, express-session dependencies to your project.
npm install keycloak-connect –save
npm install express-session –save
npm install express-session –save
Create a new folder config and create a new file keycloak-config.js in the created folder with the below content. Change the keycloakConfig variable content with Keycloak Server URL and nodejs-microservice Client Id.
config/keycloak-config.js
|
1 2 3 4 5 6 7 8 9 10 11 12 13 14 15 16 17 18 19 20 21 22 23 24 25 26 27 28 29 30 31 32 33 34 35 36 37 38 39 |
var session = require('express-session'); var Keycloak = require('keycloak-connect'); let _keycloak; var keycloakConfig = { clientId: 'nodejs-microservice', bearerOnly: true, serverUrl: 'http://localhost:8080/auth', // the keycloak instance that's running realm: 'Demo-Realm', credentials: { secret: '7f0d2565-7888-48ad-b95d-a541e2d17afb' } }; function initKeycloak() { if (_keycloak) { console.warn("Trying to init Keycloak again!"); return _keycloak; } else { console.log("Initializing Keycloak..."); var memoryStore = new session.MemoryStore(); _keycloak = new Keycloak({ store: memoryStore }, keycloakConfig); return _keycloak; } } function getKeycloak() { if (!_keycloak){ console.error('Keycloak has not been initialized. Please called init first.'); } return _keycloak; } module.exports = { initKeycloak, getKeycloak }; |
Apply the Role-Based Access for our API
keycloak.protext() can be used to secure APIs in the routers.
|
1 2 3 4 5 6 7 8 9 10 11 12 13 14 15 16 17 18 19 20 21 22 |
var express = require('express'); var router = express.Router(); const keycloak = require('../config/keycloak-config.js').getKeycloak(); router.get('/anonymous', function(req, res){ res.send("Hello Anonymous"); }); router.get('/user', keycloak.protect('user'), function(req, res){ res.send("Hello User"); }); router.get('/admin', keycloak.protect('admin'), function(req, res){ res.send("Hello Admin"); }); router.get('/all-user', keycloak.protect(['user','admin']), function(req, res){ res.send("Hello All User"); }); module.exports = router; |
Test it all out
Open Postman, and generate another access token like we did before. When generating, let’s use user rtsao. Remember that this user only has user role access.
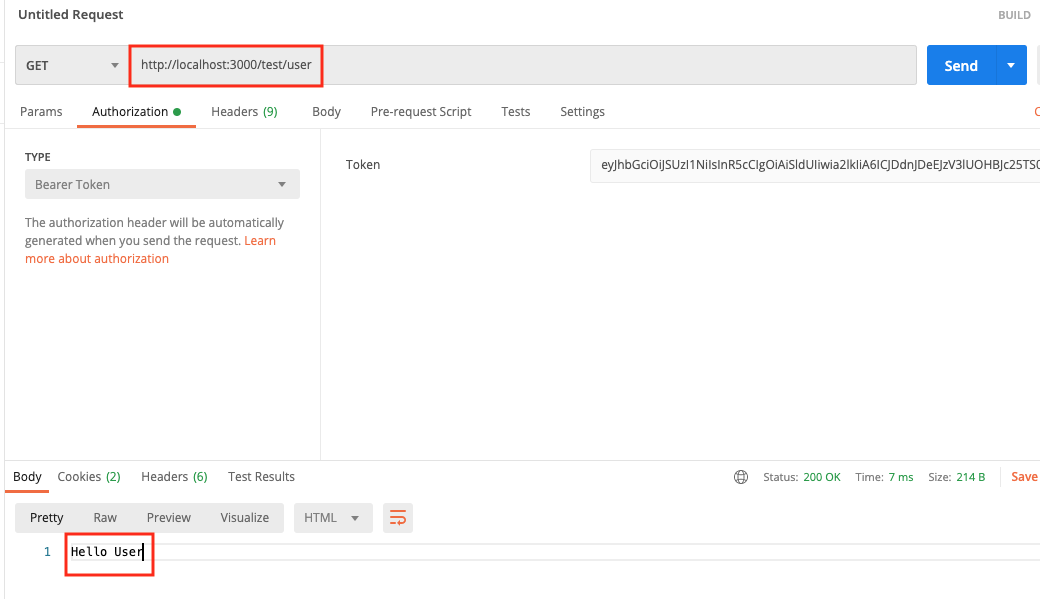
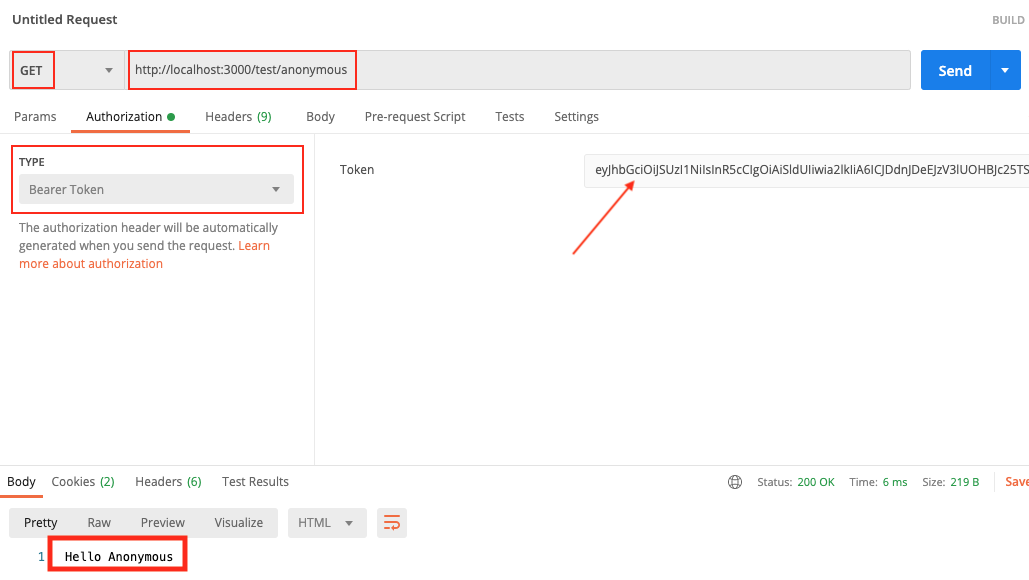
Open up a tab on Postman and put GET as the http verb.
put http://localhost:3000/test/anonymous
Click on Authorization tab, type Bearer Token, then paste the token.
Click on Send. Because the anonymous url is not protected, we always get the response.
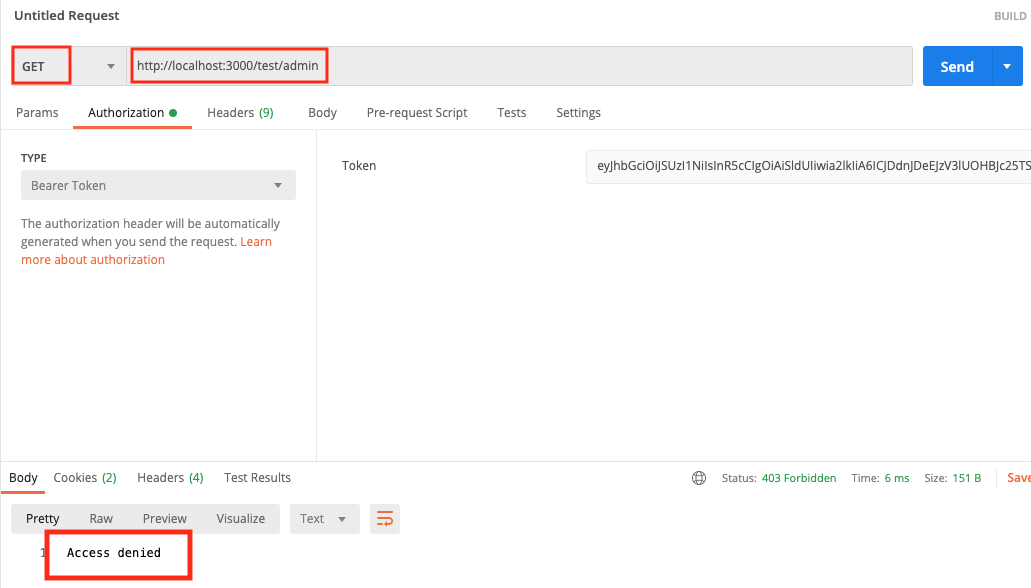
We then test on the admin, we get access denied because the token shows that we’re a user role.
When we test for role user, it all works.