ref – https://appmanager.io/blog/tips-and-tricks/uploading-an-ios-app-to-the-app-store-updated/
https://help.swiftic.com/hc/en-us/articles/201697821-Install-the-Application-Loader-on-Your-Computer
Client Side upload app to the Store
…after receiving the IPA file from your developer, go to your Apple account.
Log in, and choose the Agreements, Tax, and Banking section. Before publishing an app you’ll have to accept some of those agreements and set up your banking info so you can get paid. You’ll also need to set up tax info, depending on your country.
If you already have an App Store Connect account, make sure that your role is Admin, Technical, App Manager, or Developer. Only those roles can upload a build.
When your app is ready to upload, you can add the app to App Store Connect. (You should probably tag it in your version control first.)
In App Store Connect go to the My Apps section and hit the plus sign on the left side to create a new app. You’ll get a little form to fill out with your app’s info:

Hit Create andApp Store Connect will create a record for your app. Look on the left hand side and select the 1.0 release under iOS App. Scroll down to the build section. This is where you’ll be able to see your uploaded app.

You can use Application Loader to submit your app for review if you’re getting a build from a developer (in ipa format) and don’t have Xcode installed. You’ll still need a Mac since that’s the only operating system Application Loader runs on.
If you want to try out Application Loader and don’t have Xcode installed, get it from Resources and Help section of App Store Connect.
When you have found the Application Loader from the Resources > Help Section, simply install it and upload your ipa file. Then, you are done.
However, if you do have Xcode installed, you can access Application Loader under the Xcode -> Open Developer Tool menu.
Uploading the Build – Since we already set up the app in App Store Connect and Xcode knows about our dev account, it’ll know where to put it when we upload it.
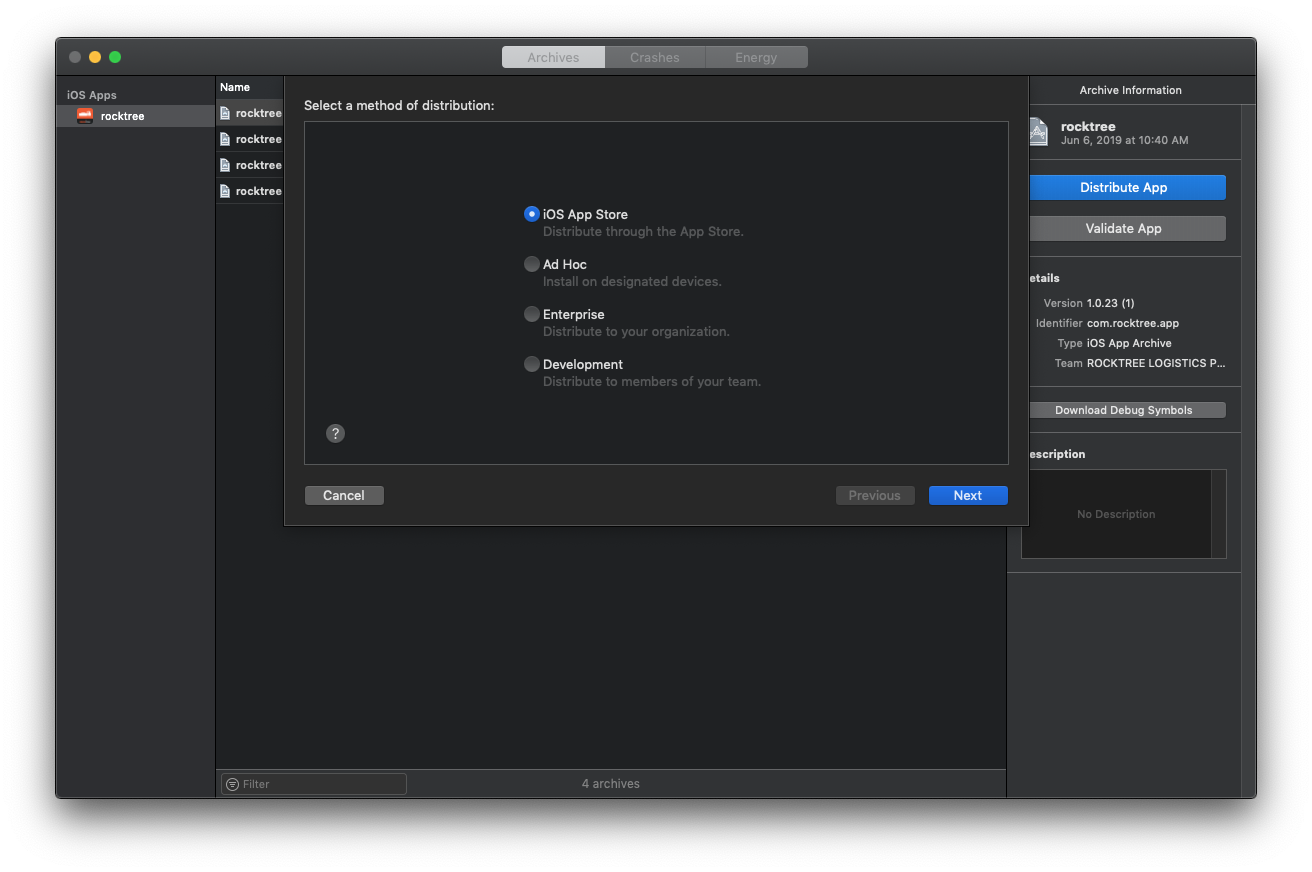
Open your project in Xcode. Select Archive in the Product menu. Choose Save for iOS App Store Distribution. That’ll create the build to be submitted.
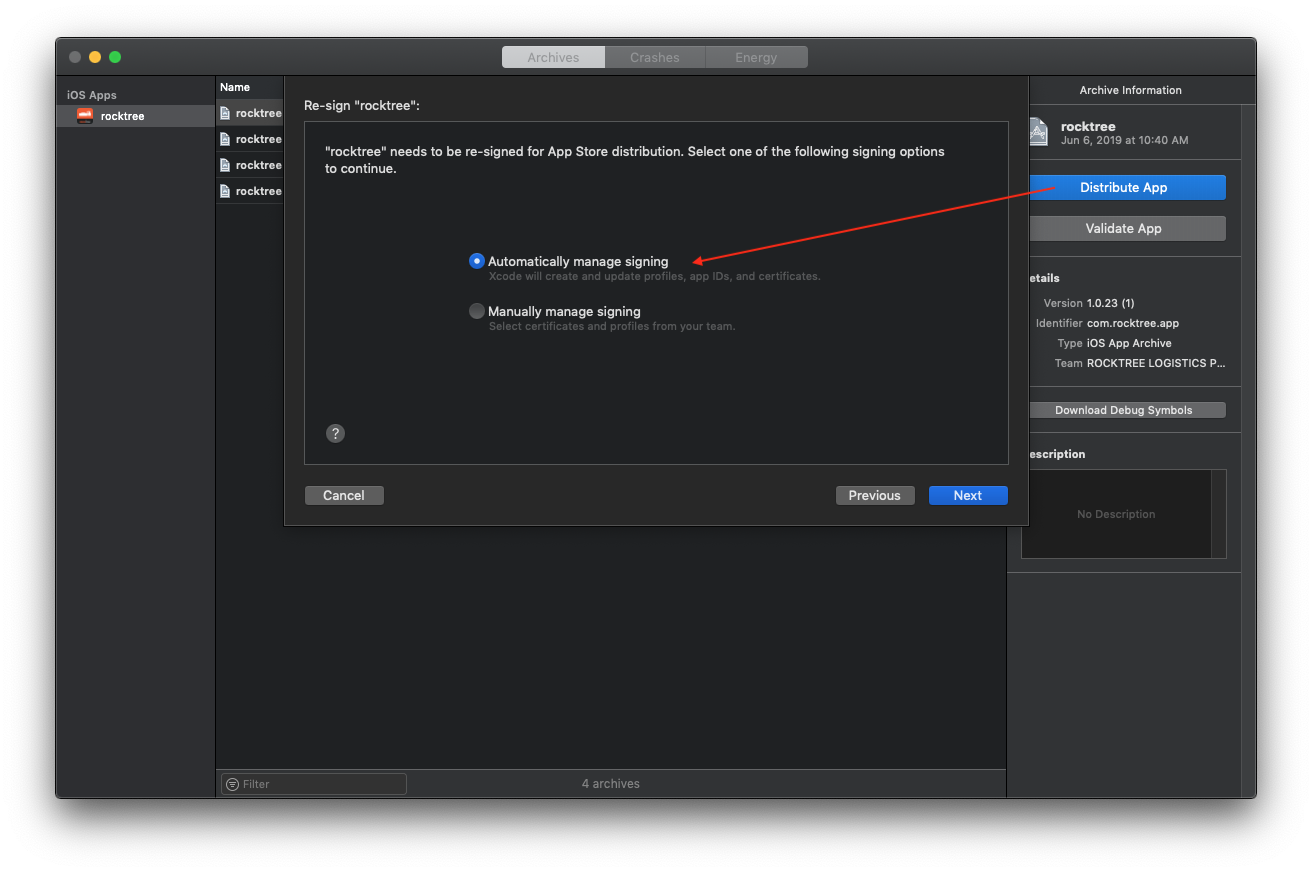
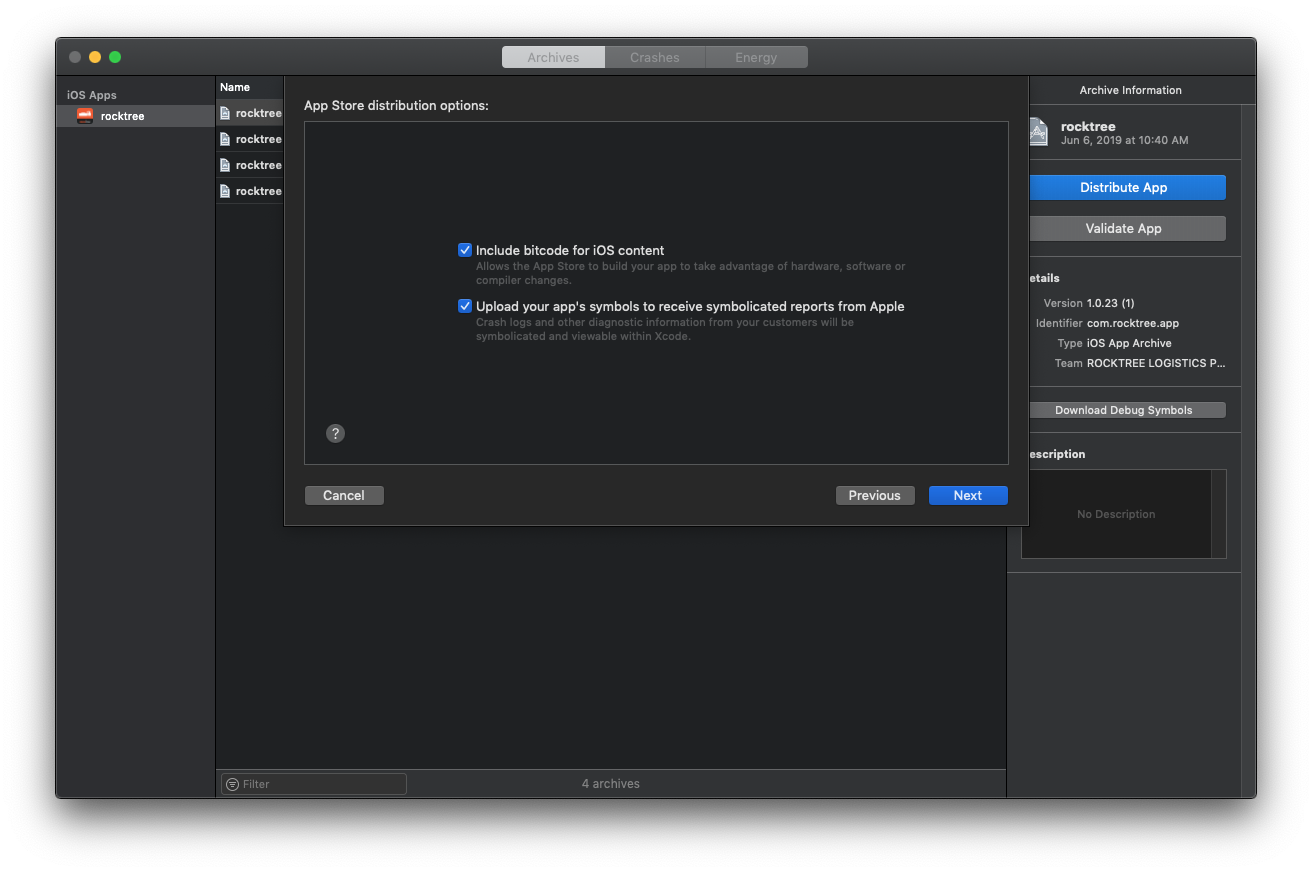
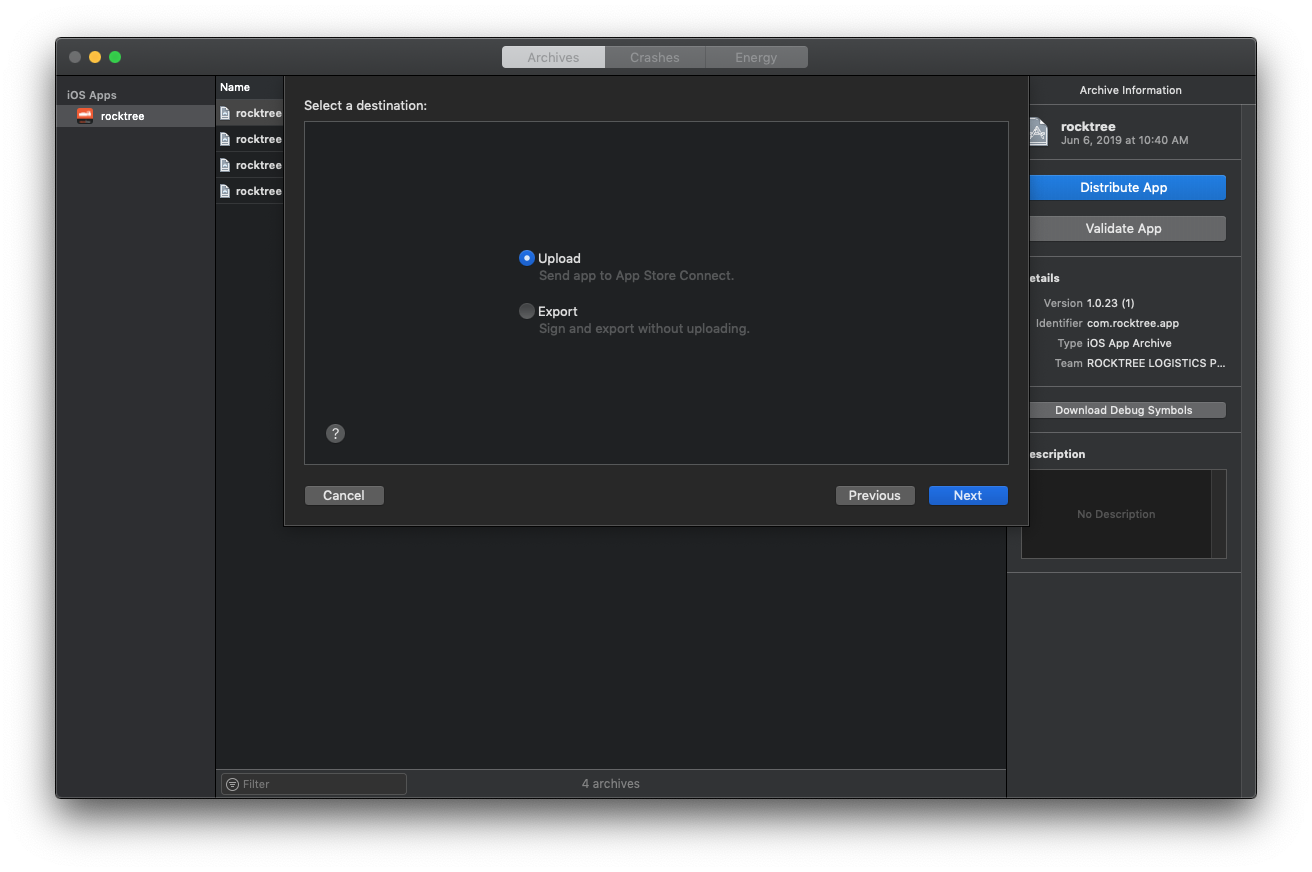
To upload your app, click on the big blue Upload to App Store button on the right side. You’ll have to confirm for Xcode that it’s going to upload the app to the right place. If you’re on multiple iOS dev teams, you’ll have to pick the one it should use. When Xcode has it all figured out, it’ll show you a summary screen. Click the Upload button.
Developer upload app
Another way to upload the app is through a developer.
First make sure to create an archive. After that you should see the archive on your list. Select the archive from the list and click the Upload to App Store… button on the right. The application binary is then uploaded to Apple’s servers.
During this process, your application is also validated. If an error occurs during the validation, the submission process will fail. The validation process is very useful as it will tell you if there is something wrong with your application binary that would otherwise result in a rejection by the App Store review team.
Just go with the default values…
Certificate
If the certificate associated with the app does not align with your computer, there will be an error. You can request from that user to get a public certificate for you to use.
If you want to create your own certificate from your computer and generate your own provisioning profile, then on:
In your Apple account, when you get provisioning profiles, you need to register a certificate first. Certificates are files generated by your computer’s Key chain.
You will need to create this Certificate (CSR file) to give to Apple.
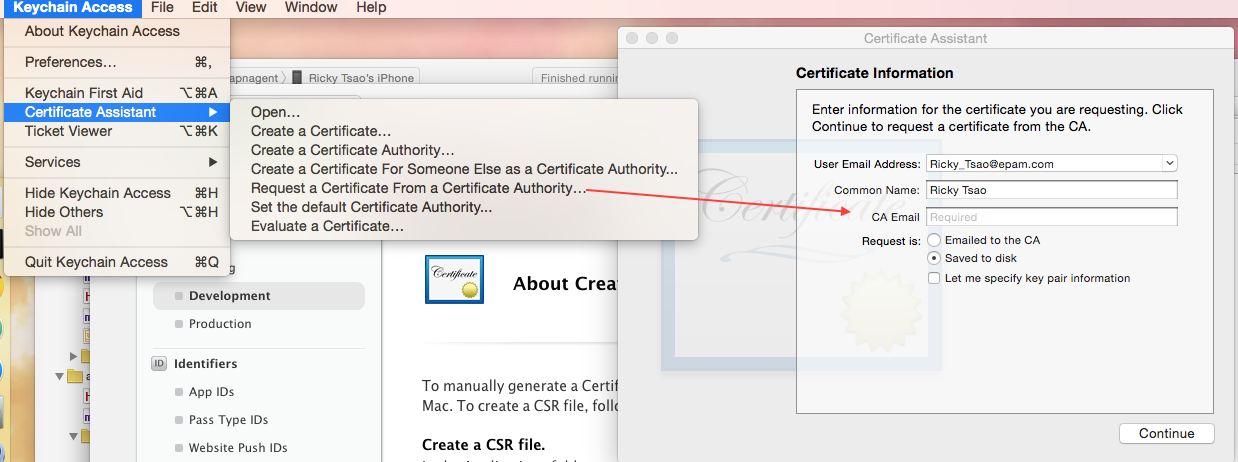
To manually generate a Certificate, you need a Certificate Signing Request (CSR) file from your Mac. To create a CSR file, follow the instructions below to create one using Keychain Access.
Create a CSR file, copy and pasted from wizard page
In the Applications folder on your Mac, open the Utilities folder and launch Keychain Access.
Within the Keychain Access drop down menu, select Keychain Access > Certificate Assistant > Request a Certificate from a Certificate Authority.
In the Certificate Information window, enter the following information:
In the User Email Address field, enter your email address.
In the Common Name field, create a name for your private key (e.g., John Doe Dev Key).
The CA Email Address field should be left empty.
In the “Request is” group, select the “Saved to disk” option.
Click Continue within Keychain Access to complete the CSR generating process.
Once, you’ve successfully created it, save the .certSigningRequest file on your computer.
On the next screen, then you will see Generate your Certificate page. Upload the .certSigningRequest file, and click Generate.
You will then see that your Certificate is ready.
Name: Apple Development iOS Push Services: com.rtsao.deleteTestPush
Type: APNs Development iOS
Identifier ID: deleteTestPush
Expires: Dec 01, 2016
Click download and you should see a .cer file
That’s about it. When you’ve reached to the end of the wizard, you’ll have a chance to turn the app in and then wait about 2 weeks for the approval.