Open Xcode and click on File->New->Project… to create a new project, choose Single View Application.
Select Swift for the language project and name it as you want, personally I called it “LocalizationTutorial”
Click on your project icon (the blue icon) in your directory hierarchy on the left hand side, to “Info”.
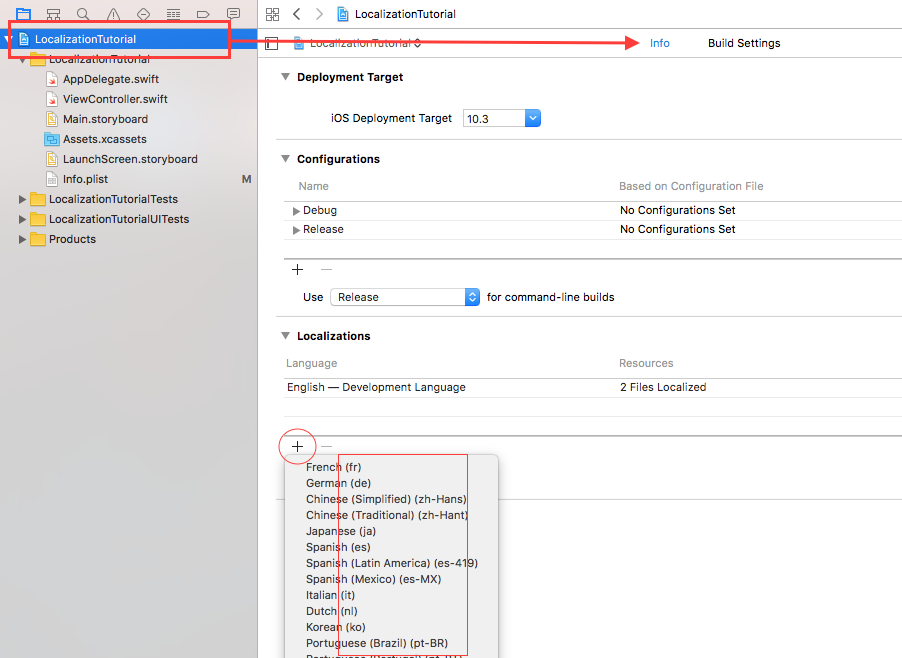
Now click on the “+” button in the “Localizations” section and select the language you want to add to the project.
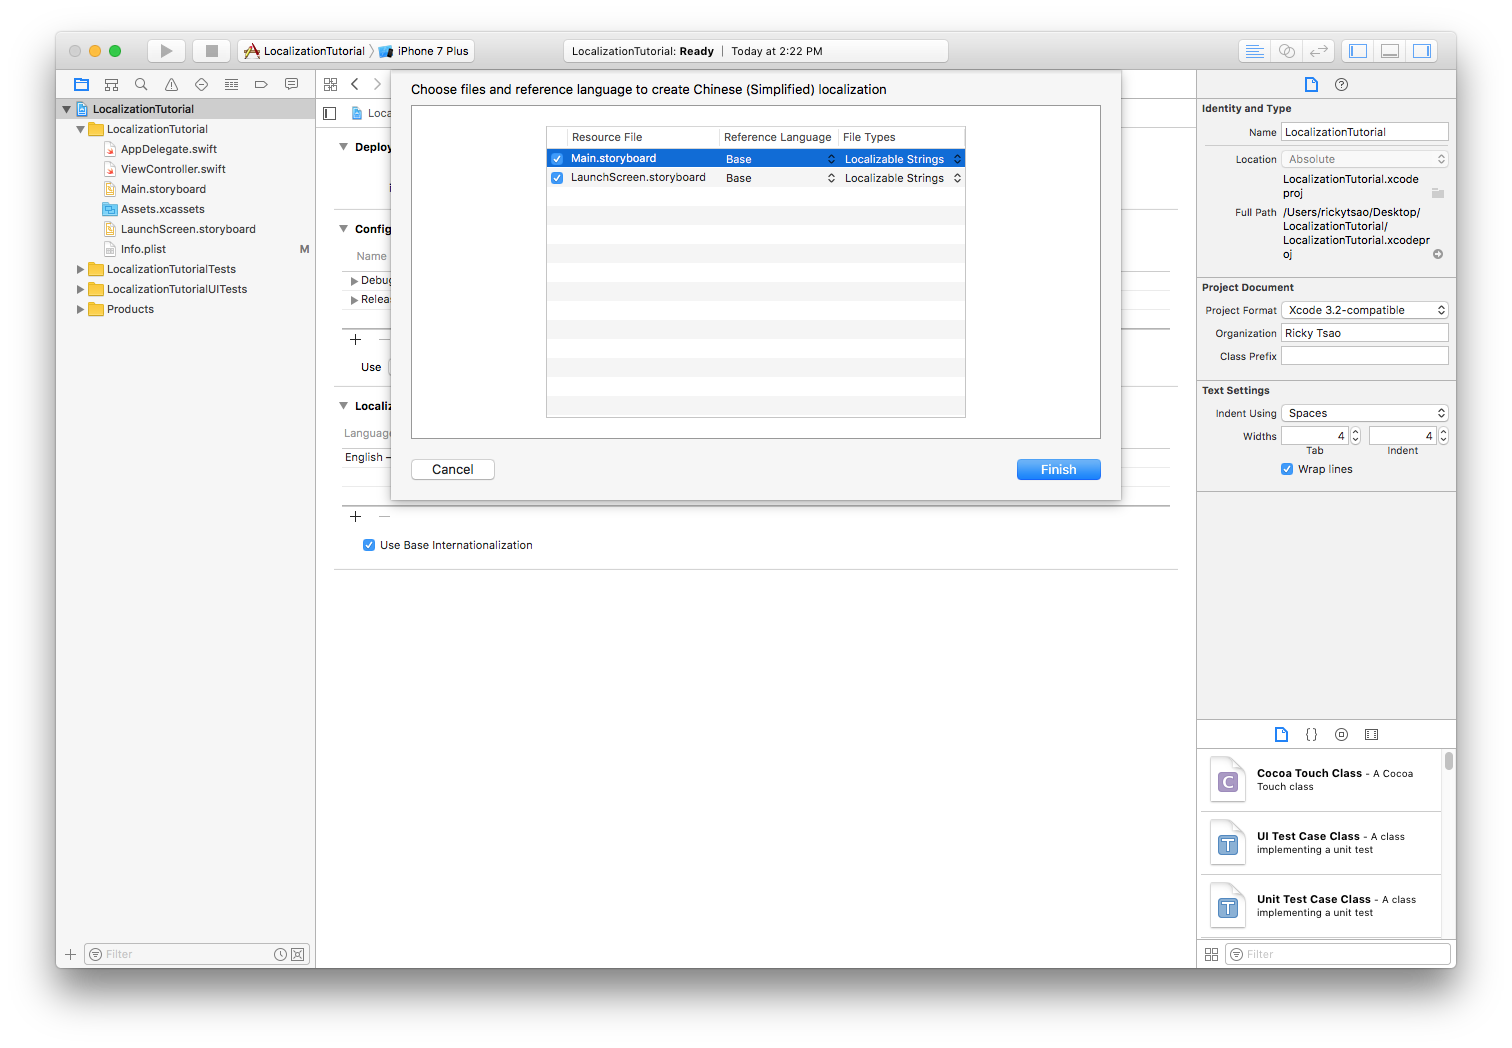
When you got this screen, choose the default files listed and click Finish.
Alright, since now our project is synchronized with different languages, we have to create the files which will contain the different translated copies for our app.
Localizable.strings
Go to File->New->File… and add a new Strings File.
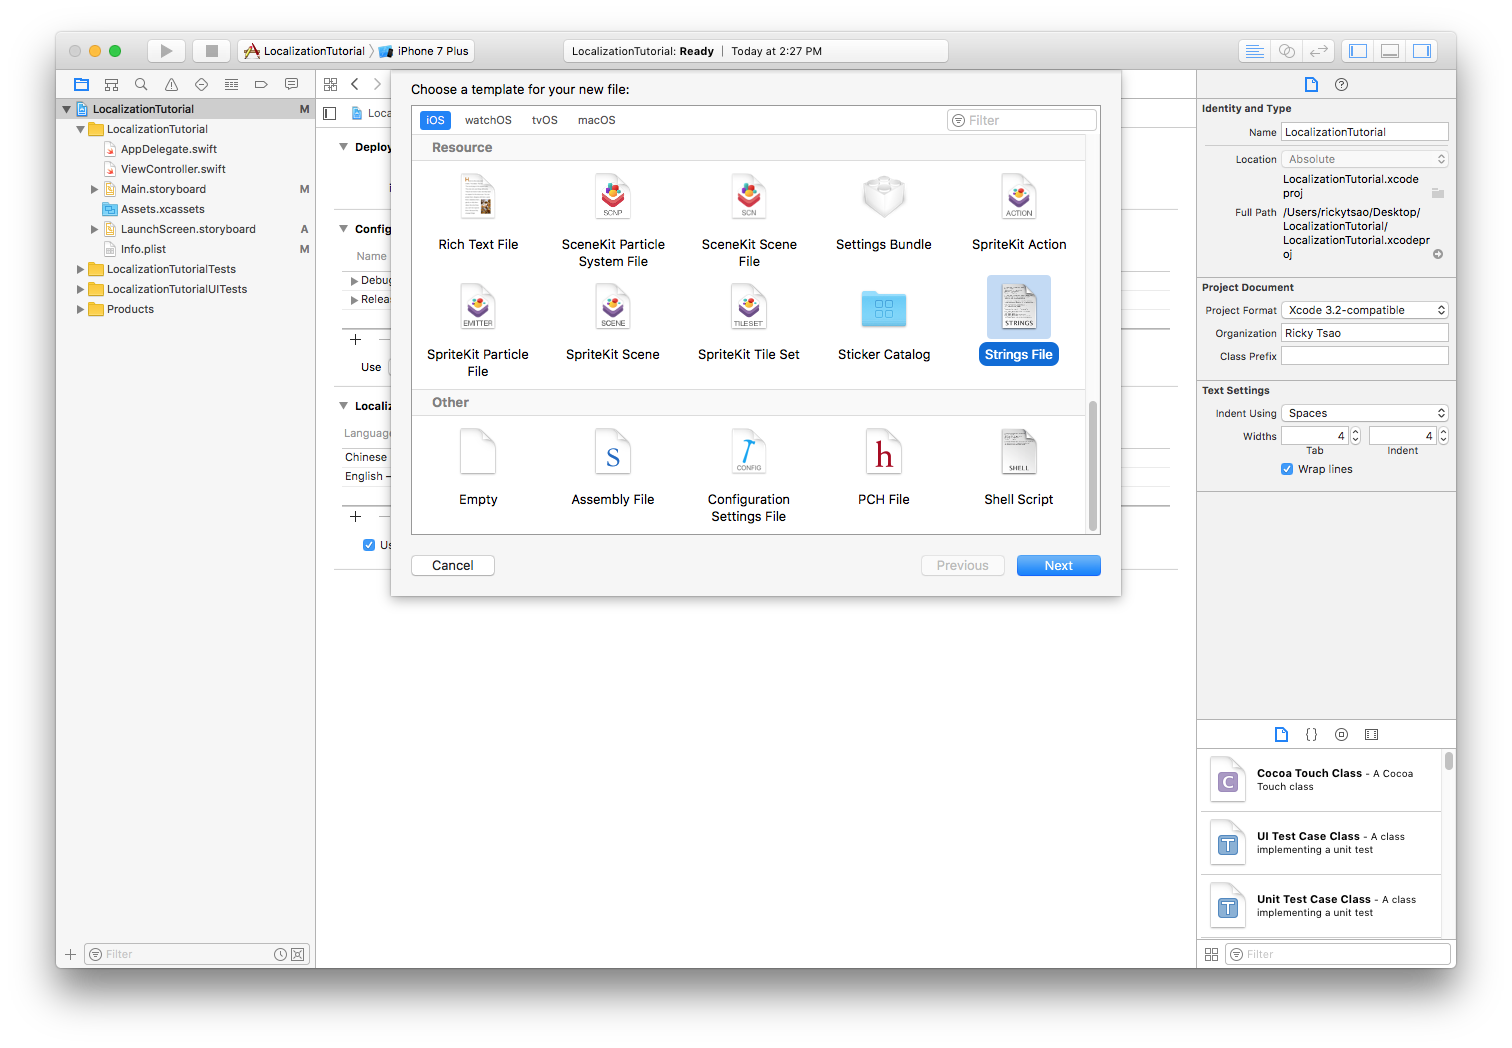
Call this file “Localizable.strings”.
Select this file in the project folder and click on “Localize…” in the Localization section (in the right utility panel).
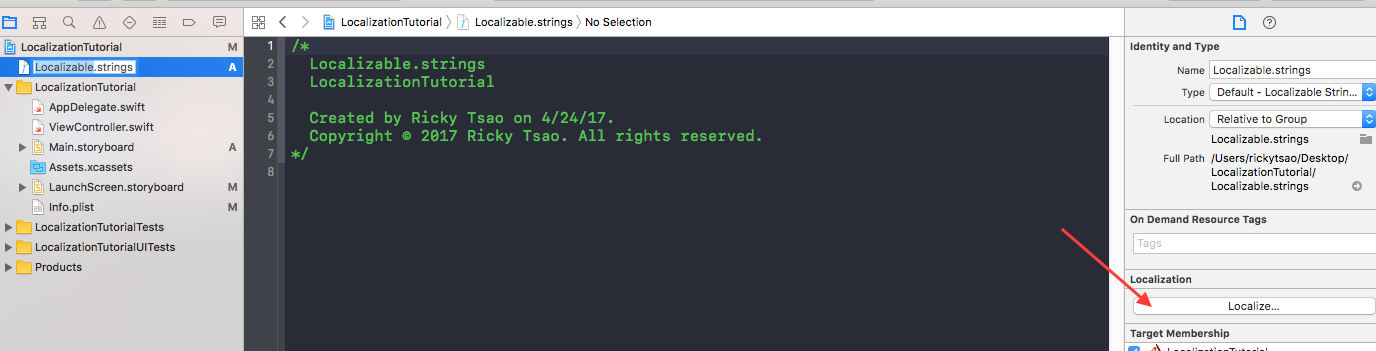
Then, select English in the localization drop down.
Now if you click on the Localizable.strings file you should be able to see that the Localization section has been updated.
Each selected language item will create an alternative version of the file for this language. You got it, you have to select “English” and the other(s) language(s) you want to use in your app.
Localizable.strings (English)
|
1 2 |
"HELLO_WORLD" = "Hello World !"; "GOOD_BYE_WORLD" = "Good bye old world"; |
Localizable.strings (Chinese (Simplified))
|
1 2 |
"HELLO_WORLD" = "世界你好!"; "GOOD_BYE_WORLD" = "再见世界!"; |
Create StringExtension.swift
|
1 2 3 4 5 6 7 8 9 10 11 12 |
import Foundation extension String { func localized(lang:String) -> String { let path = Bundle.main.path(forResource: lang, ofType: "lproj") let bundle = Bundle(path: path!) return NSLocalizedString(self, tableName: nil, bundle: bundle!, value: "", comment: "") } } |
ViewController
|
1 2 3 4 5 6 7 8 9 10 11 12 13 14 15 16 17 18 19 20 21 22 23 24 25 26 27 28 29 30 31 32 33 34 35 36 37 38 39 40 41 42 43 44 45 46 47 48 49 50 51 52 53 54 55 56 57 58 59 60 61 62 63 64 65 66 67 68 69 70 71 72 73 74 75 |
import UIKit class ViewController: UIViewController { var label: UILabel? // automatically initialized with nil var button: UIButton? // automatically initialized with nil var language: String? // automatically initialized with nil // when we need to access them, make sure to use self.---! override func viewDidLoad() { super.viewDidLoad() // Do any additional setup after loading the view, typically from a nib. // eventually be assigned // language self.language = "en" // label // You have to use the correct abbreviation from the Apple Policy Localization // localized returns the string of "HELLO_WORLD" when given abbreviation string of "en" let labelText: String = "GOOD_BYE_WORLD".localized(lang: self.language!) // label is to contain the label text self.label = UILabel(frame: CGRect(x: 0, y: 200, width: self.view.frame.width, height: 50)) self.label!.text = labelText self.label!.textAlignment = .center self.view.addSubview(self.label!) // buttons let buttonTitle: String = "Change Language" self.button = UIButton(frame: CGRect(x: self.view.frame.width/2 - 100, y: 300, width: 200, height: 50)) self.button!.setTitle(buttonTitle, for: .normal) self.button!.backgroundColor = UIColor.blue self.button!.addTarget(self, action: #selector(changeLanguage(sender:)), for: UIControlEvents.touchDown) self.button!.addTarget(self, action: #selector(resetBackgroundColor(sender:)), for: UIControlEvents.touchUpInside) self.view.addSubview(self.button!) } func changeLanguage(sender: AnyObject) { self.button!.backgroundColor = UIColor.gray /* Change Language */ if (self.language == "en") { self.language = "zh-Hans" } else { self.language = "en" } /* Update label language */ let labelText: String = "GOOD_BYE_WORLD".localized(lang: self.language!) self.label!.text = labelText } func resetBackgroundColor(sender: AnyObject) { self.button!.backgroundColor = UIColor.blue } override func didReceiveMemoryWarning() { super.didReceiveMemoryWarning() // Dispose of any resources that can be recreated. } } |
How to Run
Click the button to switch languages and display the Hello World string in different languages.