The signatures of the delegate methods reveal the true purpose of the NSFetchedResultsController class. On iOS, the NSFetchedResultsController class was designed to manage the data displayed by a UITableView or a UICollectionView. It tells its delegate exactly which records changed, how to update the user interface, and when to do this.
|
1 2 |
- (void)controllerWillChangeContent:(NSFetchedResultsController *)controller; - (void)controllerDidChangeContent:(NSFetchedResultsController *)controller; |
Creating the Fetch Results Controller
First, create a NSFetchedResultsController property
|
1 2 3 4 5 6 |
@interface ViewController () <UITableViewDelegate, UITableViewDataSource> { } //++ 1) @property (nonatomic, strong, readonly) NSFetchedResultsController *fetchedResultsController; |
Make sure to synthesize it
|
1 2 3 4 5 6 7 |
@implementation ViewController //++ @synthesize fetchedResultsController=_fetchedResultsController; ... ... @end |
Create the accessor.
NSFetchedResultsController takes:
- NSFetchRequest, which must set inject a sort descriptor
- Managed Object Context
|
1 2 3 4 5 6 7 8 9 10 11 12 13 14 15 16 17 18 19 20 21 22 23 24 25 |
- (NSFetchedResultsController *)fetchedResultsController { if (_fetchedResultsController != nil) { return _fetchedResultsController; } NSFetchRequest *fetchRequest = [[NSFetchRequest alloc] init]; NSSortDescriptor *sortDescriptor1 = [[NSSortDescriptor alloc] initWithKey:@"name" ascending:YES]; fetchRequest.sortDescriptors = [NSArray arrayWithObjects:sortDescriptor1, nil]; AppDelegate *appDelegate = (AppDelegate *)[[UIApplication sharedApplication] delegate]; NSManagedObjectContext *managedObjectContext = [appDelegate managedObjectContext]; NSEntityDescription *entity = [NSEntityDescription entityForName:@"Hero" inManagedObjectContext:managedObjectContext]; [fetchRequest setEntity:entity]; _fetchedResultsController = [[NSFetchedResultsController alloc] initWithFetchRequest:fetchRequest managedObjectContext:managedObjectContext sectionNameKeyPath:@"HeroSK" cacheName:@"Hero"]; _fetchedResultsController.delegate = self; NSLog(@"---created fetchedResultsController---"); return _fetchedResultsController; } |
In your accessor, you’ve set the fetchResultsController’s delegate to self. This means
it’ll be delegating messages to us and we have to take care of it. Thus, we do so by conforming to that delegate and implementing its methods.
In your class extension, conform to NSFetchedResultsControllerDelegate:
|
1 2 3 4 5 |
@interface ViewController () <UITableViewDelegate, UITableViewDataSource, NSFetchedResultsControllerDelegate> { } .... |
Finally, perform the fetch in your viewDidLoad:
|
1 2 3 4 5 6 7 8 9 10 11 |
- (void)viewDidLoad { [super viewDidLoad]; .... .... NSError *error = nil; if (![[self fetchedResultsController] performFetch:&error]) { NSLog(@"ERROR"); } } |
Basic FRC delegate methods
|
1 2 3 4 5 6 7 8 9 10 11 12 13 |
#pragma mark - NSFetchedResultsControllerDelegate Methods - (void)controllerWillChangeContent:(NSFetchedResultsController *)controller { NSLog(@"%s", __FUNCTION__); [self.tableView beginUpdates]; } - (void)controllerDidChangeContent:(NSFetchedResultsController *)controller { NSLog(@"%s", __FUNCTION__); [self.tableView endUpdates]; } |
Adding some Data
First, we get the MOC that’s connected to our fetch results controller.
Then, we set inject that MOC into NSEntityDescription’s insertNewObjectForEntityForName method, which returns us an Managed Object “Hero”.
We then set the properties of that Hero object and have the MOC call save.
Finally, let’s have our fetch results controller do a performFetch. We see that it now has objects.
|
1 2 3 4 5 6 7 8 9 10 11 12 13 14 15 16 17 18 19 20 21 22 23 24 25 26 |
NSManagedObjectContext *managedObjectContext = [self.fetchedResultsController managedObjectContext]; NSEntityDescription *entity = [[self.fetchedResultsController fetchRequest] entity]; //create a managed object to be set and added Hero * newHero = (Hero*)[NSEntityDescription insertNewObjectForEntityForName:[entity name] inManagedObjectContext:managedObjectContext]; newHero.name = @"heheeh"; newHero.birthdate = [[NSDate date] timeIntervalSince1970]; newHero.secretidentity = @"ricky tsao"; newHero.sex = @"male"; NSError *error1 = nil; if (![managedObjectContext save:&error1]) { NSLog(@"ERORR"); } //++ 4) Fetch any existing entities NSError *error = nil; if (![[self fetchedResultsController] performFetch:&error]) { NSLog(@"ERROR"); } int c = [[[self fetchedResultsController] fetchedObjects] count]; NSLog(@"%lu", (long unsigned)c); |
When you add additional data and have your MOC save, it’ll call the FRC’s didChangeObject: method, which in turn inserts data into your table view by calling insertRowsAtIndexPaths:withRowAnimation.
|
1 2 3 4 5 6 7 8 9 10 11 12 13 14 15 16 17 18 19 20 21 |
- (void)controller:(NSFetchedResultsController *)controller didChangeObject:(id)anObject atIndexPath:(NSIndexPath *)indexPath forChangeType:(NSFetchedResultsChangeType)type newIndexPath:(NSIndexPath *)newIndexPath { NSLog(@"%s", __FUNCTION__); switch(type) { case NSFetchedResultsChangeInsert: NSLog(@"tableView insertRowsAtIndexPaths:withRowAnimation:"); [self.tableView insertRowsAtIndexPaths:@[newIndexPath] withRowAnimation:UITableViewRowAnimationFade]; break; case NSFetchedResultsChangeDelete: NSLog(@"tableView deleteRowsAtIndexPaths:withRowAnimation:"); [self.tableView deleteRowsAtIndexPaths:@[indexPath] withRowAnimation:UITableViewRowAnimationFade]; break; case NSFetchedResultsChangeUpdate: case NSFetchedResultsChangeMove: break; } } |
Making the Results show up
Use your fetch controller for data display instead of NSArray in your cellForRowAtIndexPath.
|
1 2 3 4 5 6 7 8 9 10 11 12 13 14 15 16 17 18 19 20 21 22 23 |
- (UITableViewCell *)tableView:(UITableView *)tableView cellForRowAtIndexPath:(NSIndexPath *)indexPath { static NSString * CellIdentifier = @"Primary-Cell"; UITableViewCell * cell = [tableView dequeueReusableCellWithIdentifier:CellIdentifier]; if (cell == nil) { cell = [[UITableViewCell alloc] initWithStyle: UITableViewCellStyleValue1 reuseIdentifier: CellIdentifier]; cell.selectionStyle = UITableViewCellSelectionStyleNone; } Hero * aHero = (Hero*)[self.fetchedResultsController objectAtIndexPath:indexPath]; cell.textLabel.textColor = [UIColor orangeColor]; cell.indentationLevel = 1.0f; //cell.textLabel.text = (NSString*)[self.data objectAtIndex:indexPath.row]; cell.textLabel.text = [NSString stringWithFormat:@"%@ %@ %f",[aHero name], [aHero sex], [aHero birthdate]]; return cell; } |
Do the same for numberOfRowsInSection
|
1 2 3 |
- (NSInteger)tableView:(UITableView *)tableView numberOfRowsInSection:(NSInteger)section { return [self.fetchedResultsController.fetchedObjects count]; } |
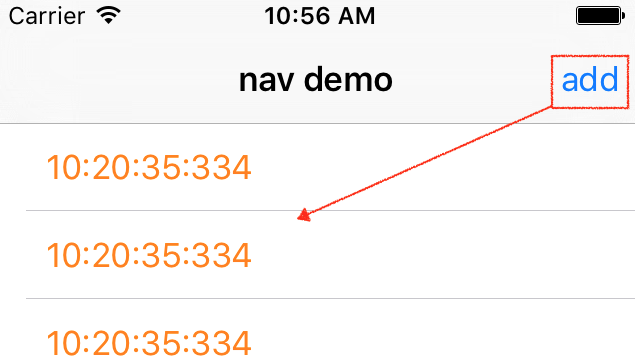
Adding objects in a loop
We loop through creating a bunch of Managed Objects. We set the properties to milliseconds to give them unique data.
Then after the loop is done, we simply tell the MOC to save.
|
1 2 3 4 5 6 7 8 9 10 11 12 13 14 15 16 17 18 19 20 21 22 23 24 25 26 27 28 |
-(void)addPerson:(id)sender { NSLog(@"ADDING GROUP OF PEOPLE"); // 5) use the MOC connected to the fetchController NSManagedObjectContext *managedObjectContext = [self.fetchedResultsController managedObjectContext]; NSEntityDescription *entity = [[self.fetchedResultsController fetchRequest] entity]; for ( int i = 0; i < 8; i++) { //create a managed object to be set and added Hero * newHero = (Hero*)[NSEntityDescription insertNewObjectForEntityForName:[entity name] inManagedObjectContext:managedObjectContext]; NSDateFormatter *dateFormat = [[NSDateFormatter alloc] init]; [dateFormat setDateFormat:@"HH:mm:ss:SSS"]; NSString * s = [dateFormat stringFromDate:[NSDate date]]; newHero.name = [NSString stringWithFormat:@"%@", s]; newHero.birthdate = [[NSDate date] timeIntervalSince1970]; newHero.secretidentity = @"ricky tsao"; newHero.sex = @"Mail"; } NSError *error1 = nil; if (![managedObjectContext save:&error1]) { NSLog(@"ERORR"); } } |
Once, you save, you’ll see that our FRC will animate all the adding of the newly added objects into our table.
Its output is:
As you can see FRC’s delegate methods will and did change content are always wrapped around insertions, deletions, changes, etc.
ADDING GROUP OF PEOPLE
-[ViewController controllerWillChangeContent:]
-[ViewController controller:didChangeObject:atIndexPath:forChangeType:newIndexPath:]
tableView insertRowsAtIndexPaths:withRowAnimation:
…
…
…
-[ViewController controller:didChangeObject:atIndexPath:forChangeType:newIndexPath:]
tableView insertRowsAtIndexPaths:withRowAnimation:
-[ViewController controllerDidChangeContent:]
Deleting Objects
We delete objects by clicking on the delete button in edit mode. In order to get into edit mode, we need to set TRUE for editing on a table row.
Let’s make the table view editable when we click on a row:
|
1 2 3 4 5 6 7 |
- (void)tableView:(UITableView *)theTableView didSelectRowAtIndexPath:(NSIndexPath *)indexPath { NSLog(@"selected!!"); //puts our rows into editing mode [self.tableView setEditing:YES animated:YES]; } |
When the edit mode is on, let’s use the default delete button style, which is a rectangular red button.
We can also set the string of the button. Instead of the standard Delete, let’s use “Kick!” instead:
|
1 2 3 4 5 6 7 8 9 10 11 |
-(UITableViewCellEditingStyle)tableView:(UITableView *)tableView editingStyleForRowAtIndexPath:(NSIndexPath *)indexPath { // Otherwise, allow the delete button to appear return UITableViewCellEditingStyleDelete; } -(NSString *)tableView:(UITableView *)tableView titleForDeleteConfirmationButtonForRowAtIndexPath:(NSIndexPath *)indexPath { // Customize the Delete button to say "complete" return @"KICK!"; } |

output:
— DELETING OBJECT —
-[ViewController controllerWillChangeContent:]
-[ViewController controller:didChangeObject:atIndexPath:forChangeType:newIndexPath:]
tableView deleteRowsAtIndexPaths:withRowAnimation:
-[ViewController controllerDidChangeContent:]
As you can see, the deletion is animated in our table view!
Click and re-click to get in/out of editing mode
When a table is in edit mode, by default, it does not allow you to re-click or re-select rows. However, if you set the property allowsSelectionDuringEditing to YES, then you can.
|
1 2 3 4 5 6 |
self.tableView = [[UITableView alloc] initWithFrame: self.view.bounds style:UITableViewStylePlain]; .... ... self.tableView.allowsSelectionDuringEditing = YES; //for re-clicks in edit mode |
Let’s say you want the user to be able to go back to non-edit mode by clicking the table again. Look at property isEditing to see if you’re in edit mode. If so, just simply set the tableview back to NO for setEditing.
|
1 2 3 4 5 6 7 8 9 10 11 12 |
- (void)tableView:(UITableView *)theTableView didSelectRowAtIndexPath:(NSIndexPath *)indexPath { NSLog(@"selected!!"); //puts our rows into editing mode if([self.tableView isEditing]) { [self.tableView setEditing:NO animated:YES]; } else { [self.tableView setEditing:YES animated:YES]; } } |