Let’s say we want to add an attribute event_date, so that the iOS app takes in that date, and can send and store it in an Easy Table on Azure backend.
Azure backend side
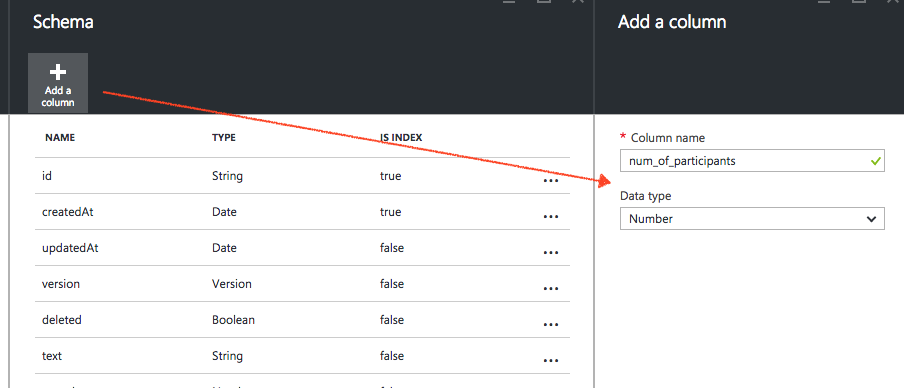
Click on the designated table, you add the column attribute. Save it.
iOS side
Note: For ever new attribute you add, make sure you delete the old app that’s installed on your device. This is so that the existing app’s Core Data mode does not conflict with your new addition.
After you have finished your Easy Table, you use Quick Start to generate an iOS project that connects its Core Data to the Easy Table in Azure backend.
What you pull from the Easy Table depends on your NSFetchController:
- entity
- predicate
- sortDescriptors
of the NSFetchController get method like so:
|
1 2 3 4 5 6 7 8 9 10 11 12 13 14 |
fetchRequest.entity = [NSEntityDescription entityForName:@"TodoItem" inManagedObjectContext:context]; // show only non-completed items fetchRequest.predicate = [NSPredicate predicateWithFormat:@"complete == NO"]; // sort by item text fetchRequest.sortDescriptors = @[[NSSortDescriptor sortDescriptorWithKey:@"createdAt" ascending:YES]]; // Note: if storing a lot of data, you should specify a cache for the last parameter // for more information, see Apple's documentation: http://go.microsoft.com/fwlink/?LinkId=524591&clcid=0x409 NSFetchedResultsController *theFetchedResultsController = [[NSFetchedResultsController alloc] initWithFetchRequest:fetchRequest managedObjectContext:context sectionNameKeyPath:nil cacheName:nil]; |
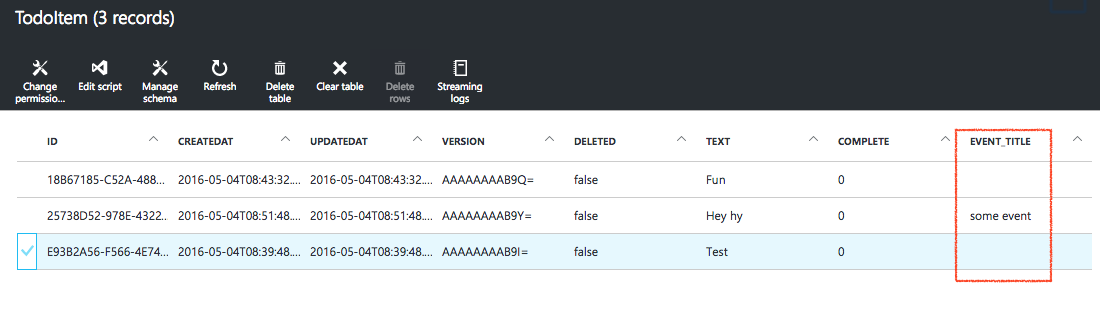
So we want to match the event_title attribute we added on the Azure backend.
We do so by manipulating our .xcdatamodelId file. In core data, each entity matches that of a table. Look for the TodoItem (or whatever table name you have created in Azure) entity. Click on it, and click the plus button to add it.

In your iOS code, we pass the data dictionary to the Azure backend to fill in on the attribute. Thus, just make sure you put the key for “event_date”, and the value that you want to send, which in our case is NSDate.
|
1 2 3 4 5 6 7 8 9 10 11 12 13 14 15 16 17 18 |
- (IBAction)onAdd:(id)sender { if (self.itemText.text.length == 0) { return; } NSDictionary *item = @{ @"text" : self.itemText.text, @"event_title" : @"some event", @"event_date" : [NSDate date], @"author" : @"Ricky", @"num_of_participants" : [NSNumber numberWithInteger:8], @"complete" : @NO }; [self.todoService addItem:item completion:nil]; self.itemText.text = @""; } |
Then, run your app. Add an entry. Go to your dashboard, and refresh the table rows. You will see your results there.