Why Auto Layouts?
Say we put a label in the middle of our xib with “hello world”. If you run it in on different iPhone devices, the label will appear in different positions. This is because each device is a different size.
If we were to put something at the “middle” of an iPhone SE, it will look much different on a much larger iPhone 7S. In fact, it uses points straight up. So “middle” on iPhone SE may be (120, 260). When you run it on the iPhone 7S, the label will be at (120, 260), which is obviously not the middle of the iPhone 7S device. It will appear on the upper left region of the 7S screen.
Same concept when the device switches from portrait to landscape. Even though the device rotates, the label stays same as coordinate (120, 260)

Hence, auto layout is a constraint-based layout system. It allows developers to create an adaptive UI that responds appropriately to changes in screen size and device orientation.
Using Auto Layout to Center our label

Each button has its own function:
Align – Create alignment constraints, such as aligning the left edges of two views.
Pin – Create spacing constraints, such as defining the width of a UI control.
Issues – Resolve layout issues.
Stack – Embed views into a stack view. Stack view is a new feature since Xcode 7. We will further discuss about it in the next chapter.
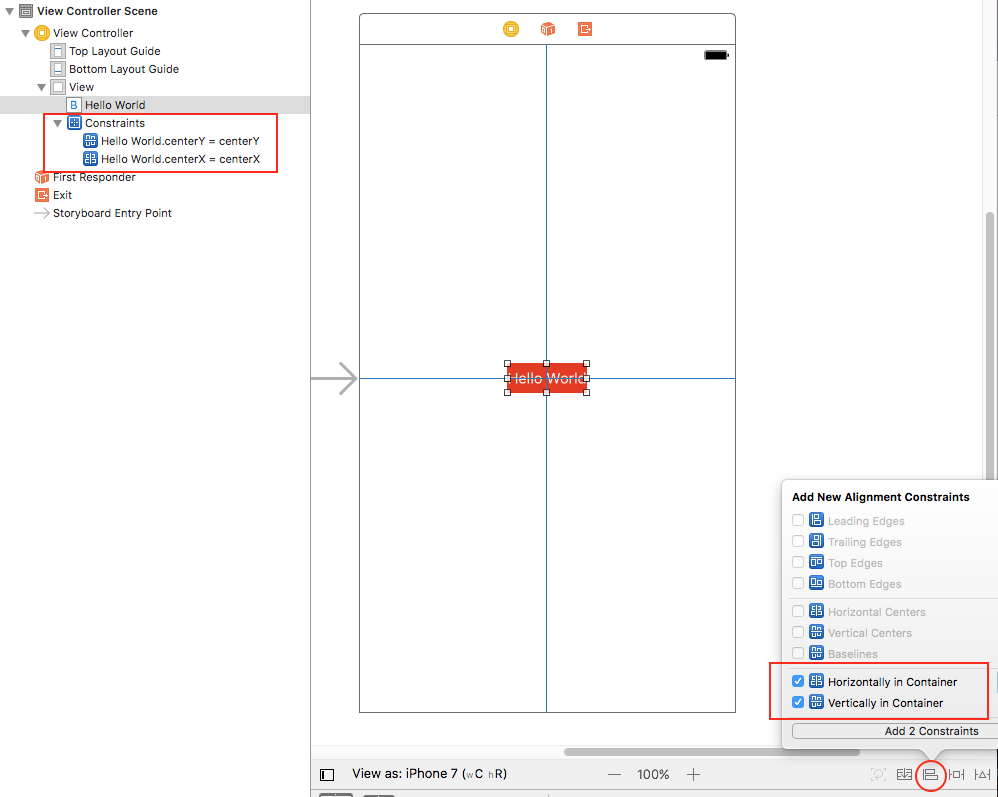
center horizontally and center vertically. Both constraints are with respect to the view.
To create the constraints, we will use the Align function. First, select the button in Interface Builder and then click the Align icon in the layout bar. In the pop-over menu, check both “Horizontal in container” and “Vertically in container” options. Then click the “Add 2 Constraints” button.
Now run the app in different device sizes, and you’ll see that the label should be centered in all of them.
Resolving Layout Constraint Issues
The layout constraints that we have just set are perfect. But that is not always the case. Xcode is intelligent enough to detect any constraint issues.
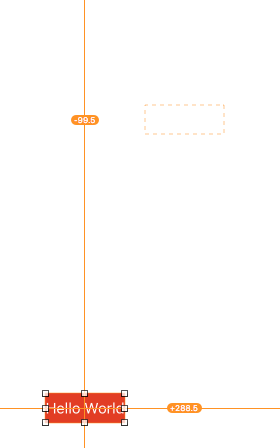
Try to drag the Hello World button to the lower-left part of the screen. Xcode immediately detects some layout issues and the corresponding constraint lines turns orange that indicates a misplaced item.
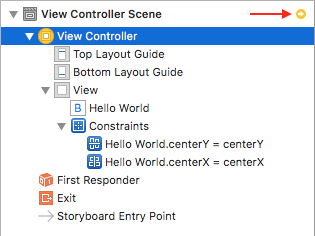
When there is any layout issue, the Document Outline view displays a disclosure arrow (red/orange). Now click the disclosure arrow to see a list of the issues. Interface Builder is smart enough to resolve the layout issues for us. Click the indicator icon next to the issue and a pop-over shows you a number of solutions. In this case, select the “Update Frame” option and click “Fix Misplacement” button. The button will then be moved to the center of the view.
Then, simply choose update the frame for xCode to resolve the problem for you.
Alternative way to view Storyboard

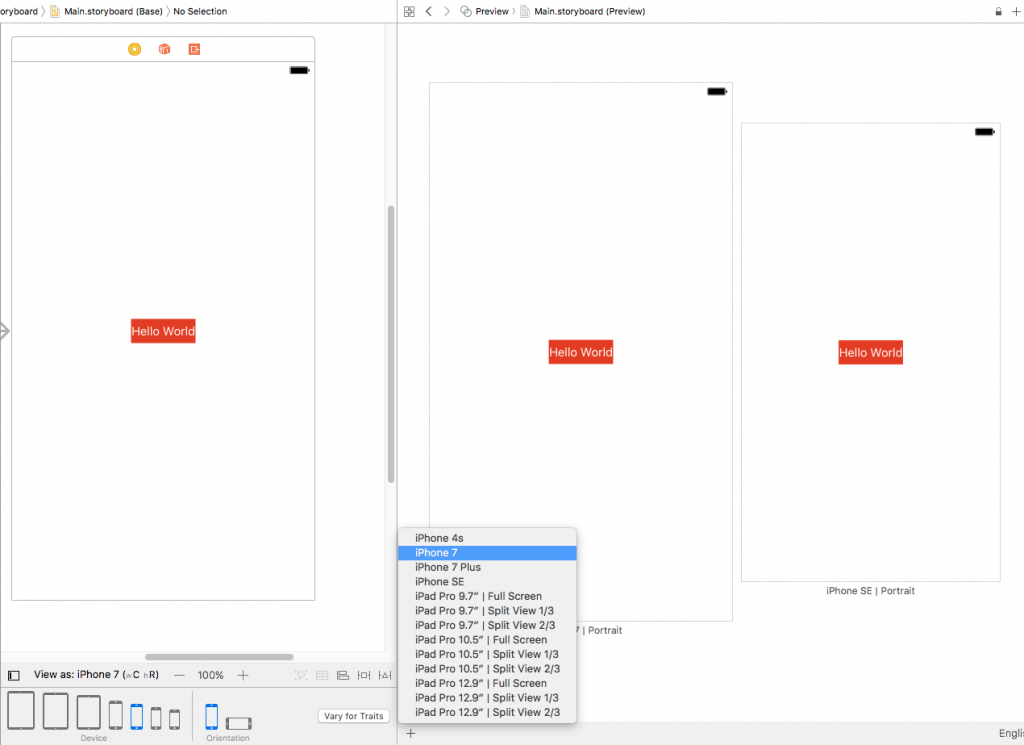
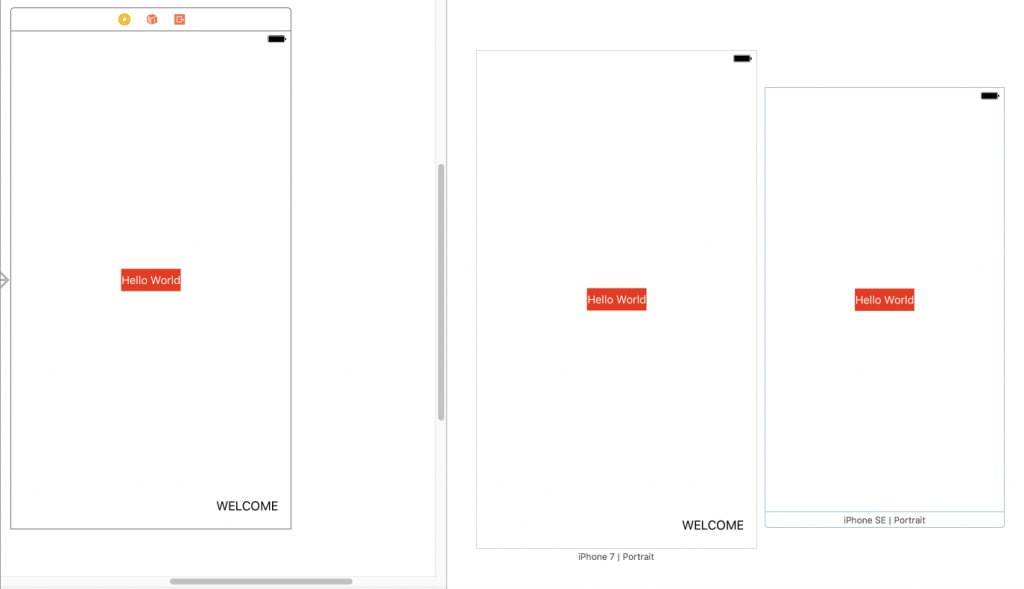
You can also add more devices to preview:
Add a label to the bottom right hand corner.
If you opened the preview assistant again, you should see the UI change immediately. Note that without defining any layout constraints for the label, you are not able to display the label on all iPhone devices.
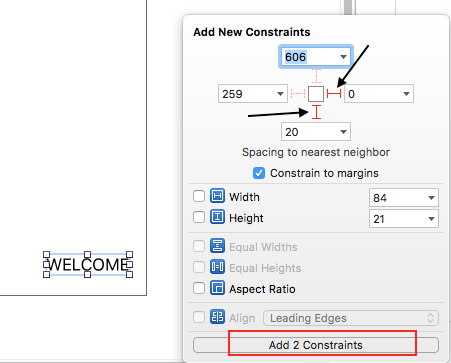
The label is located 0 points away from the right margin of the view and 20 points away from the bottom of the view.
This is much better. When you describe the position of an item precisely, you can easily come up with the layout constraints. Here, the constraints of the label are:
The label is 0 points away from the right margin of the view.
The label is 20 points away from the bottom of the view.
In auto layout, we refer this kind of constraints as spacing constraints. To create these spacing constraints, you can use the Pin button of the layout button.
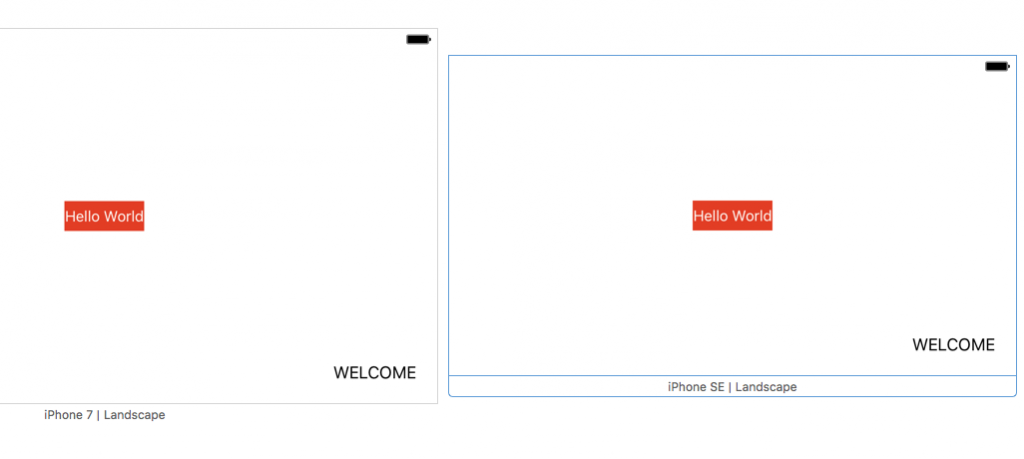
Once you added the two constraints, all constraint lines should be in solid blue. When you preview the UI or run the app in simulator, the label should display properly on all screen sizes, and even in landscape mode.
