30 Days of Zumo.v2 (Azure Mobile Apps): Day 7 – Refresh Tokens
Getting the key from your Azure AD Portal
Go to your Azure Active Directory Portal via manage.windowsazure.com
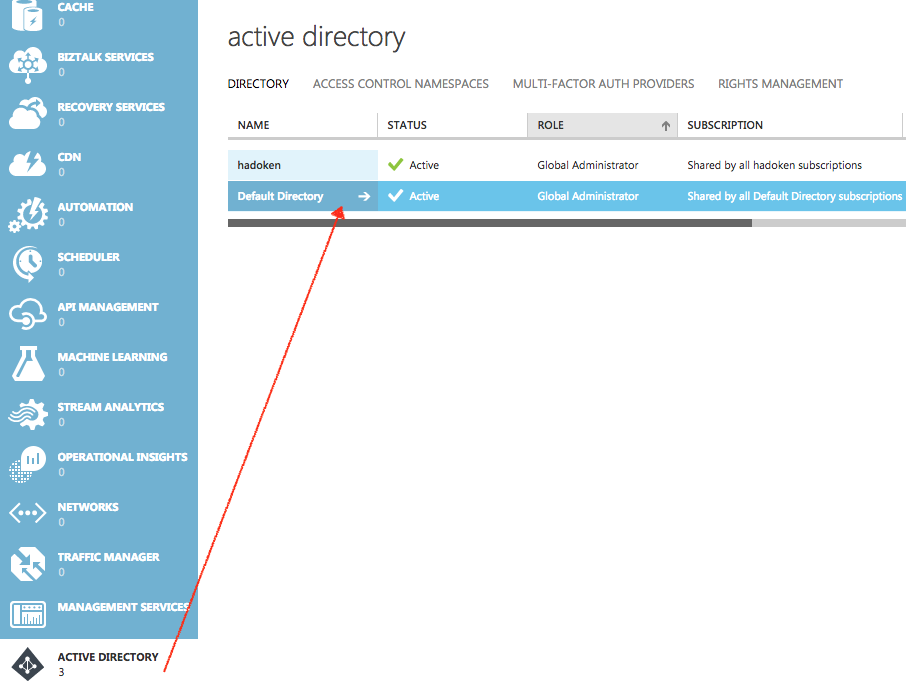
Sign in, and click on Active Directory, then you should be able to see your app.
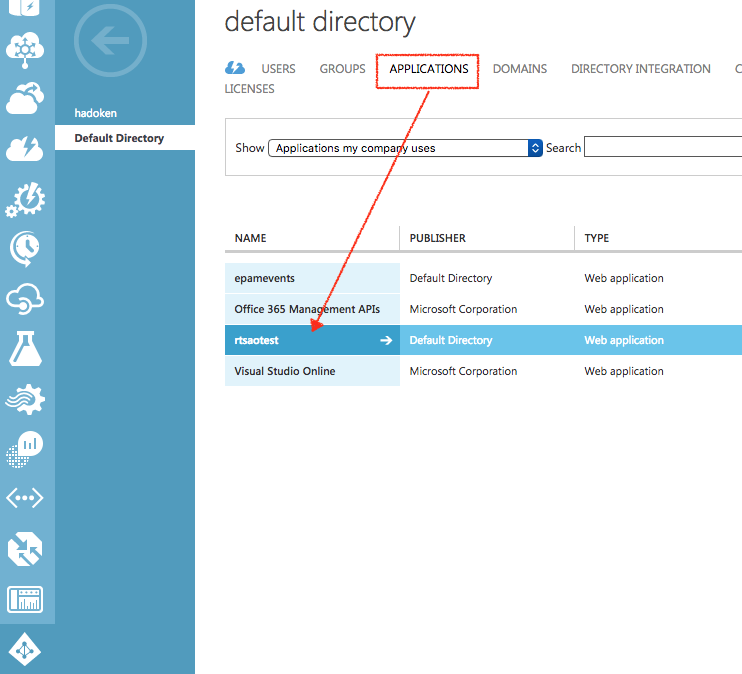
Click on Applications, then your app name
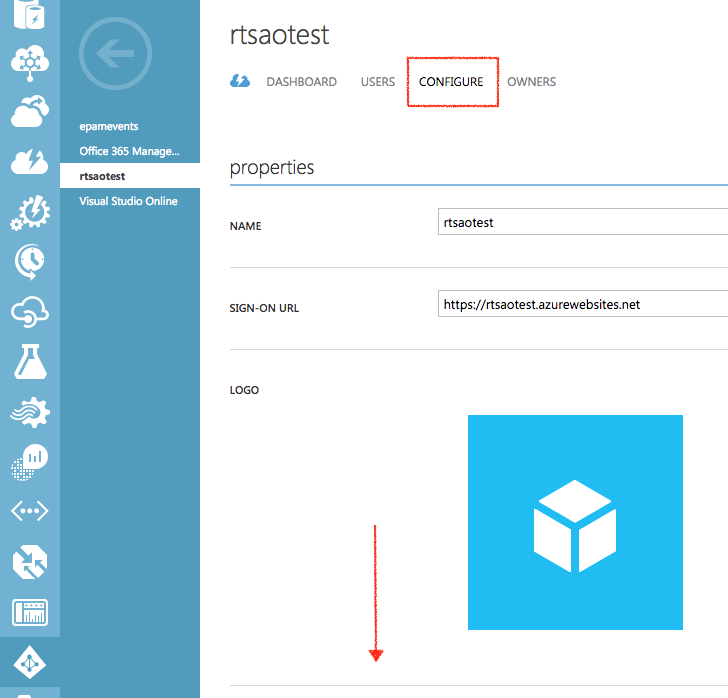
In the next screen, click on Configure, then scroll down the page
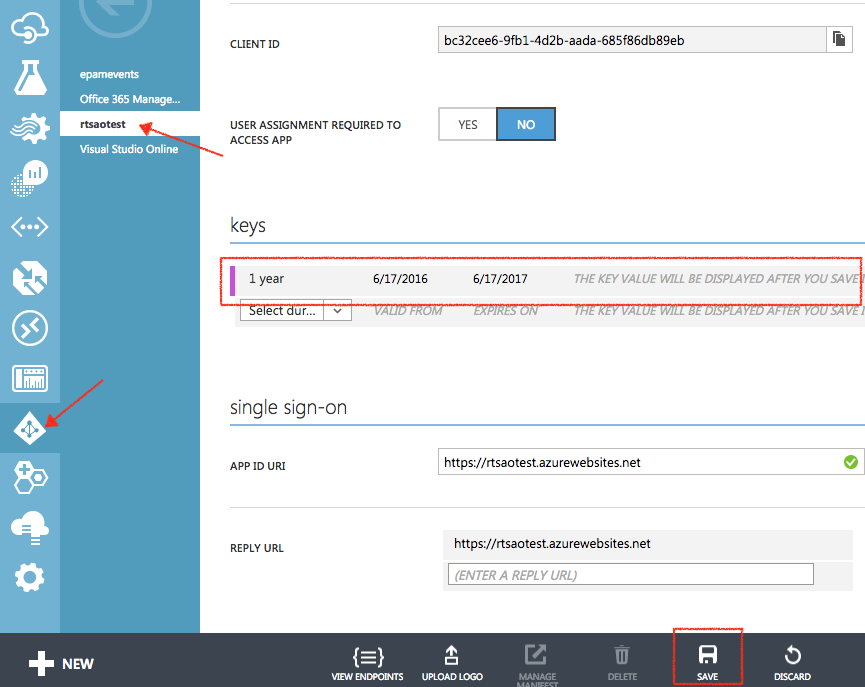
Under ‘Keys”, select a year, and then save. You will then see the secret key appear. Copy that into test.js under the other global variables.
Save your client ID, and your key because we will be using it later.
Configured the Azure AD service to use refresh tokens
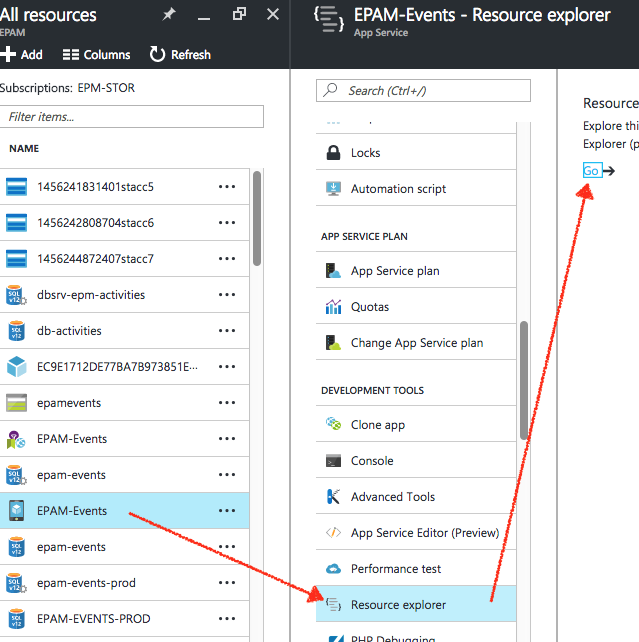
Log into your portal, select your app, scroll down to Resource explorer. You’ll see the next blade have a Go link. Click on the go link.
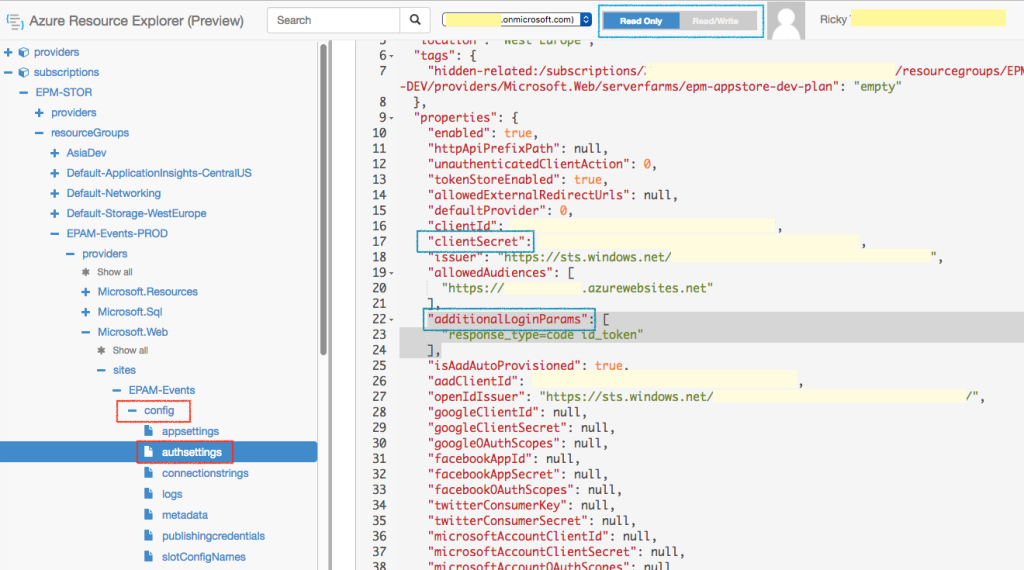
A separate page will appear with a lot of resource data. On the left hand side of the window is a tree explorer of your app’s resources. Expand the tree menu config and then authSettings.
Because this is a dangerous place, it’s set to read-only mode.
Click on the grey Read/Write box at the top of the screen, then click on Edit next to the PUT button.
I need to set two things. Firstly, the key that I created in the Azure AD portal needs to be copied into the clientSecret field as a string. Secondly, I need to set the additionalLoginParams to [“response_type=code id_token”], like this:
Also make sure the client ID matches from your Active Directory management portal from above.
