ref – https://blog.logrocket.com/using-typescript-with-react-native/
Open up a terminal
npx react-native init TypeScriptTemplate –template react-native-template-typescr
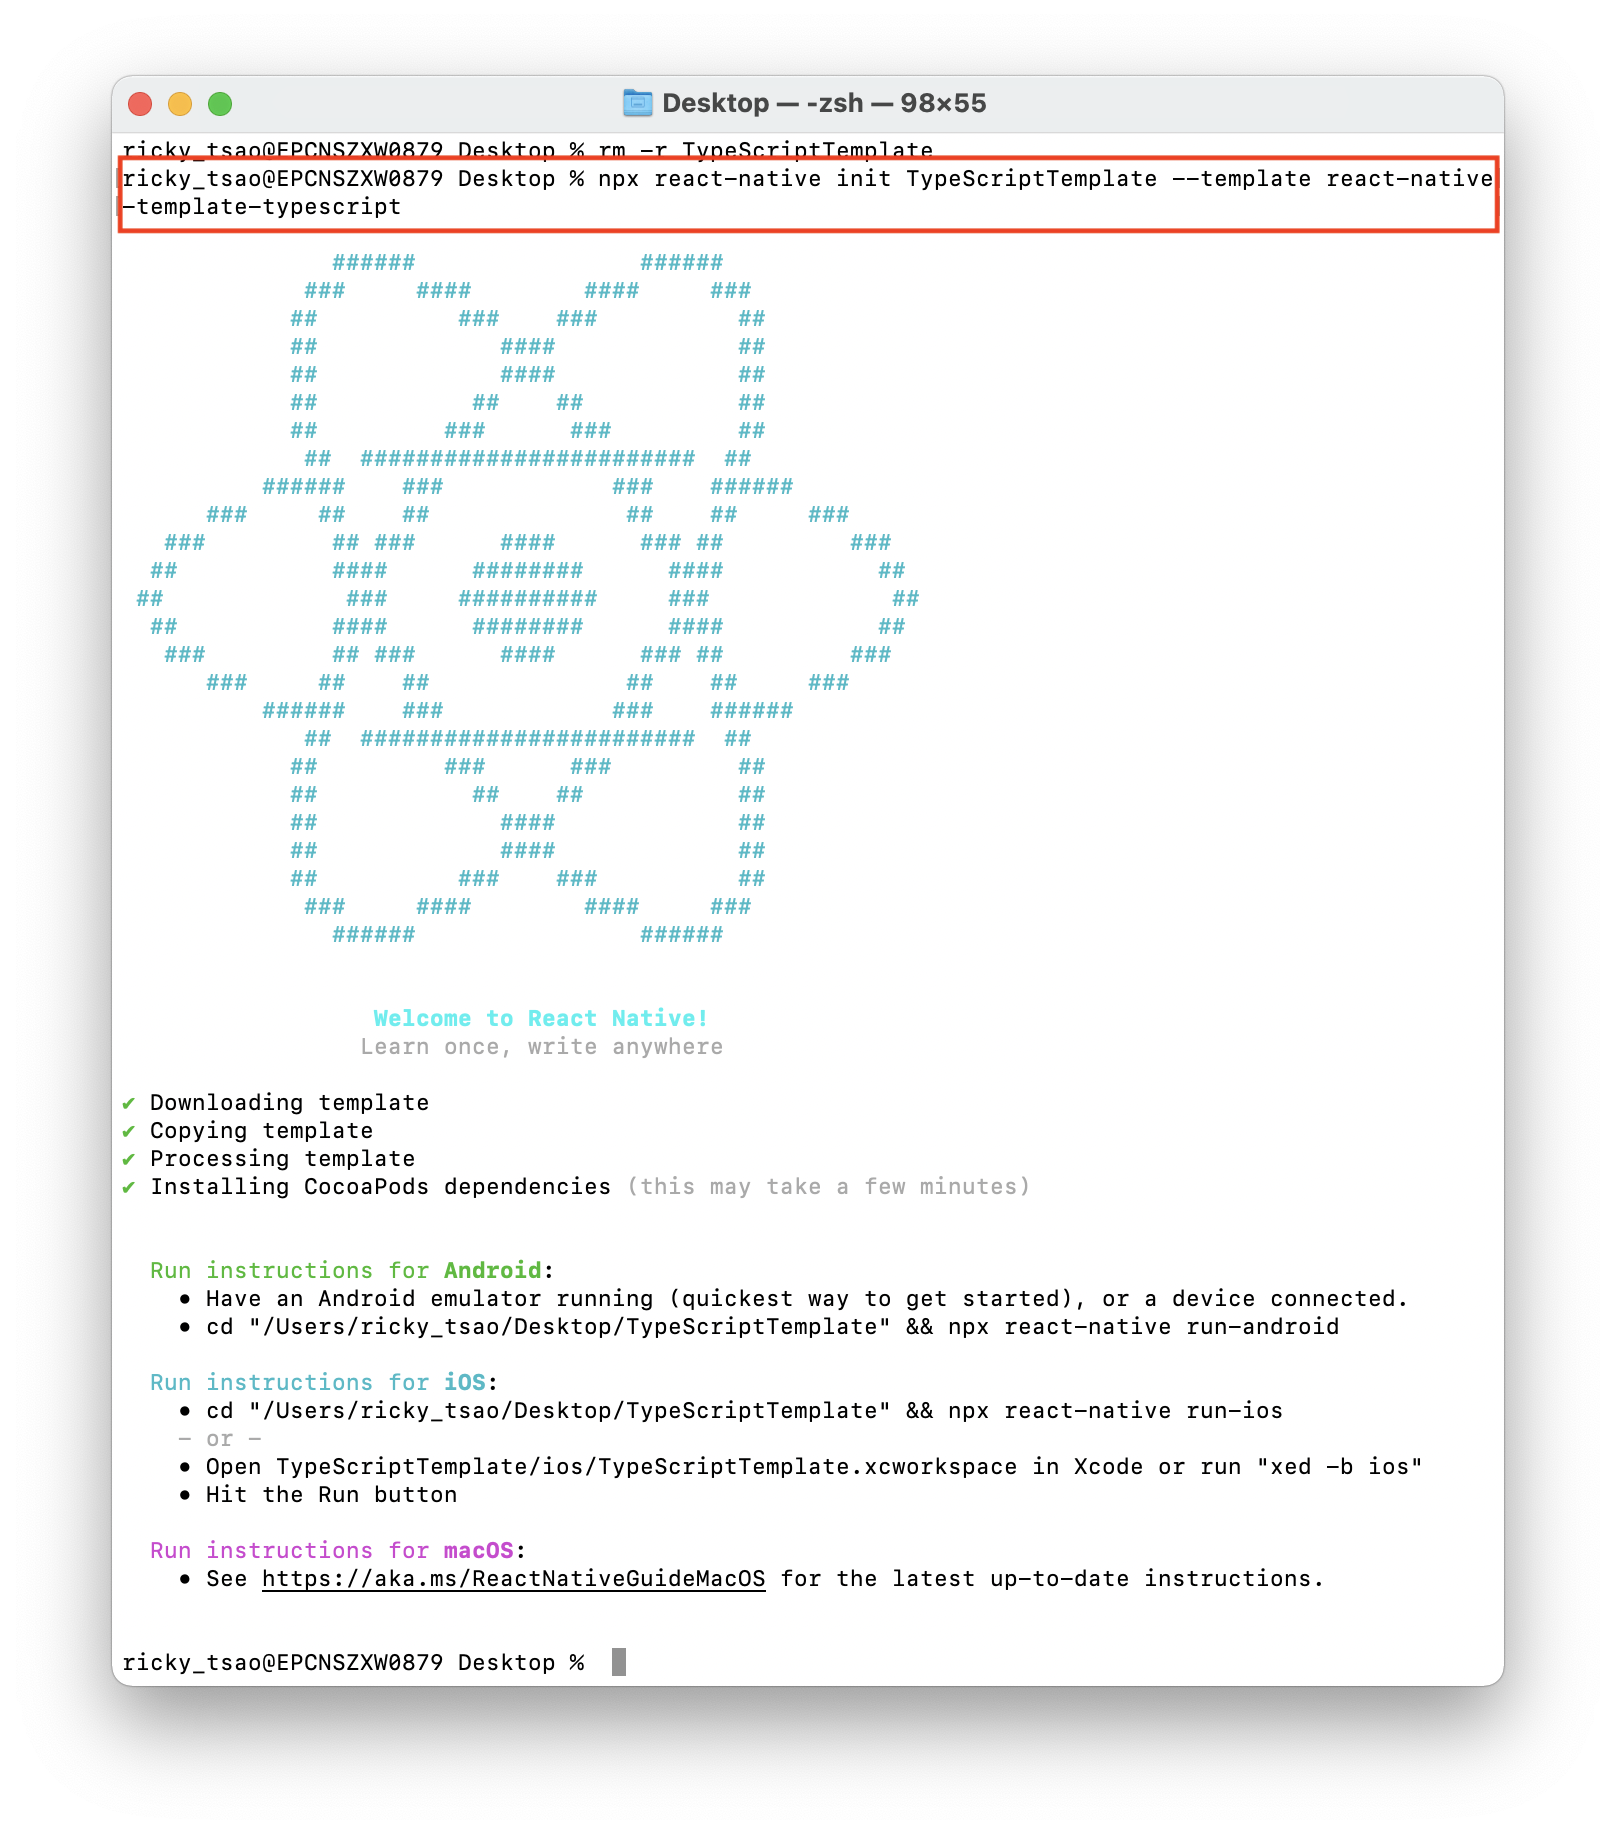
Once we’ve finished creating the React Native typescript template project, let’s go ahead with running the project.
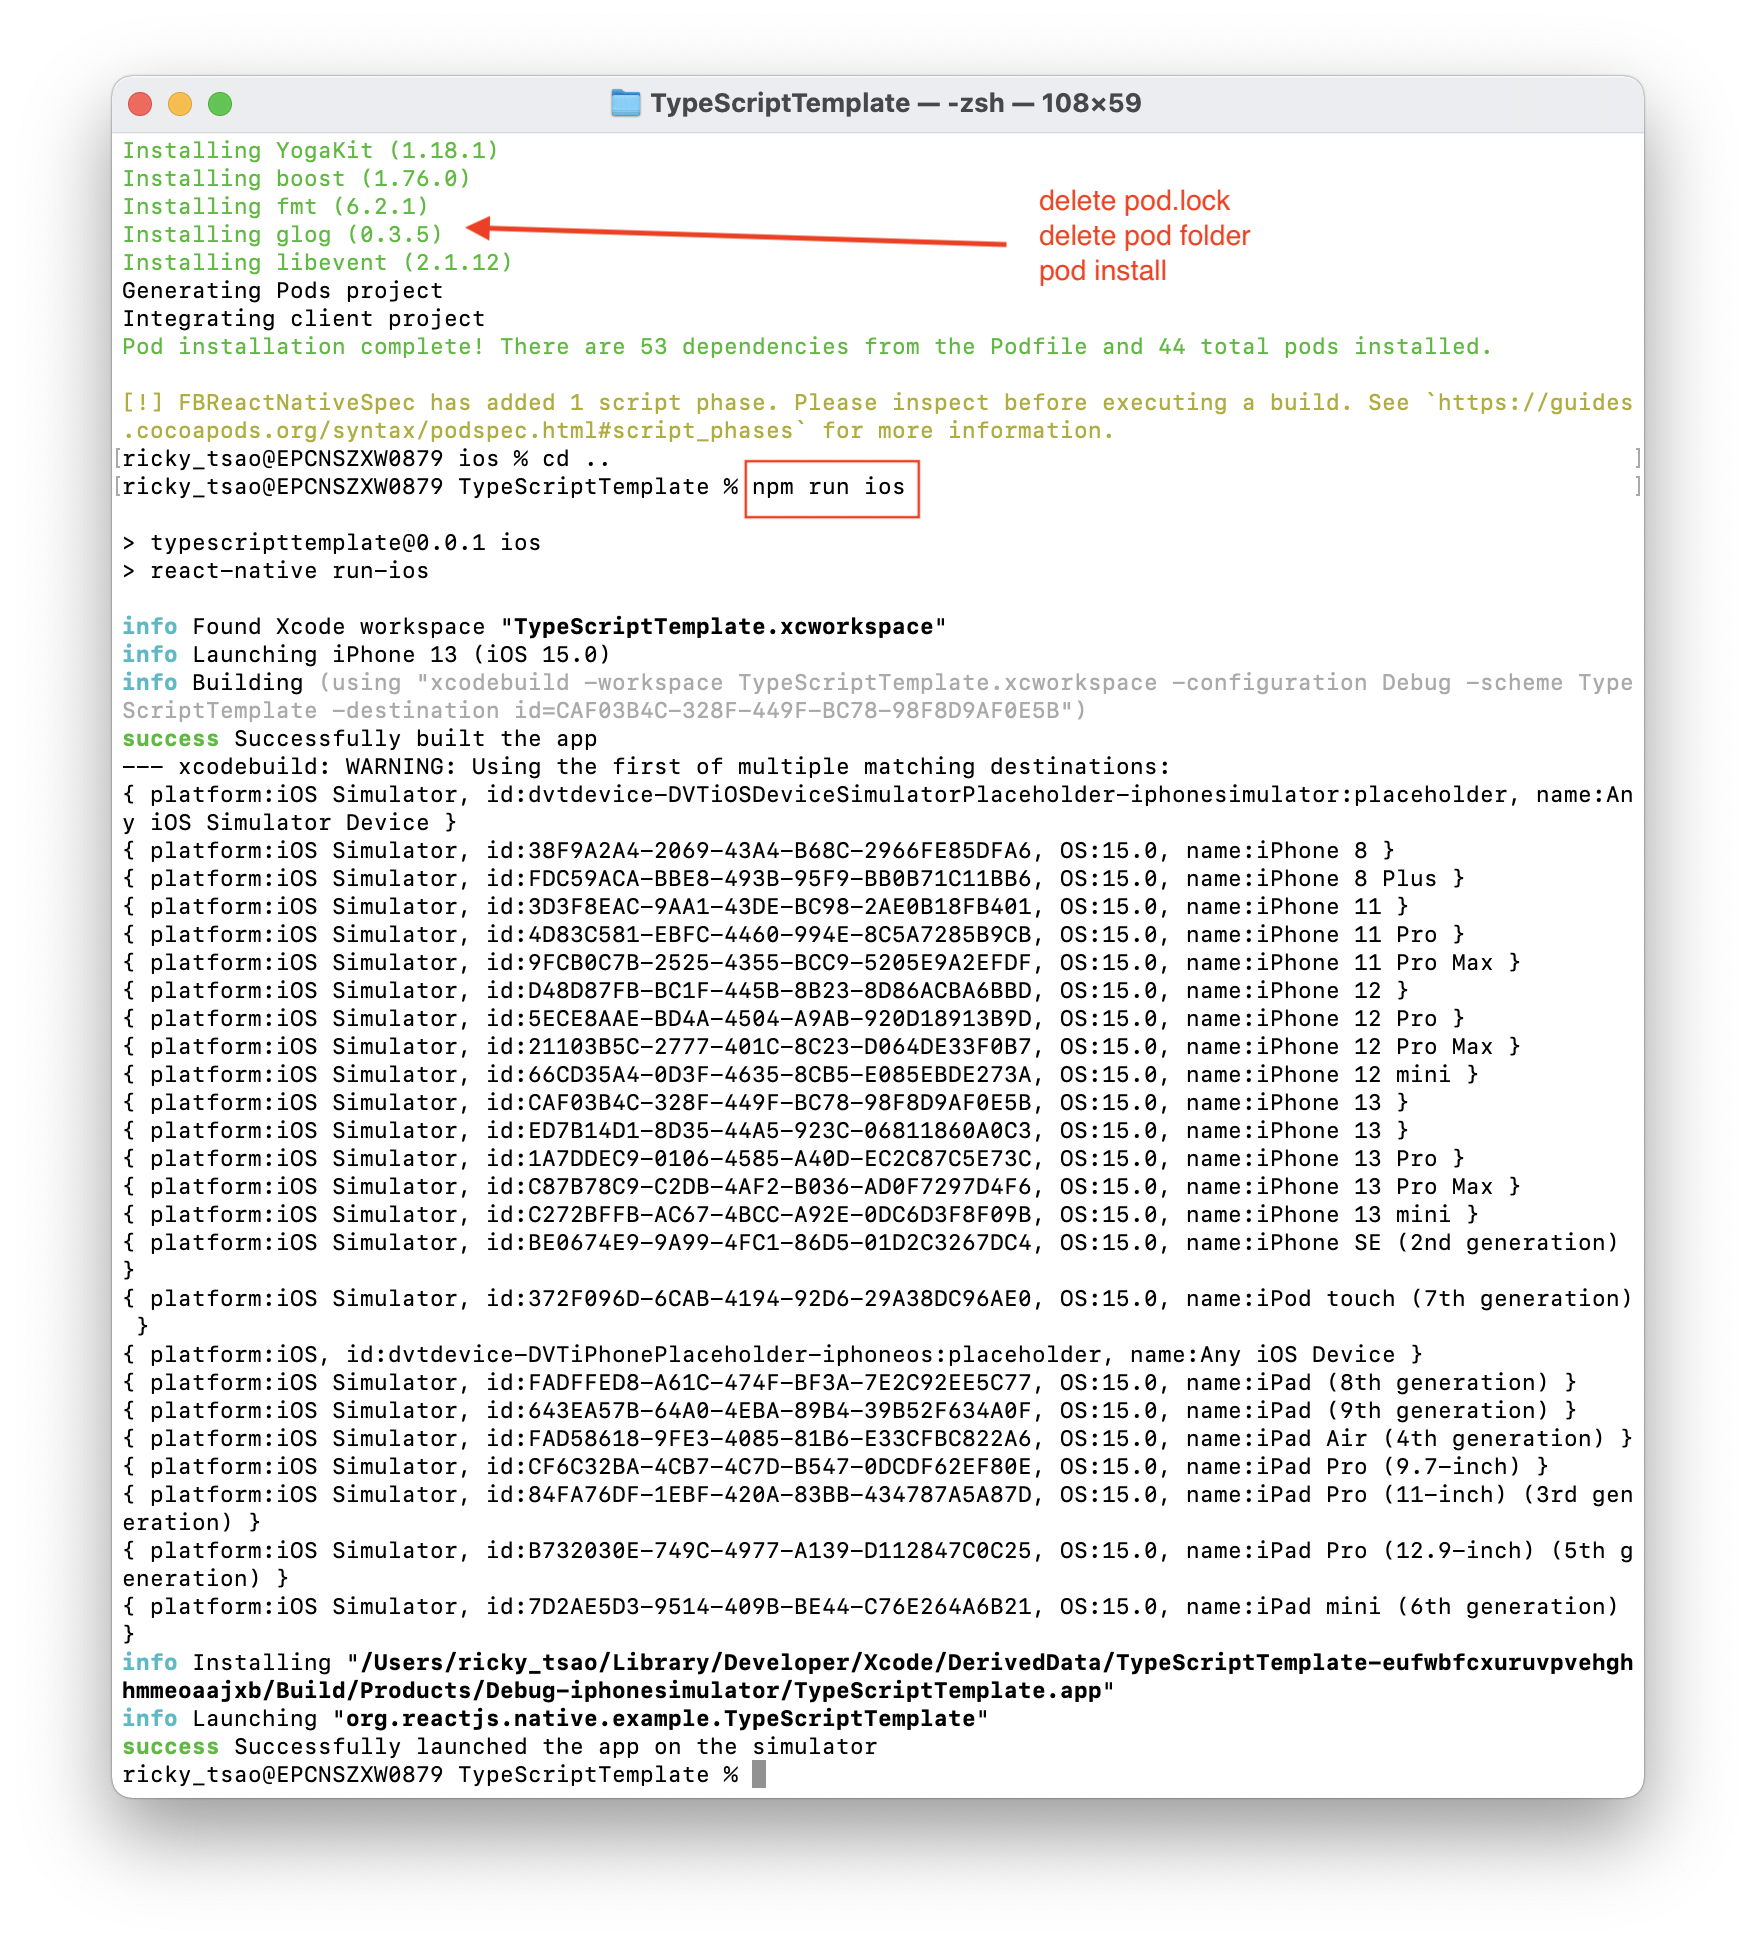
cd into the ios folder:
npm run ios
You’ll probably run into some issues.
TroubleShooting
First make sure you delete the pod.lock file, and pod folder. Then reinstall all the pod dependencies by going:
pod install
In /Users/{your name}/Desktop/{your project}/node_modules/react-native/scripts/generate-spec.sh
put this line at the top:

When I installed a new version of xCode, there were two installations. The default was still pointing to the old version, so I followed the direction on the terminal and removed the old one.
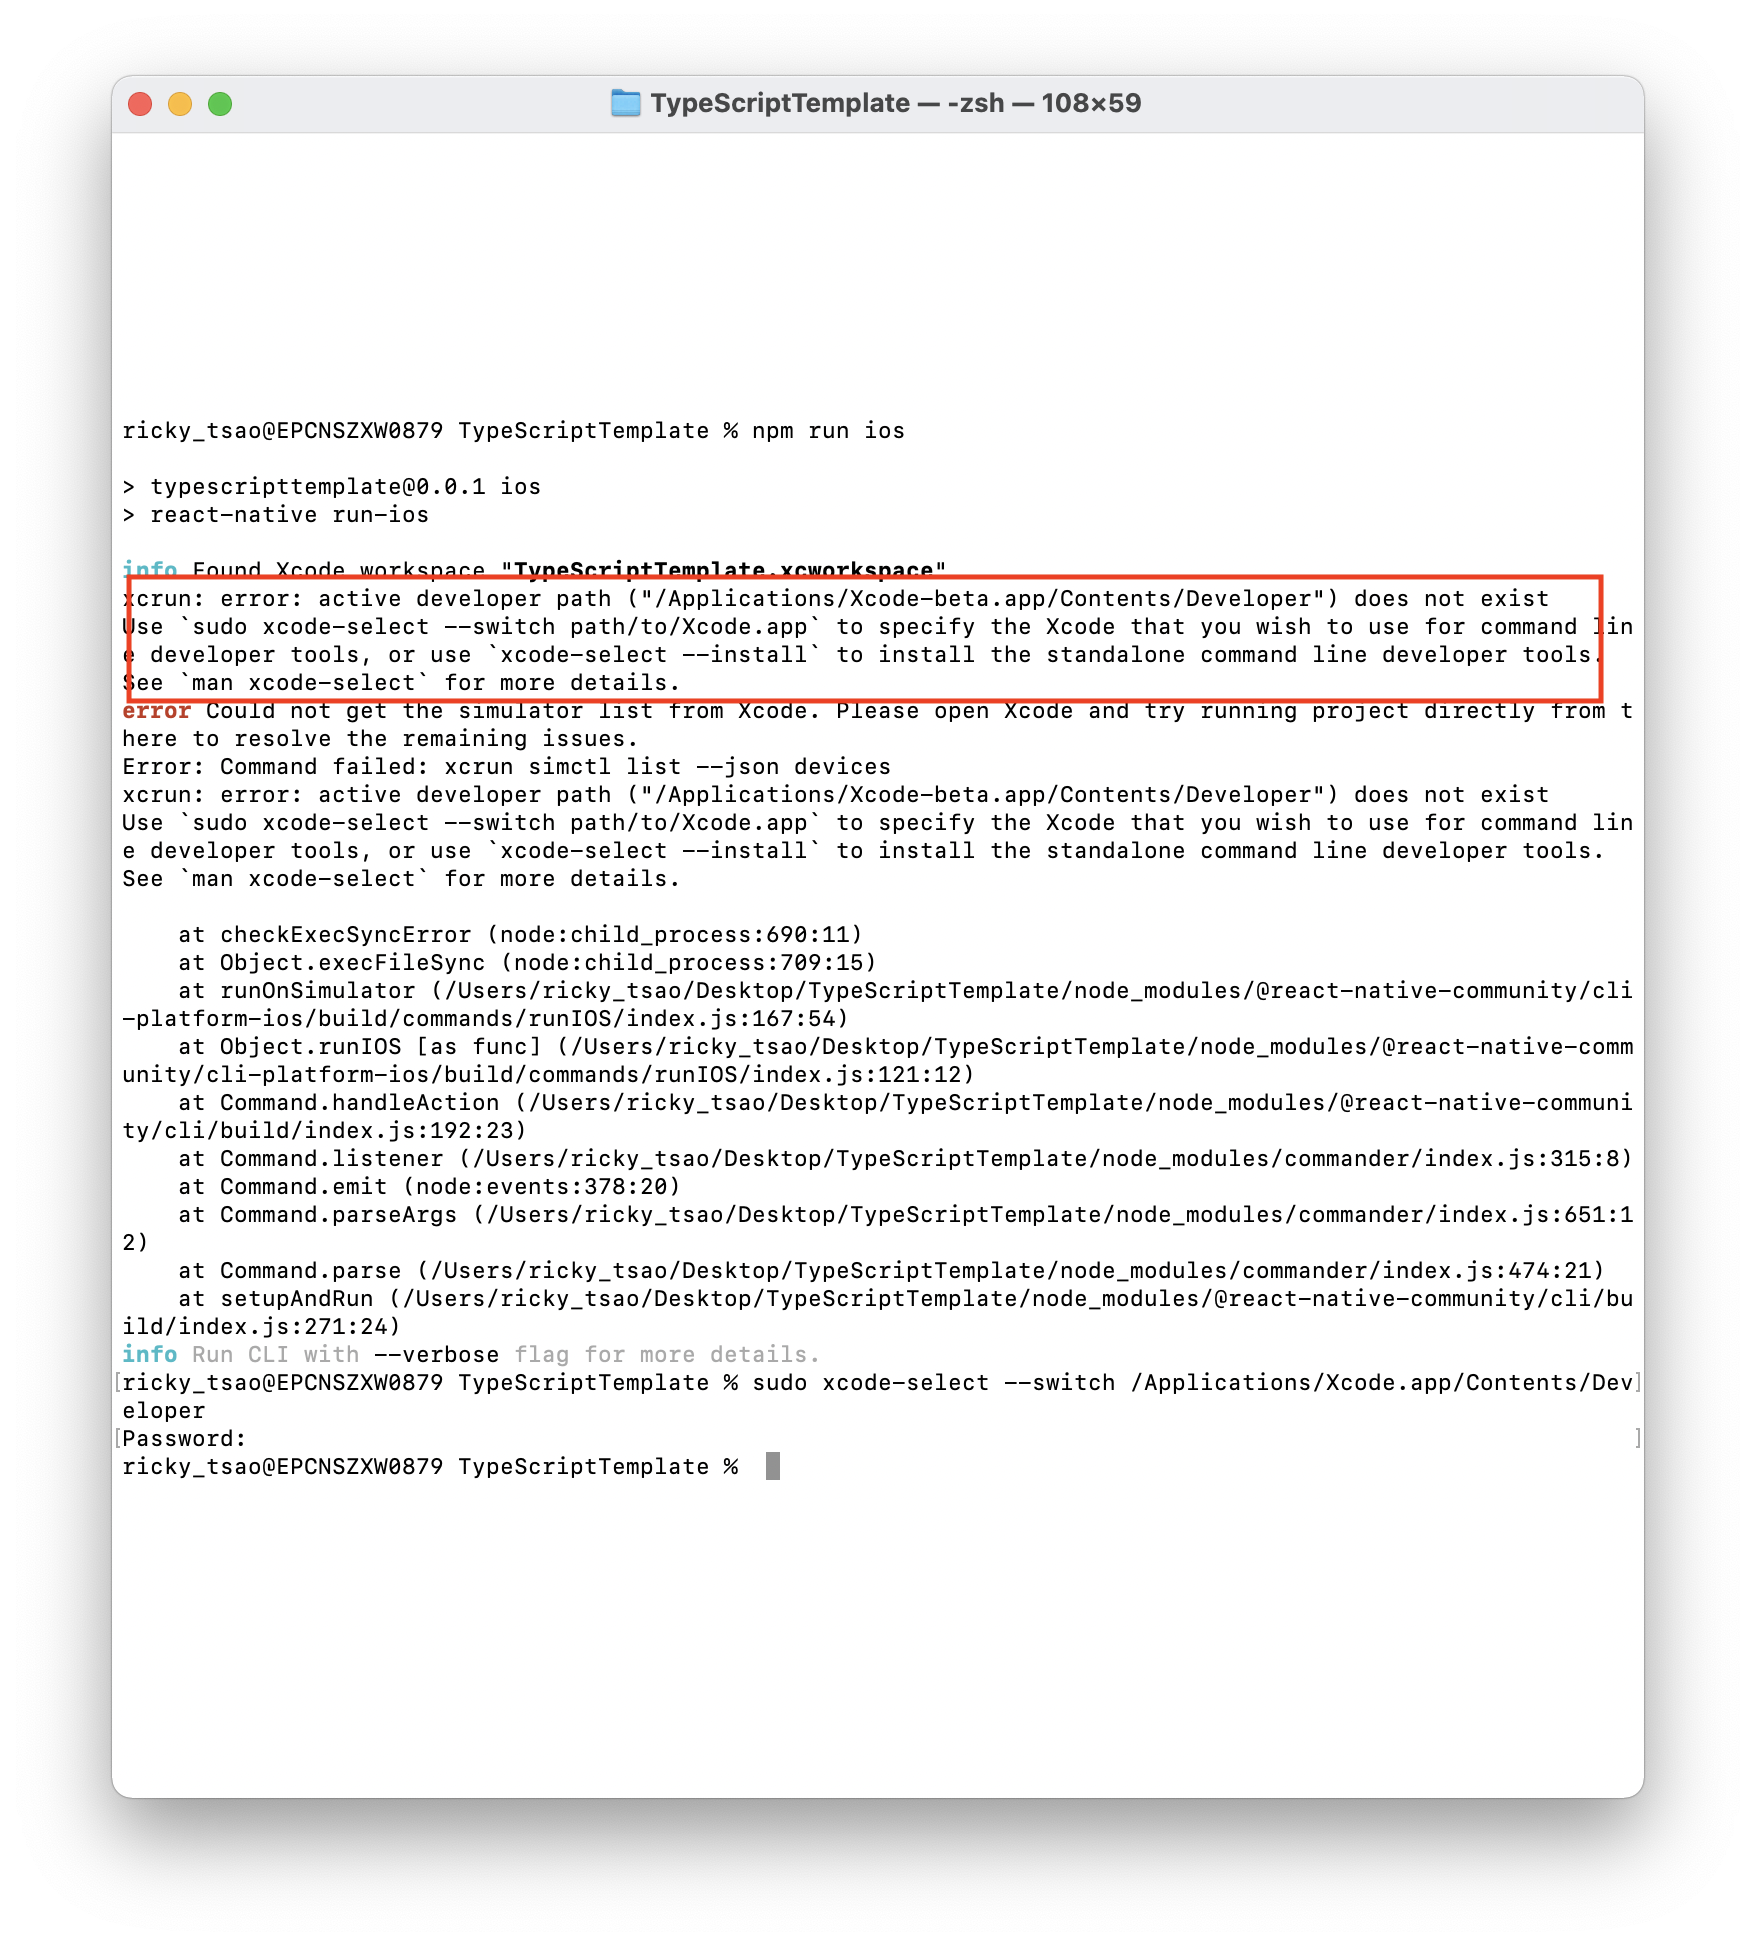
Last but not least, make sure you restart your computer so the changes to the environment can take place.
Starting Development
Create a folder structure like src/components in the root directory and create a Header.tsx component in the components folder.
src/components/Header.tsx
|
1 2 3 4 5 6 7 8 9 10 11 12 13 14 15 16 17 18 19 20 21 22 23 24 25 26 |
import React from 'react'; import {View, Text, StyleSheet} from 'react-native'; interface Props { title: string; } const Header: React.FC<Props> = ({title}) => { return ( <View style={styles.header}> <Text style={styles.headerText}>{title}</Text> </View> ); }; const styles = StyleSheet.create({ header: { paddingVertical: 20, borderBottomWidth: 1, borderBottomColor: '#cfcfcf', alignItems: 'center', }, headerText: { fontSize: 20, fontWeight: '600', }, }); export default Header; |
React.FC means functional component. We want to create a React Functional Component that takes in a parameter with type Props
Props is defined as an interface with the property title and of type string
This means that in our App.tsc, we will be using it like so:
|
1 |
<Header title="Shopping List" /> |
Thus, we can use instantiate this functional component and use typescript to type the prop property. In other words, because we’re using TypeScript, we are now able to define what our component should take in, how it should take it in, and how many to take.
The benefit of doing it this way is that we get better IntelliSense and some validation when we’ll use the component ( e.g. when the title is not passed to the component, there’s going to be an instant error).
Thus, if we were to use Header without putting any prop named title in, we’d get some errors:
![]()
If you tried to assign a number (or any other data type that isn’t a string) you’ll get a different error. This is TypeScript trying to help you catch bugs before they happen.
Adding Items
Create a new component, AddItem.tsx, to your /src/components folder and paste the code below:
|
1 2 3 4 5 6 7 8 9 10 11 12 13 14 15 16 17 18 |
import React, {useState} from 'react'; import { View, Text, TextInput, TouchableOpacity, StyleSheet, Alert, } from 'react-native'; export interface IItem { item: string; quantity: string; } interface Props { setShoppingList: React.Dispatch<React.SetStateAction<IItem[]>>; shoppingList: IItem[]; } |
Getting and Setting our Array of Items
First, we want to create interface IItem. It is a type that says I must have two strings, one called item, the other called quantity.
We will declare an array of this IItem, where each element contains an item string and quantity string.
Next we see type Props.
It has shoppingList, which gets an array [] of type IItem, as mentioned previously. This automatically GETS the data.
In order to SET an array of IItem, React guarantees that dispatch function identity is stable and won’t change on re-renders.
https://reactjs.org/docs/hooks-faq.html#how-to-avoid-passing-callbacks-down
1) Thus, we must declare type React.Dispatch because this property will be called inside of a button handler. It calls a set function, which is defined by React.SetStateAction.
2) Thus, we want to declare SetStateAction:
|
1 |
React.SetStateAction<IItem[]> |
It’s an action state that initializes to iItem [].
How The iItem array is used
create functional component called AddItem
type Props says the first is called ‘shoppingList’, that
must be of type IItem array which Sets
the second is called ‘shoppingList’, which is an array of iItem
Hence, in App.tsx, it must be used this way:
|
1 2 3 4 5 |
const [shoppingList, setShoppingList] = useState<IItem[]>([]); <AddItem setShoppingList={setShoppingList} shoppingList={shoppingList} /> |
How AddItem Functional Component is created
String
Same for quantity.
|
1 2 3 4 5 6 7 8 9 10 11 12 13 14 15 16 17 18 19 20 21 22 23 24 25 26 27 28 29 30 31 32 33 34 35 36 37 38 39 40 41 42 43 44 45 46 47 48 49 50 51 52 53 54 55 56 |
const AddItem: React.FC<Props> = ({shoppingList, setShoppingList}) => { const [item, setItem] = useState(''); // quantity string is used to set quantity number // once addItem is executed, we use it to append the new item const [quantity, setQuantity] = useState(''); // if item (string entered from textfield) exists, then we set shoppinglist to // what we had previously, and then append this item. const addItem = () => { console.log('--- addItem ---') console.log(item) if (!item) { Alert.alert('No Item!', 'You need to enter an item'); } else { // we set the IItem [] with the previous items of shoppingList, // and append a new one setShoppingList([ ...shoppingList, { item, quantity: quantity || '1', }, ]); setItem(''); setQuantity(''); } }; return ( <View> <Text style={styles.heading}>Add Shopping Item</Text> <View style={styles.form}> <TextInput style={styles.input} placeholder="Enter item" value={item} onChangeText={text => setItem(text)} /> <TextInput style={styles.input} placeholder="Enter quantity" keyboardType="numeric" value={quantity} onChangeText={q => { setQuantity(q); }} /> <TouchableOpacity style={styles.addItemButton} onPress={addItem}> <Text style={styles.buttonText}>Add Item</Text> </TouchableOpacity> </View> </View> ); }; |
simple styles for the textfields
|
1 2 3 4 5 6 7 8 9 10 11 12 13 14 15 16 17 18 19 20 21 22 23 24 |
const styles = StyleSheet.create({ heading: { fontSize: 20, fontWeight: '700', }, form: { marginTop: 30, }, input: { padding: 15, borderColor: 'rgba(0, 0, 0, 0.2)', borderWidth: 1, borderRadius: 5, marginBottom: 20, }, addItemButton: { backgroundColor: '#eb8634', paddingVertical: 20, borderRadius: 5, alignItems: 'center', }, buttonText: {color: '#fff', fontWeight: '500'}, }); export default AddItem; |
Showing the Items
Create another file in /src/components named Item.tsx.
|
1 2 3 |
import React from 'react'; import {View, Text, StyleSheet} from 'react-native'; import {IItem} from './AddItem'; |
We import type from iItem in AddItem file. That way we force the parameter type to be of type iItem. After all, we are displaying the item and need the data passed in to conform to that type.
|
1 2 3 4 5 6 7 8 9 10 |
// create functional component, that takes in an iItem as prop const Item: React.FC<IItem> = ({item, quantity}) => { // we then display them via JSX return ( <View style={styles.item}> <Text style={styles.itemName}>{item}</Text> <Text style={styles.quantity}>x{quantity}</Text> </View> ); }; |
and the CSS theme for it
|
1 2 3 4 5 6 7 8 9 10 11 12 13 14 15 16 17 18 19 20 21 22 |
const styles = StyleSheet.create({ item: { padding: 20, flexDirection: 'row', justifyContent: 'space-between', alignItems: 'center', borderBottomWidth: 1, borderBottomColor: 'rgba(0, 0, 0, 0.2)', }, itemName: { fontWeight: '500', }, quantity: { padding: 6, borderWidth: 1, borderColor: 'rgba(0, 0, 0, 0.2)', borderRadius: 10, overflow: 'hidden', backgroundColor: 'rgba(0, 0, 0, 0.05)', }, }); export default Item; |
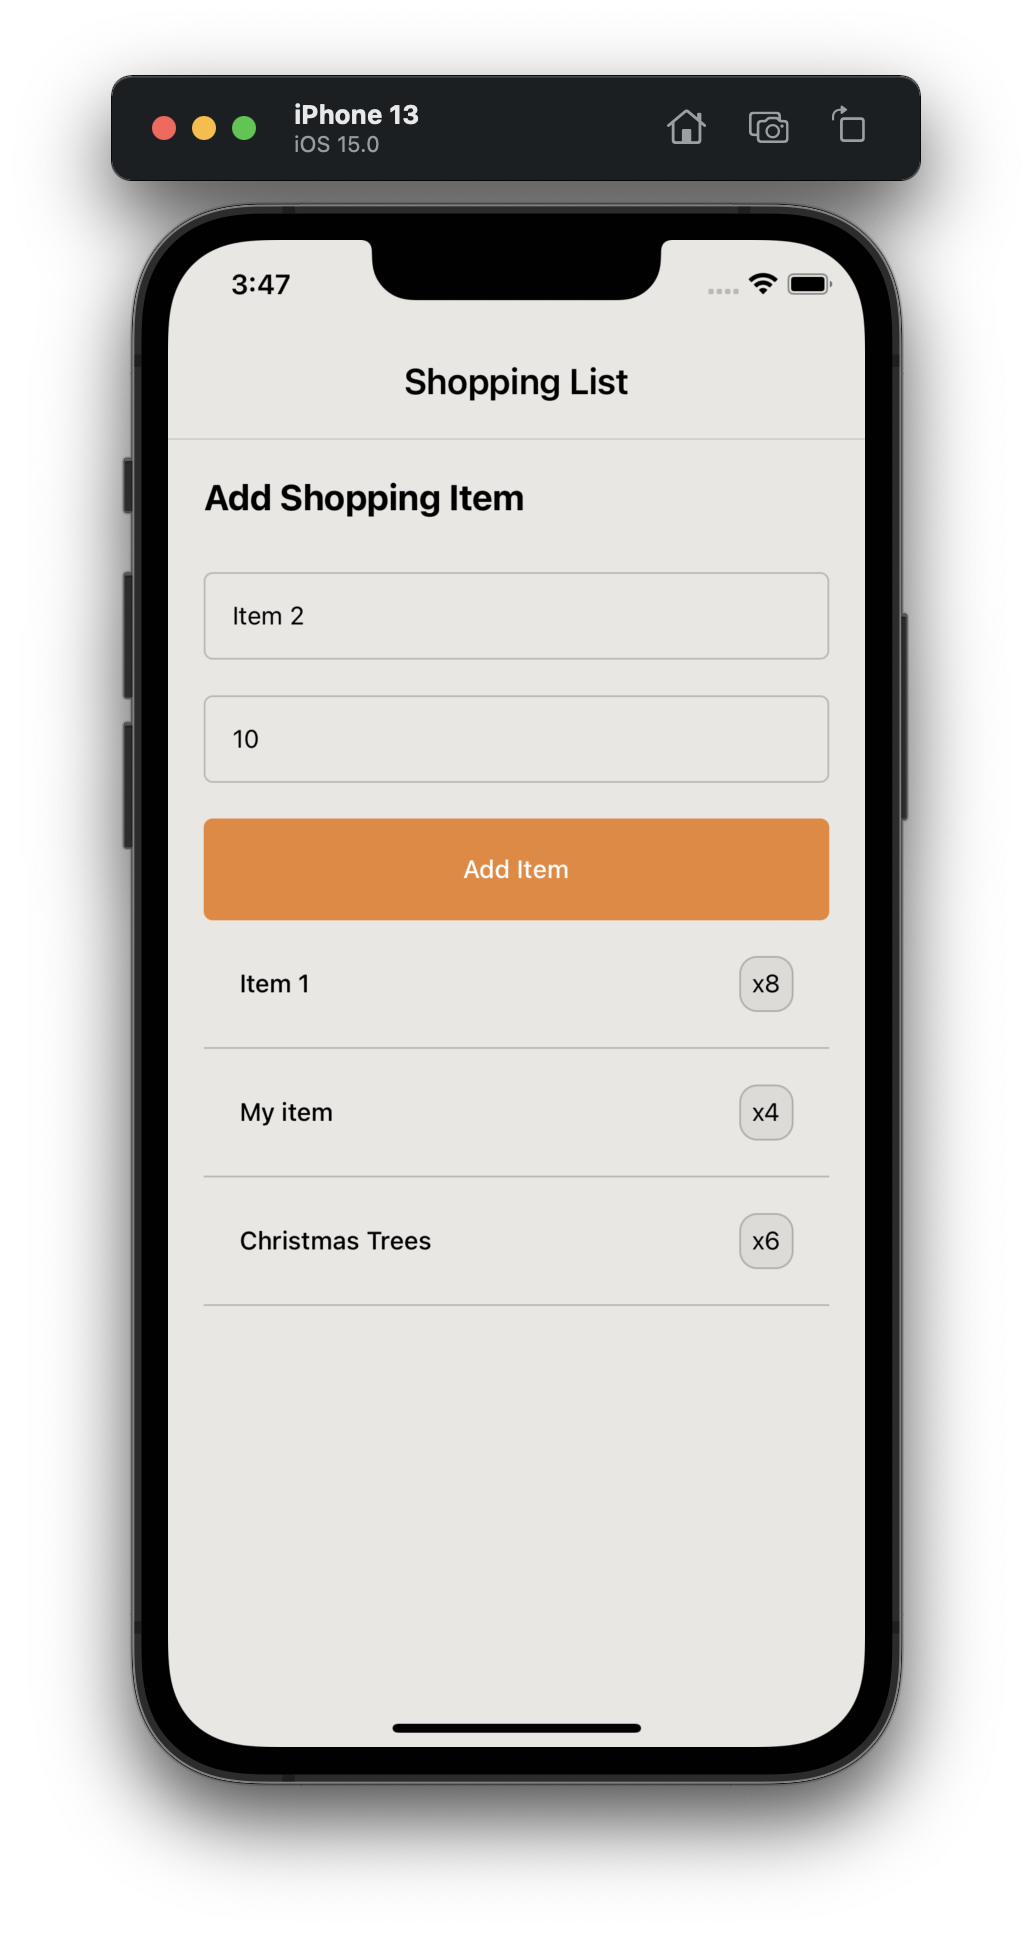
The app should look like this: